Build an eCommerce Site Using React Gatsby Shopify & Prismic
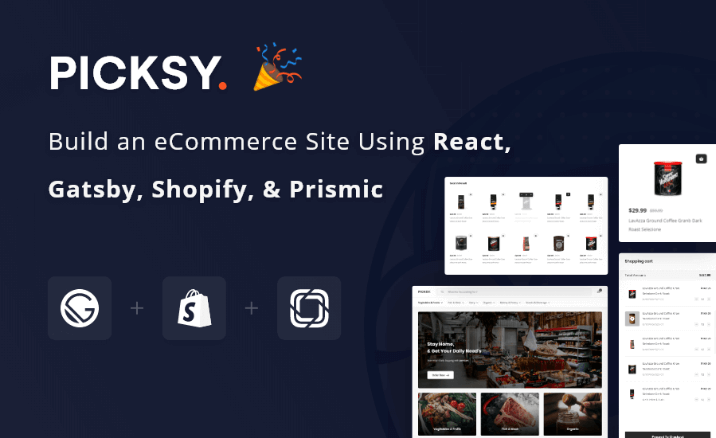
Picksy is a full-featured modern headless eCommerce app powered by Shopify, Prismic & Gatsby. If you are here, I guess by now you may have heard the term “Headless” or “Headless Shopify” when it comes to the next wave of bleeding-edge eCommerce builds. Most of the popular eCommerce platforms pushing it as “the next big thing”.

If you’re not fully up to speed on the definition of headless websites, in short, it separates your frontend (i.e. the client-side or the customer end) from the backend (i.e. the API the data end where we kept our products, orders, etc.).
Picksy - React Gatsby Grocery Ecommerce Template
What is Picksy?
As the title suggests, Picksy is a Gatsby powered headless Shopify eCommerce app. In short, Picksy is a Gatsby app which is the Frontend (i.e. the client-side or the customer end as described above) of our headless Shopify app.
Technologies we used
The main technologies of our Headless Shopify app are Gatsby, Shopify & Prismic.
- Gatsby: Frontend or client-side of the Headless App.
- Shopify: Shopify provide us the backend where we add products, collection and handle our customer orders.
- Prismic: We have used Prismic as CMS to manage our content.
- Now: For hosting we have used Now (currently known as Vercel)
Benefits of Picksy
As a member of Headless Shopify App built with Gatsby, Picksy comes to you as a ready-made package of
- Super Fast performance
- Best Practices
- Best SEO
- PWA (Progressive Web App)
- Modern User Interface
- Bleeding-edge technologies developers prefer
- Easy hosting solution compare to the traditional E-Commerce App.
- Say goodbye to your worries about security
- Easily manageable by small to medium team
- Deploy latest Code, Product, CMS changes using Continuous Integration
And much more. It is so flexible that you can easily change your content, design etc.
How Picksy Works ?
Picksy is an out of box headless Shopify solution. So, what this means is you only care about your product in your store and Picksy take care of your client-side or customer end. So, whenever we make changes in our Shopify product or Prismic CMS content we will want to have this changes in our live site without having to manually build and deploy the website each time there is a change. That's where Automatic Build with Webhooks comes into play. We will discuss Automatic build with more details in the dedicated Automatic Build section.
Basically, Picksy works with below steps:-
- Setup Shopify store and add Product & Collection in your Shopify store.
- Setup Prismic CMS add content in the Prismic CMS.
- Setup Picksy
- Setup Now (deployment)
- Setup Webhooks (for auto deployment)
That is it, your Gatsby powered Headless Shopify E-Commerce store is ready.
The setup part is discussed in details in the Installation section
Installation
Installation section is divided into few parts. In this section, we will discuss how you can setup your Shopify account, Prismic CMS and our Gatsby project.


Setup Shopify
Although we have provided a dummy Shopify access in the .env.example file if you want to change it with yours, you will need a Shopify account and a store. You can create it for free if you don't have it yet from here https://www.shopify.com/. After creating your store, you need to create a private app and generate Storefront Access Token from here https://shopify.dev/docs/storefront-api/getting-started#authentication.
Now provide your Store Name and Access Token In the .env.development and .env.production file in your Picksy root directory with your Shopify store name (storename.myshopify.com) and access token (your token must have full permissions on Storefront API).
Below comments are just to give you an idea how those variables values should be
// The domain name of your Shopify shop. This is required.
// Example: 'gatsby-source-shopify-test-shop' if your Shopify address is
// 'gatsby-source-shopify-test-shop.myshopify.com'.
// An API access token to your Shopify shop. This is required.
// You can generate an access token in the "Manage private apps" section
// of your shop's Apps settings. In the Storefront API section, be sure
// to select "Allow this app to access your storefront data using the
// Storefront API".
// See: https://help.shopify.com/api/custom-storefronts/storefront-api/getting-started#authentication
GATSBY_SHOP_NAME\=graphql
GATSBY_SHOPIFY_ACCESS_TOKEN\=dd4d4dc146542ba7763305d71d1b3d38
After generating your token and setting them in the .env files you can import our products to get idea about which data we are using. You can find the exported products.csv in the Shopify-products folder.
Your Shopify store is pretty much setup for now. Check your cart, checkout, currency setup and do some test orders before proceeding to the next steps.
Setup Prismic
Prismic CMS setup should be straight forward. You create your account from here. Then Create a repository (keep the repository name in small letter, e.g. mysitedata or my_site_data). Provide your repository name in the .env.development and .env.production file. After that, you need to create Custom Types. We have provided the custom types in the prismic-custom-types folder.
There are 3 custom types in the prismic-custom-types folder.
- Create a repeatable type named Category and paste the category.json file inside this type. It should auto generate the type structure. Category type should contain the same data as a collection in Shopify. We have used prismic category in our site menu section. Separate prismic category just created so that we can control the menu section and show and hide them whenever we want.
- Create a single type name Common and paste common.json to generate the structure. From the structure, you can see that this is the data that is being used mostly in our header and footer section across the app.
- Create another single type name Home and paste the home.json file. You guess it right, this is our home page and we will keep all our static text, banner image, category block, the section here.
In the .env.development and .env.production provide your repository name.
GATSBY_PRISMIC_REPOSITORY\=put_your_prismic_repository_name_here
We will try to provide more details about prismic in details in the Dedicated Prismic section. Make sure you put some data here so that you can see that data changes in the Setup Gatsby section.
Setup Picksy (Gatsby)
This section assume that you already downloaded the picksy file from Themeforest and open it in your favorite editor.
Before you proceed in this section make sure you completed previous steps, those are,
- Setup Shopify
- Setup Prismic
Make sure you have provided the necessary information in the .env.development and .env.production file.
Development
Run below commands for Development in the picksy root directory,
- yarn
- yarn develop
After successful development, you should see the URL where your local server is running along with the graphql playground,
Local server URL should be: http://localhost:8000/
Local graphql server URL should be: http://localhost:8000/___graphql

Production
Run below commands for Production in the picksy root directory
- yarn
- yarn build
- yarn serve

NB: To clean .cache, public directory run the below command
- yarn clean
After Yarn Serve command you should be able to see your site in production mode in this URL: http://localhost:9000/
Deployment
We have provided now.json file with necessary env variables so that you can easily deploy this project into now .
Before you proceed for the next step make sure you have a now account.
Follow the below steps to setup now cli
i) install now cli to your machine from here
ii) login into to now using now login command
To deploy the Picksy to your now server run the picksy in production mode
Run below commands for Production in the Picksy room directory where we have the package.json file
- yarn
- yarn build
- now (for first time after that run now --prod)
that is it.
Automatic Build
Till now we have successfully setup Shopify, Prismic, Gatsby (Picksy). Run the app on development and production. Deployed the app on Now (Vercel).
we already know that Gatsby is a SSG (Static Site Generation) means it generates your site with your API changes only when you build it. If there is any change comes in the api e.g. you added a new product or updated the name of a product. you need to rebuild gatsby in order to have those changes.
In short, Automatic Build solve this problem. So, whenever we make changes in our shopify product or Prismic CMS content we will want to have this changes in our live site without having to manually build and deploy the site each time there is a change. That's where Automatic Build with Webhooks comes into play.
How automatic build works
- Put your code in a github repository
- Integrate your github repository with Now(Vercel) account.
- Generate Deploy Hooks from your Now app.
- Add Deploy hooks to your shopify webhook section.
- Add Deploy hooks to your prismic webhook section.
- After that shopify product or prismic content change will trigger automatic build & deploy.
- In a few minutes your changes will appear in your live site.
1.Put your code in a github repository:
Put your code in a github repository. Not going to go into details for this section.
2.Integrate your github repository with Now(Vercel) account
Go to your Now account -> Project Settings -> Git Integration and follow the below image to add your github repo into Now.

3.Generate Deploy Hooks fron your Now app
Go to your Now account -> Project Settings -> Git Integration -> Deploy Hooks Generate Deploy Hooks from the Deploy Hook section

4. Add Deploy hooks to your Shopify webhook section
Copy Deploy hook from Now and Move to Shopify Settings -> Notifications ->Webhooks -> Create webhook. For the event, choose Product creation, leave the format as JSON and paste the URL from the Deploy hook and hit Save webhook. Do this again two more times for Product deletion and Product update and any other event you feel may be necessary.

5. Add Deploy hooks to your prismic weebhook section
Same way create deploy hook in Now and Add them in your Prismic Webhook section from Settings -> Webhooks -> Create a webhook

gatsby-config.js
If you are familiar with gatsby development you should already know what does file does. If you don't know about it yet don't worry, you can easily learn about it from there official docs
we have used several source plugin such as,
-
gatsby-source-Shopify: For sourcing Shopify product, collection into gatsby.
-
gatsby-source-prismic-graphql: For sourcing Prsmic content into gatsby.
-
gatsby-plugin-layout: For defining global components such as context provider, layout in one place.
our gatsby-config.js file looks similar to the below image,

gatsby-node.js
In the gatsby-node.js file, we have basically fetched all our Shopify collection and generated a dynamic page based on Shopify collection.
Here's how our Shopify collection look like in our Shopify store,

When we source our Shopify collection in graphql, image taken from http://localhost:8000/___graphql

and finally, we generated the dynamic category pages in the gatsby-node.js file.

NB: don't worry about those underlines those are catching spelling mistakes in my editor.
Home Page
In Picksy we have added only on the page but you can add as many as you want. We have shown almost everything in this page that any standard eCommerce site will need.
In our Home page we have several section,
- Notice Bar
- Header with Logo, Search, Account Link
- Menu Section
- Banner Section
- Category Block
- Featured Product
- Trending Product
- How It Works
- Latest Product
- Shipping Banner
- Footer
Lets, get familiar with the above blocks and how they have been implemented.
Except for header and footer, all of this component is being called in the pages/index.tsx file. Header and footer are defined in the component/layout/ layout.tsx file.
1. Notice Bar

We have added a small notice section. The content comes from the prismic. You can show and hide this notice from your prismic content.

You can find the above settings in the common content in your prismic data. To check this noticebar implementation head over to the below file,
components/header/noticebar/noticebar.tsx
First we have tested the prismic data in our graphql playground

then we have implemented that query in our Noticebar component to retrieve the notice section data from prismic,

2. Header with Logo, Search, Account Link
Header section contain Logo, Search & Account Link. This are mostly static section comes from the code. As we thought Logo, Search, Link won't change regular basis. Buy you are welcome to add these content from prismic if you want.

you can find the implementation of this section, change the logo in the below file,
components/header/topbar/topbar.tsx
Search implementation discussed in our dedicated search section.
3. Menu Section
In the gatsby-node.js file, we showed how you can generate dynamic category pages. well, still you need to access those pages from some where. That's why we have created this menu section. Menu section is one of the core features for this app. Because your customer can easily access those category pages.
Which means your customer can quickly check which products are available in those category pages. This comes very handle for a grocery site where customer try the category menu before using the search.
All thought the category or collection is created on the Shopify store but we have recreated each collection from shopify to our Prismic CMS . Because we wanted more control over our category. Now we can easily show and remove a category from prismic without having to delete it from our Shopify store.
Let's see how we have implemented it,
1. We have created a repetitive category type in prismic

2.Copy the category.json file contents from the prismic-custom-type folder (check in the downloaded folder)

3. Paste it in the JSON editor as shown in the below image on the right side. it should generate the left side field before or after you save it.

4. Now check the below image how we have entered our category content from Shopify to prismic

you can see there are three fields Title, Slug, Parent Category
i) Your Shopify collection Title
ii) Your Shopify collection unique slug
iii) Parent Category? well, we don't have parent category in Shopify we just created it in prismic. so that we can show our Shopify collection under specific menu just like the below image,

In the Above image Vegetables, Organic, Snacks & Beverages, Fish & Meat, Dairy, Bakery & Pastry are parent categories. we didn't create this category or collection under Shopify because Shopify by default don't support nested collection. So we just created them in Prismic. Parent Category don't have any slug because they don't have any category pages what is important here you provide the Title and enable the parent category for the child category like below image where Dairy is a parent category of Eggs,

N.B. Please note that if you don't choose parent category it won't show up in the dropdown menu
for query and code implementation check the below file,
components/header/navbar/main-menu.tsx
4. Prismic Static Content
This section will cover below points from Home Page,
-
Banner Section
-
Category Block
-
How it works
-
Shipping Banner section
-
Footer
As this section comes from prismic so we will assume that you have created all the prismic type suggested in Setup Prismic section.
you will find the query and implementation in the below file,
pages/index.tsx
we will show here how we have created the content in prismic,
1. Banner Section
We just uploaded the banner image in prismic Home Page

you will also find banner title, subtitle and button text there

2. Category Block
Category block comes from the prismic, it's a prismic group field with image, title, and slug.

Prismic Structure

Prismic Content

3. How It Works
Here's how we have created the structure of how it works in prismic,

We took two rich text fields for Title and Subtitle and a group field with image, title, and description which enable the option to add similar content.

and how it looks in our app,

In the same way, we have created the Shipping And Footer section
Search
Search section is quite straight forward, we queried all of our Shopify products and use fuse.js to implement the fuzzy search in the product title and tag.
fuzzy search configuration,

You can check how search works with tags in the below image,

you can check the implementation in the below file,
components/search/index.tsx
Quick Cart
Quick cart is one of the main feature of our app. Redirecting use to the single product page or opening a modal for adding cart is a pretty much traditional way. we wanted to implement a quick carting system so that customer can easily add the product to their cart and easily to the checkout without redirecting to the other page.

Cart view,

For implementing cart we have used react context provider, you will find the implementation in the below file,
provider/cart-provider.tsx provider/local-cart-provider.tsx
Checkout
You will be redirected to Shopify checkout page when you will click the Proceed to Checkout button in a new tab and your current product cart will be clear from the storage.

Shopify Checkout page,

Order
Once you will have some order you can see them in your Shopify order section, you can also use the Shopify shop app for order notification on your mobile. you will get order notification in the email as well.

This is your Shopify store. you are the owner of your store. you can do any kind of changes here as you want. You can add any payment gateway as well.