How To Build a Fashion E-Commerce Site With WordPress & WooCommerce
Problem With Traditional WooCommerce Theme
The main problem of the WooCommerce theme is, the developer or the agency built a WooCommerce theme in mind of eye-catchy theme only. For that, Most of the WooCommerce themes are used too much color, design, and complicated blocks, and make the UX experience very bad. If you can see all the top E-Commerce website is no eye-catchy instead, those are minimal and build in mind of UX to get a better experience.
Solve the issue using Cartsy
With the development of the last couple of years on RedQ, we also want to do something that will solve the generic WooCommerce template issue and make a WooCommerce theme that will be UX in mind. That doesn’t mean we don’t want to UI better; we also follow a minimalistic UI approach, which is followed by the top E-Commerce website. On that mind, We start building a totally different approach theme called Cartsy.
Speed Issue
Another problem WooCommerce customer faced is performance. Generally, for WooCommerce product render from the SQL database and because of WooCommerce and WordPress huge relation between the database table, the rendering of products aren’t that smooth. It takes some time to load the product, takes time to search the product.
Solve Speed Issue
We also want to solve that speed issue, and for that, we add Algolia searching on Cartsy theme. Algolia is a hosted search engine capable of delivering real-time results from the first keystroke. Algolia's powerful API lets you quickly and seamlessly implement search within your websites and mobile. Generally, Algolia implements on non-WordPress Websites like NodeJS, Python, Go, etc. But we want to implement to WordPress, and after spending a tremendous amount of time, the developer successfully integrates Algolia on cartsy theme. With Cartsy and Algolia, your E-Commerce customer will get a different experience, which isn’t possible by default WooCommerce DB product loading.
Fast Installation
Generally set up a WooCommerce website and configure it take quite an amount of time; we also want to solve that issue and try to make a good experience for the admin or developer who built the website. You can create your WooCommerce website and configure it with Algolia within 10 minutes. If you don’t want to use Algolia, then it’ll take just 5 minutes to setup your WooCommerce website.
Today we’re going to show you how to build your Fashion website within 10 minutes with Algolia setup. So let’s get started.
Buy Cartsy Theme
Before starting the installation, make sure you already bought the Cartsy theme. If you didn’t buy it yet, then go to https://redq.io/cartsy and buy your Cartsy theme. After purchasing the theme, you’ll get a license key, which will be needed during the installation.
Installation
We’ll follow this procedure to build the fusion site, which are,
-
Install Cartsy theme.
-
Make necessary server configuration.
-
Activate the license.
-
Install all the necessary plugins.
-
Create a google map API key and integrate the key with your website.
-
Create Algolia API key and integrate the key with your website.
So let's get with the procedure,
Install Cartsy Theme
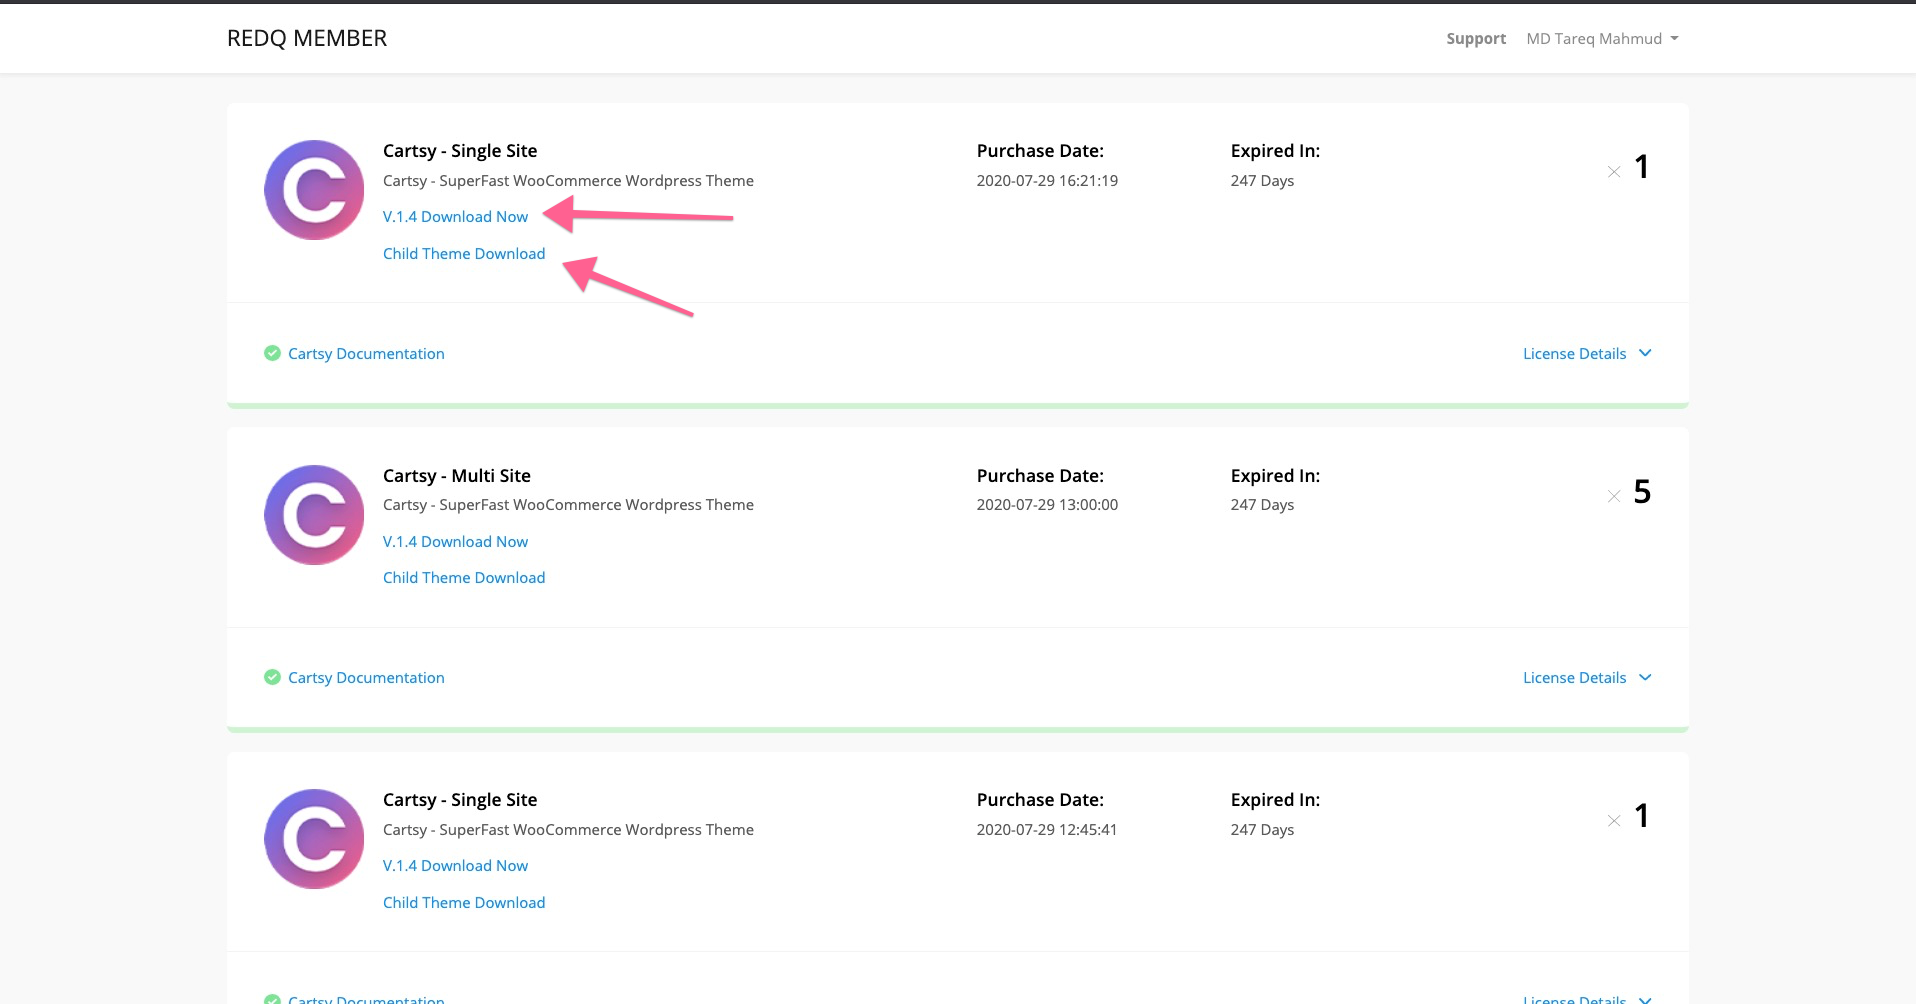
At first, download the Cartsy theme and Cartsy child theme from http://member.redq.io/.
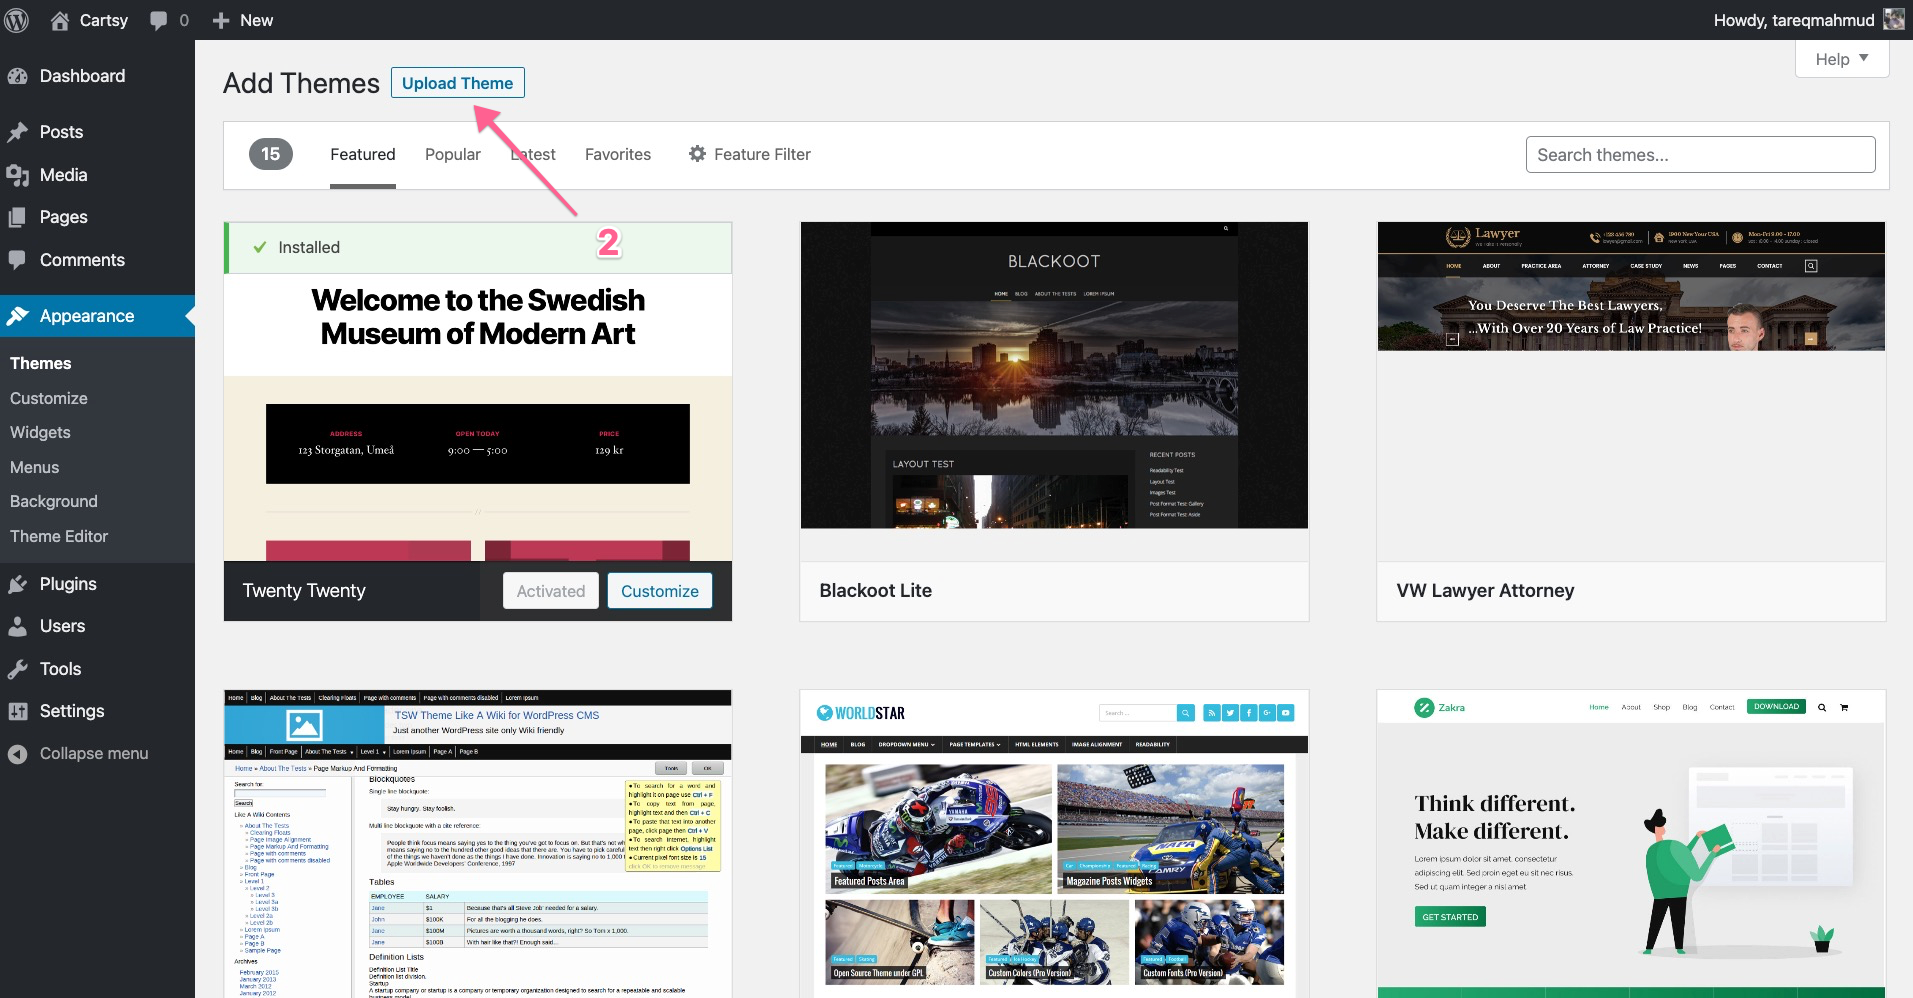
After download, go to your wp-admin/Appearance.
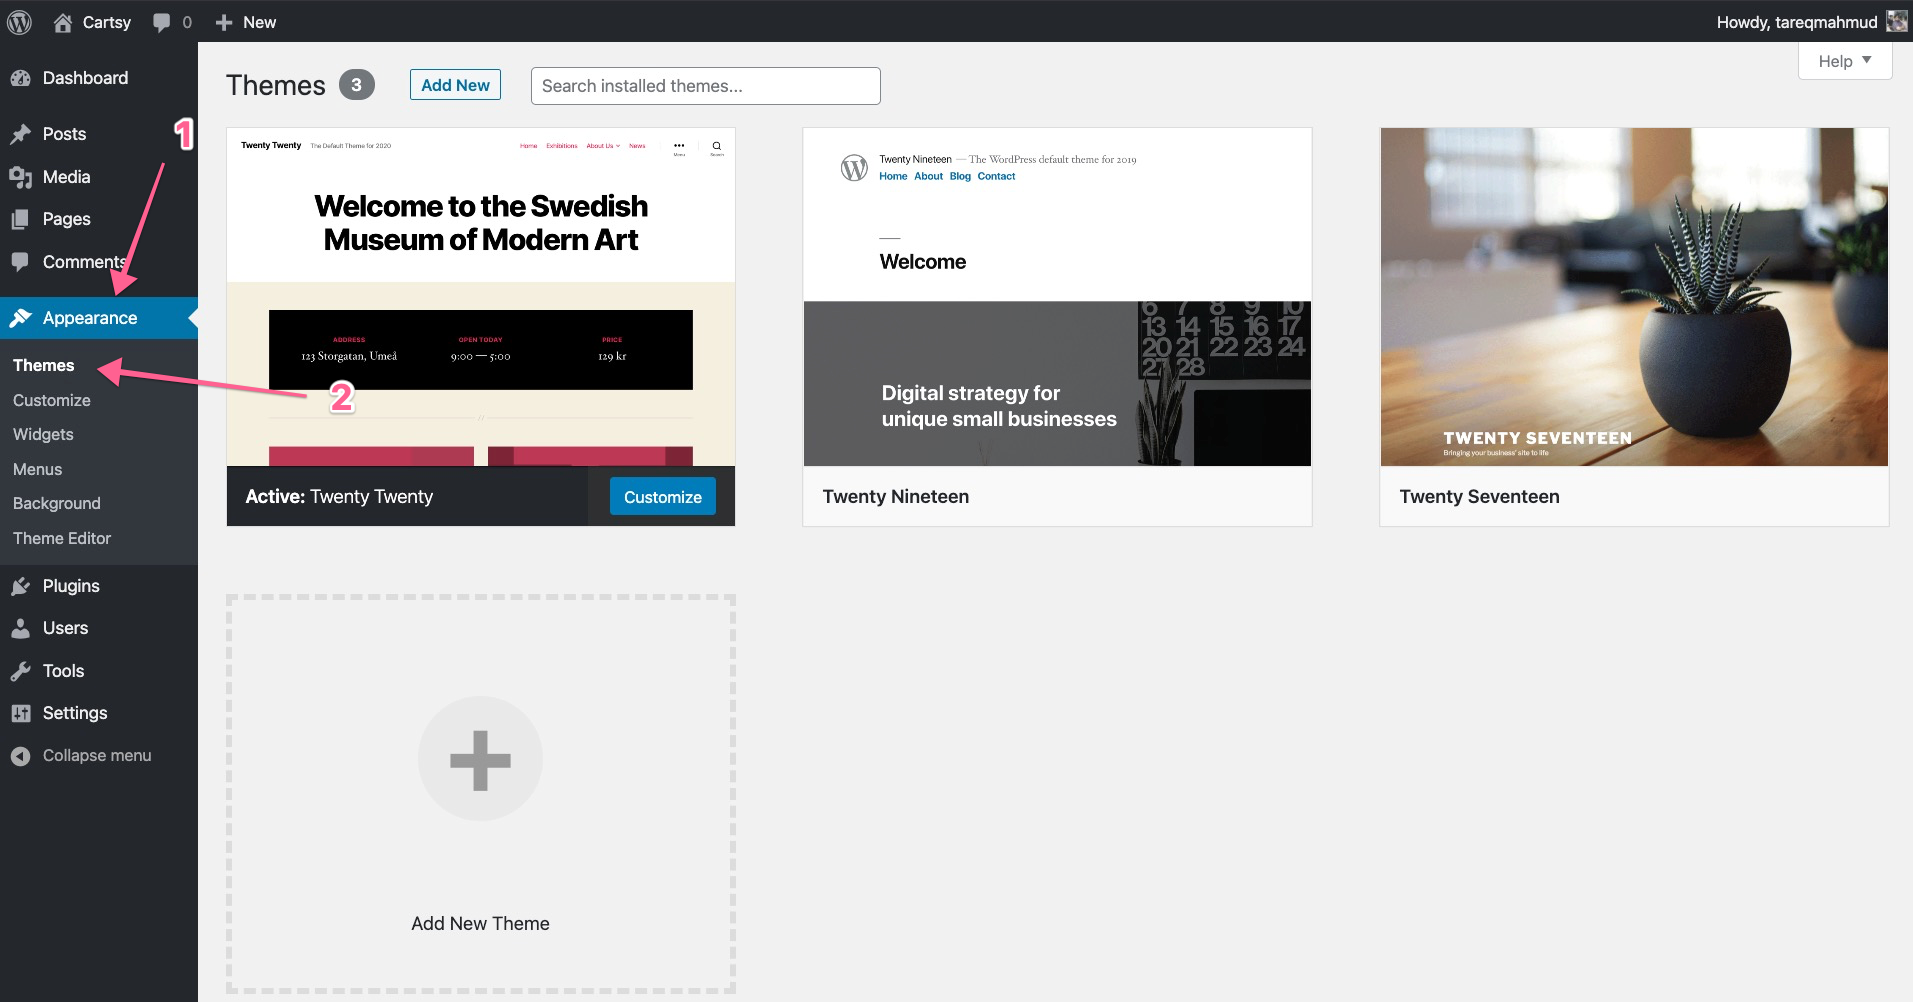
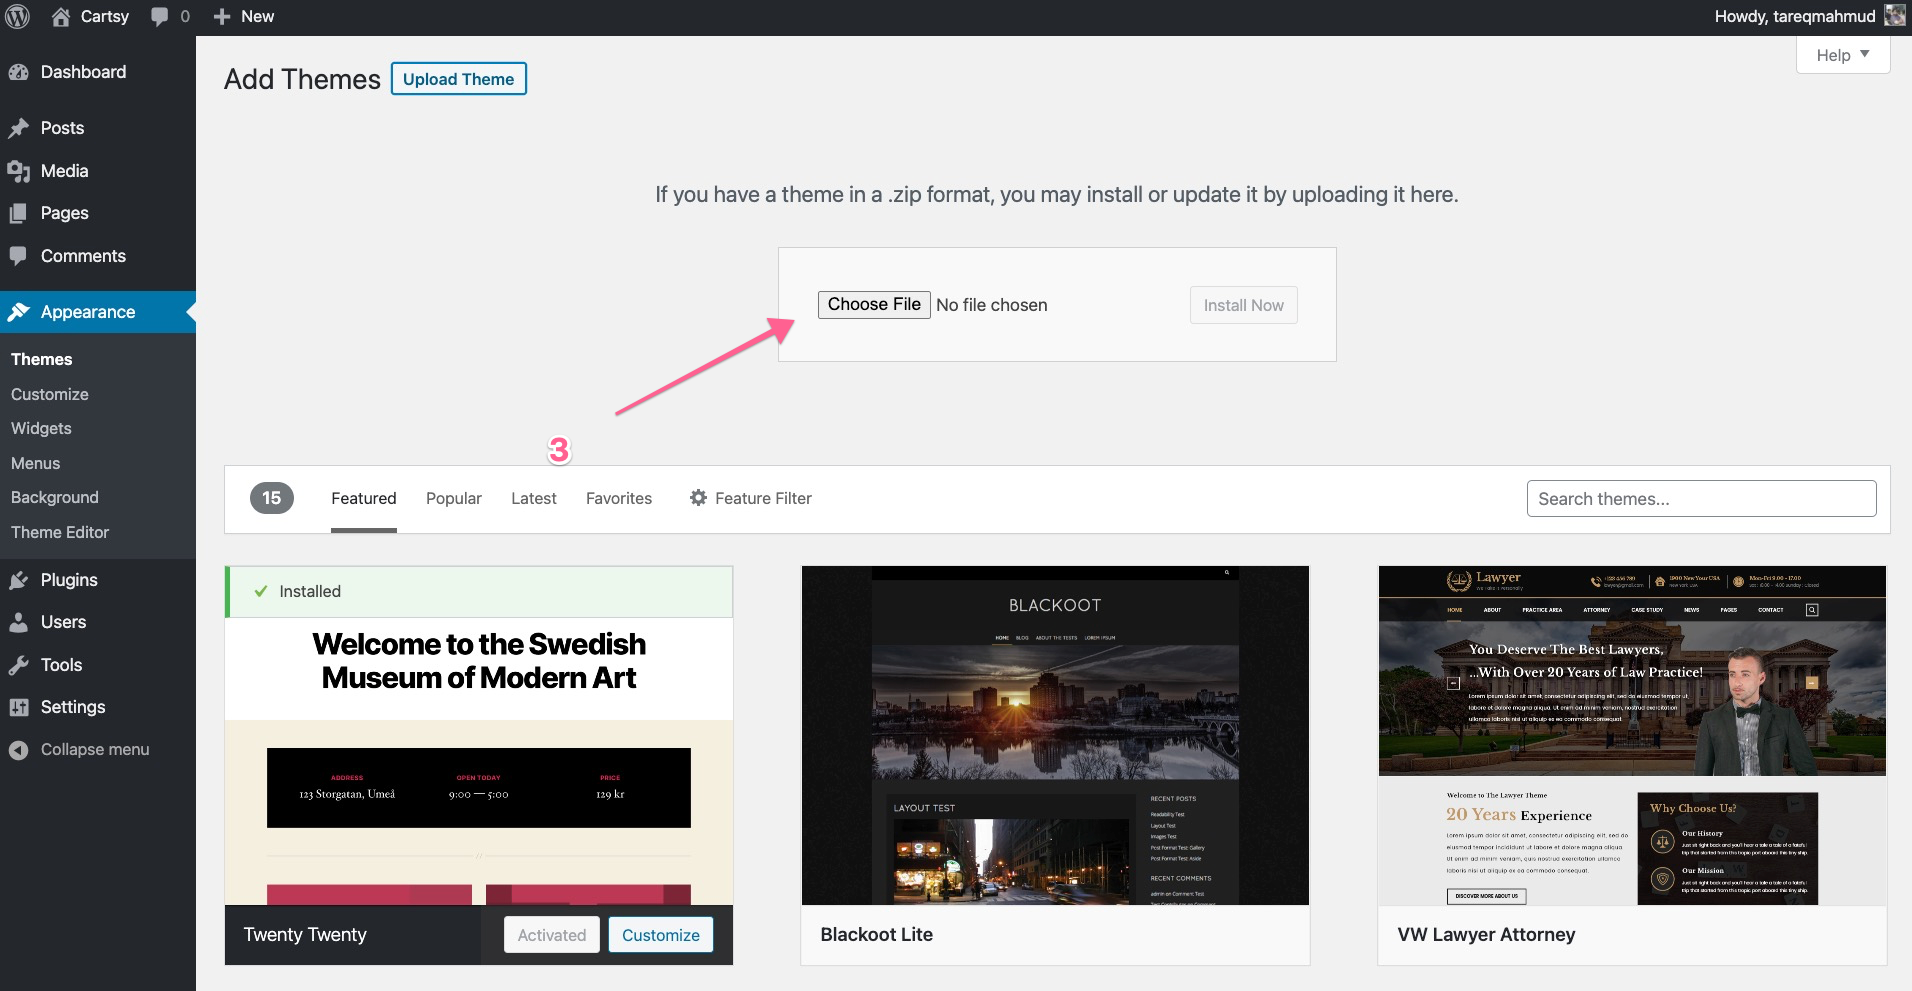
Then Go to Add New -> upload and select the downloaded Cartsy theme. After the upload, similarly, install the Cartsy child theme

After installing both Cartsy and Cartsy child theme, Activate Cartsy child theme
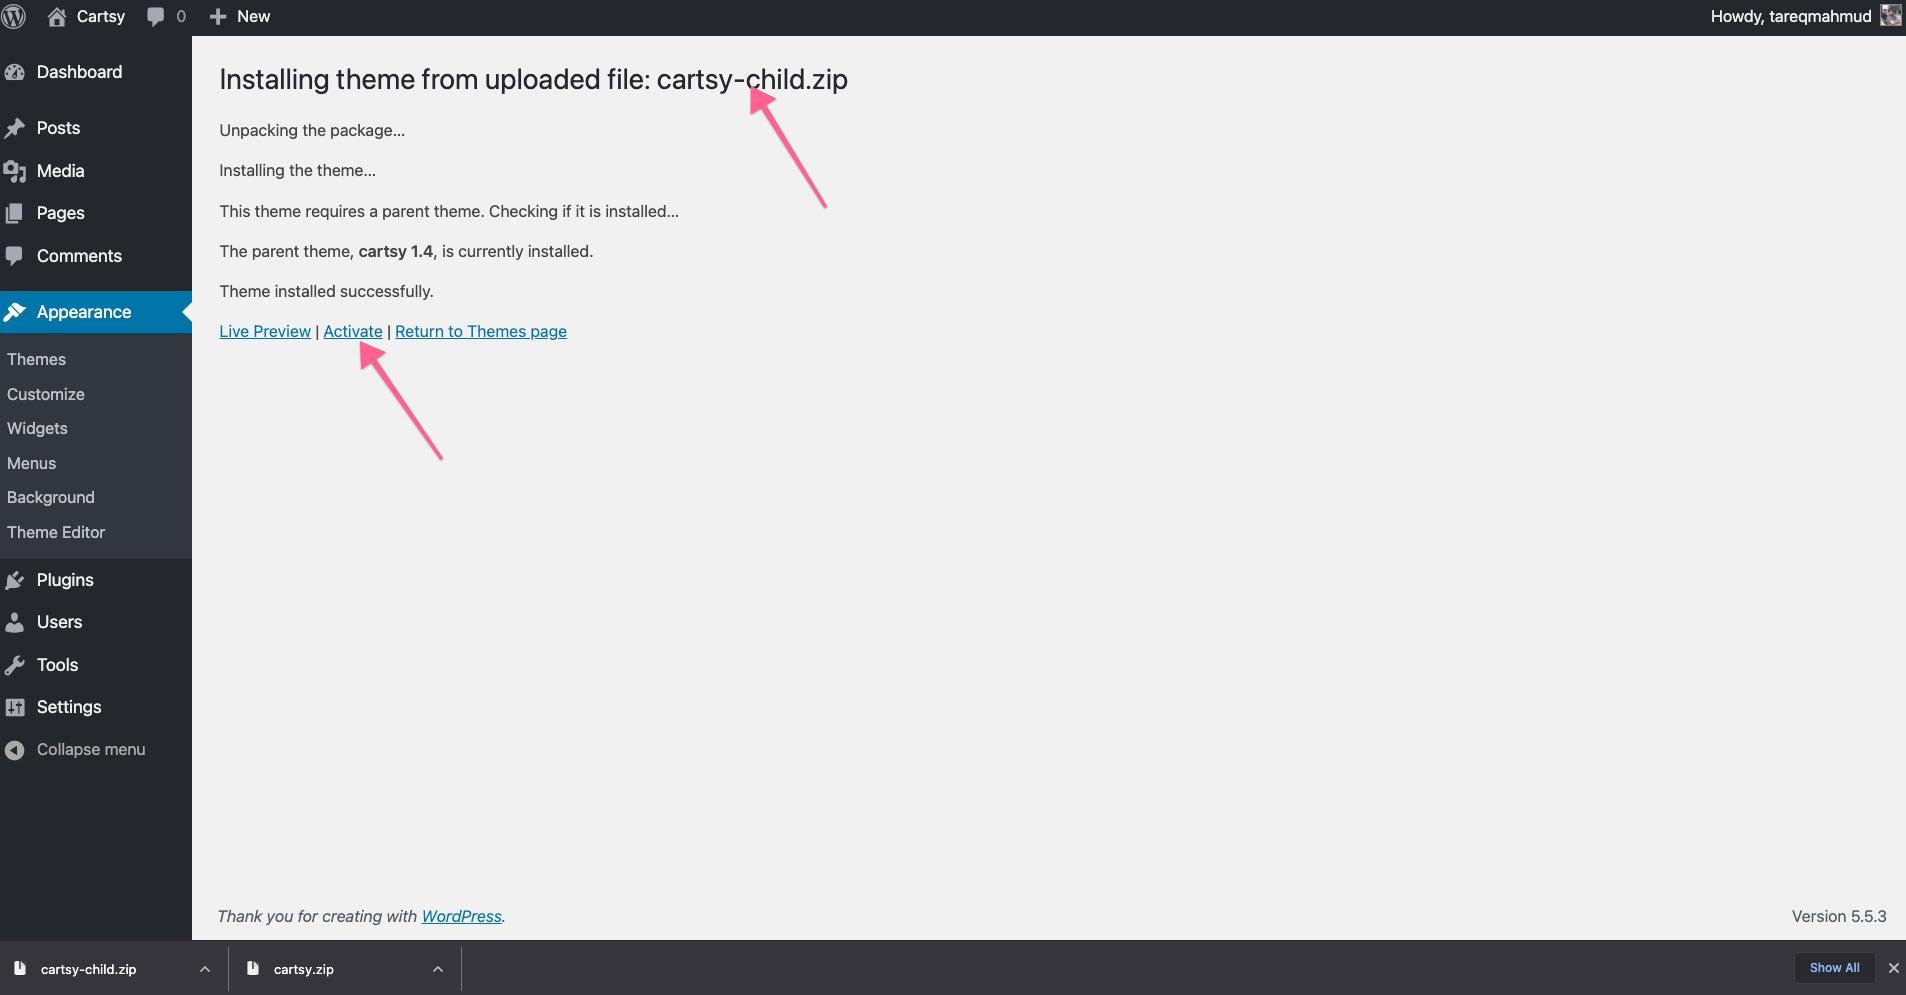
With that, our theme is successfully installed and activated
Server Configuration
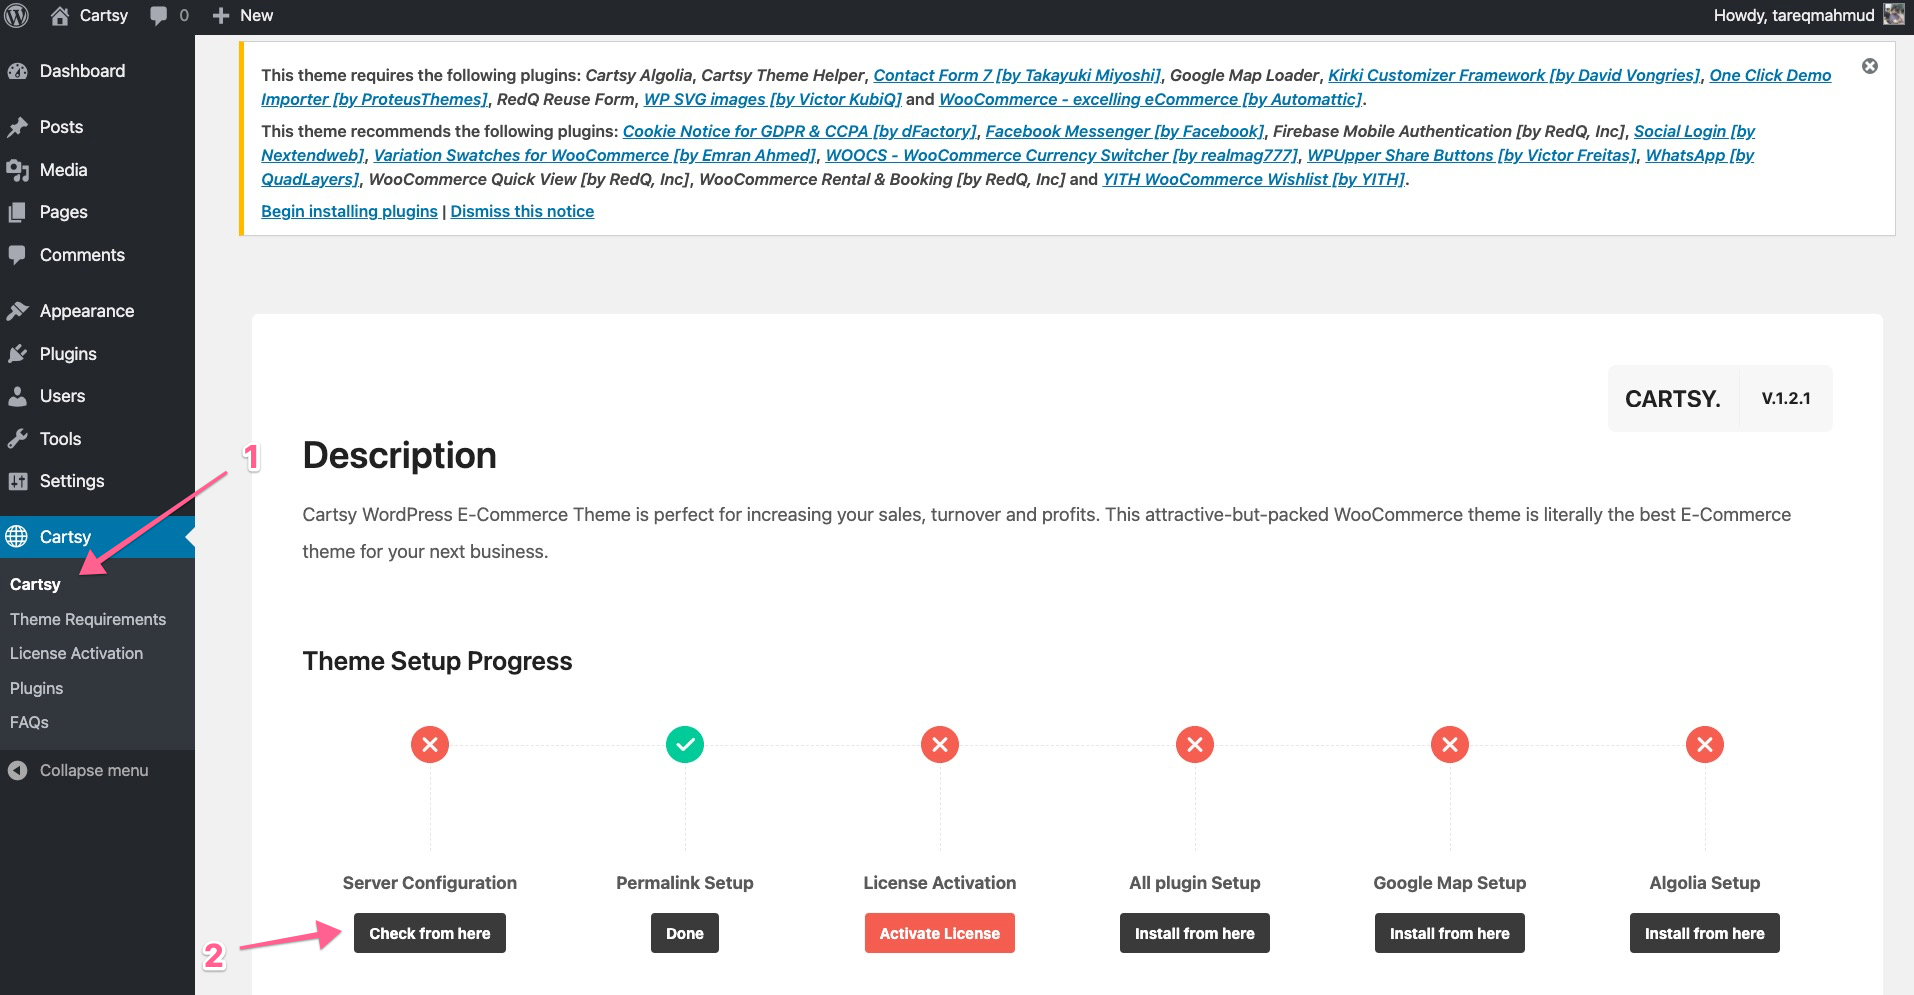
Server configuration depends on your specific server. Suppose for WooCommerce, there is a suggestion to have at least 256M memory, but you used 64M on your server, So for your server, you’ve to increase the memory. So similar to that, there can be many configurations need based on your server's previous configuration. To simplify that, we add a status section to understand what needs to be configured on your server to improve the WooCommerce application experience. Just go to Cartsy -> Server Configuration, and you’ll get the status of your server and the suggested configuration from that.
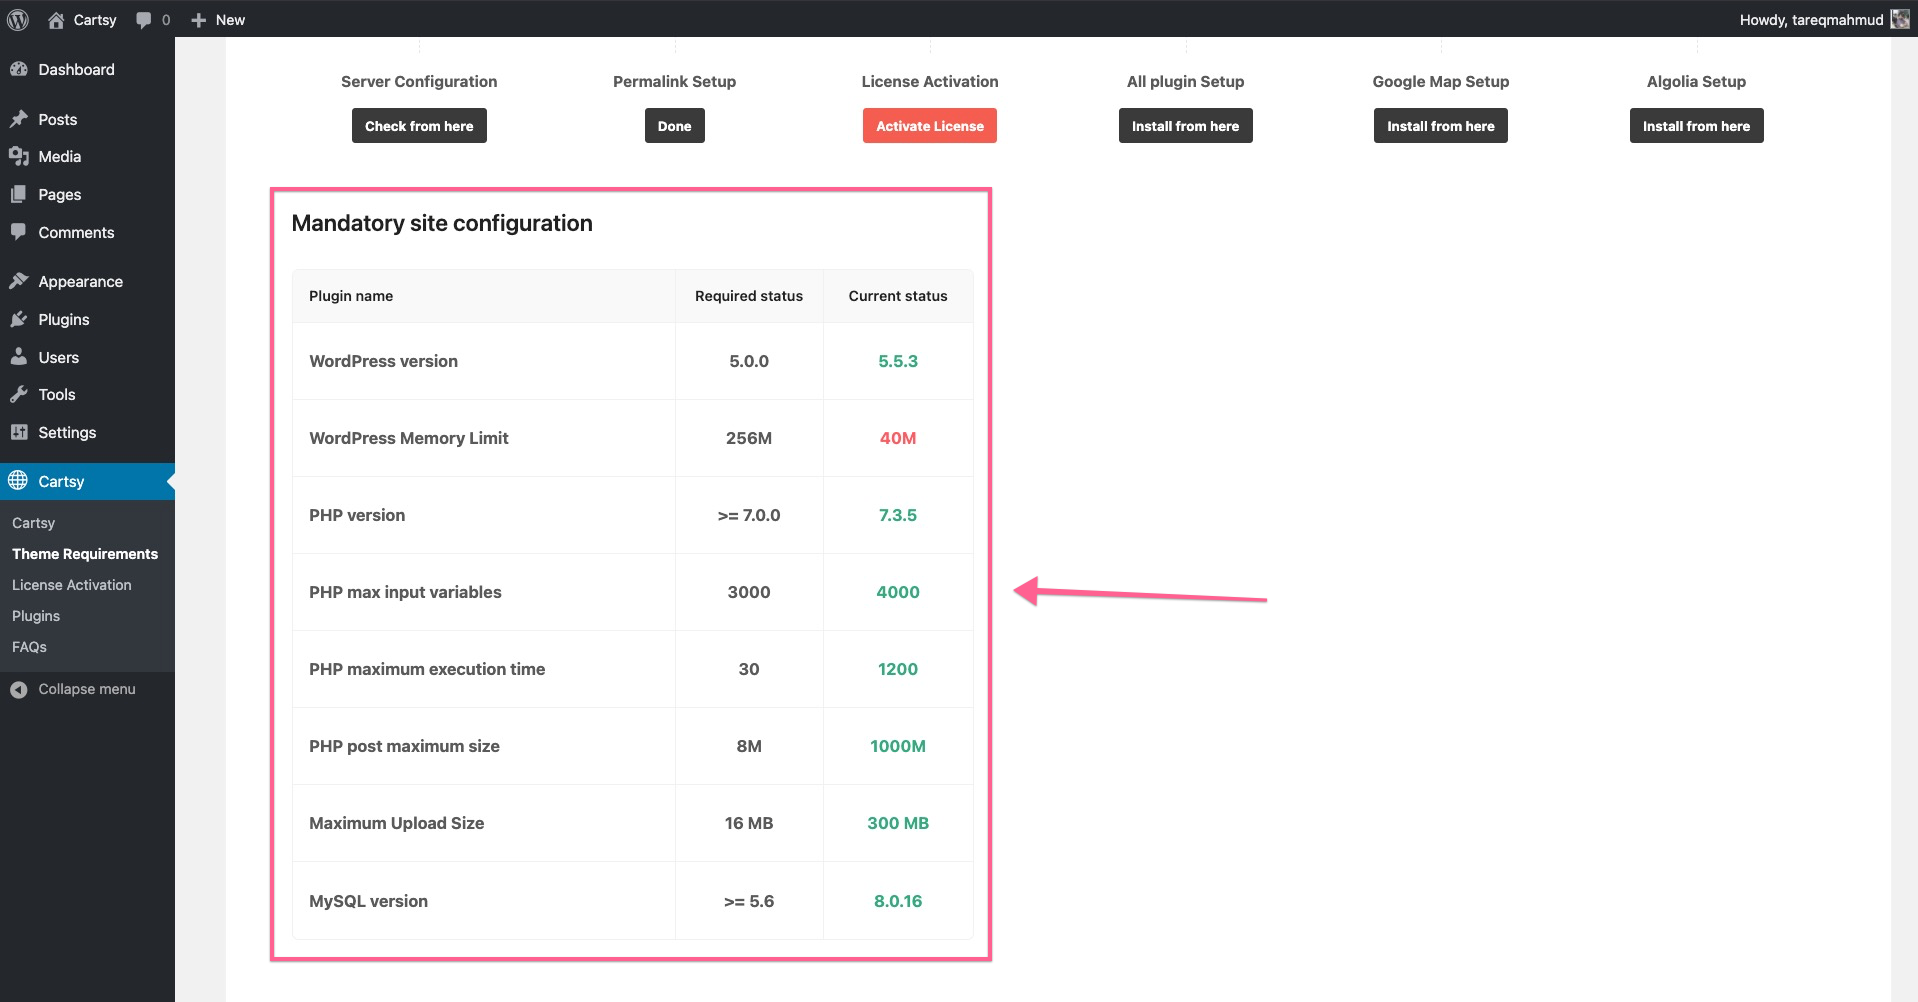
Just take a screenshot of that page and forward that to your hosting provider; they will assist you on this.
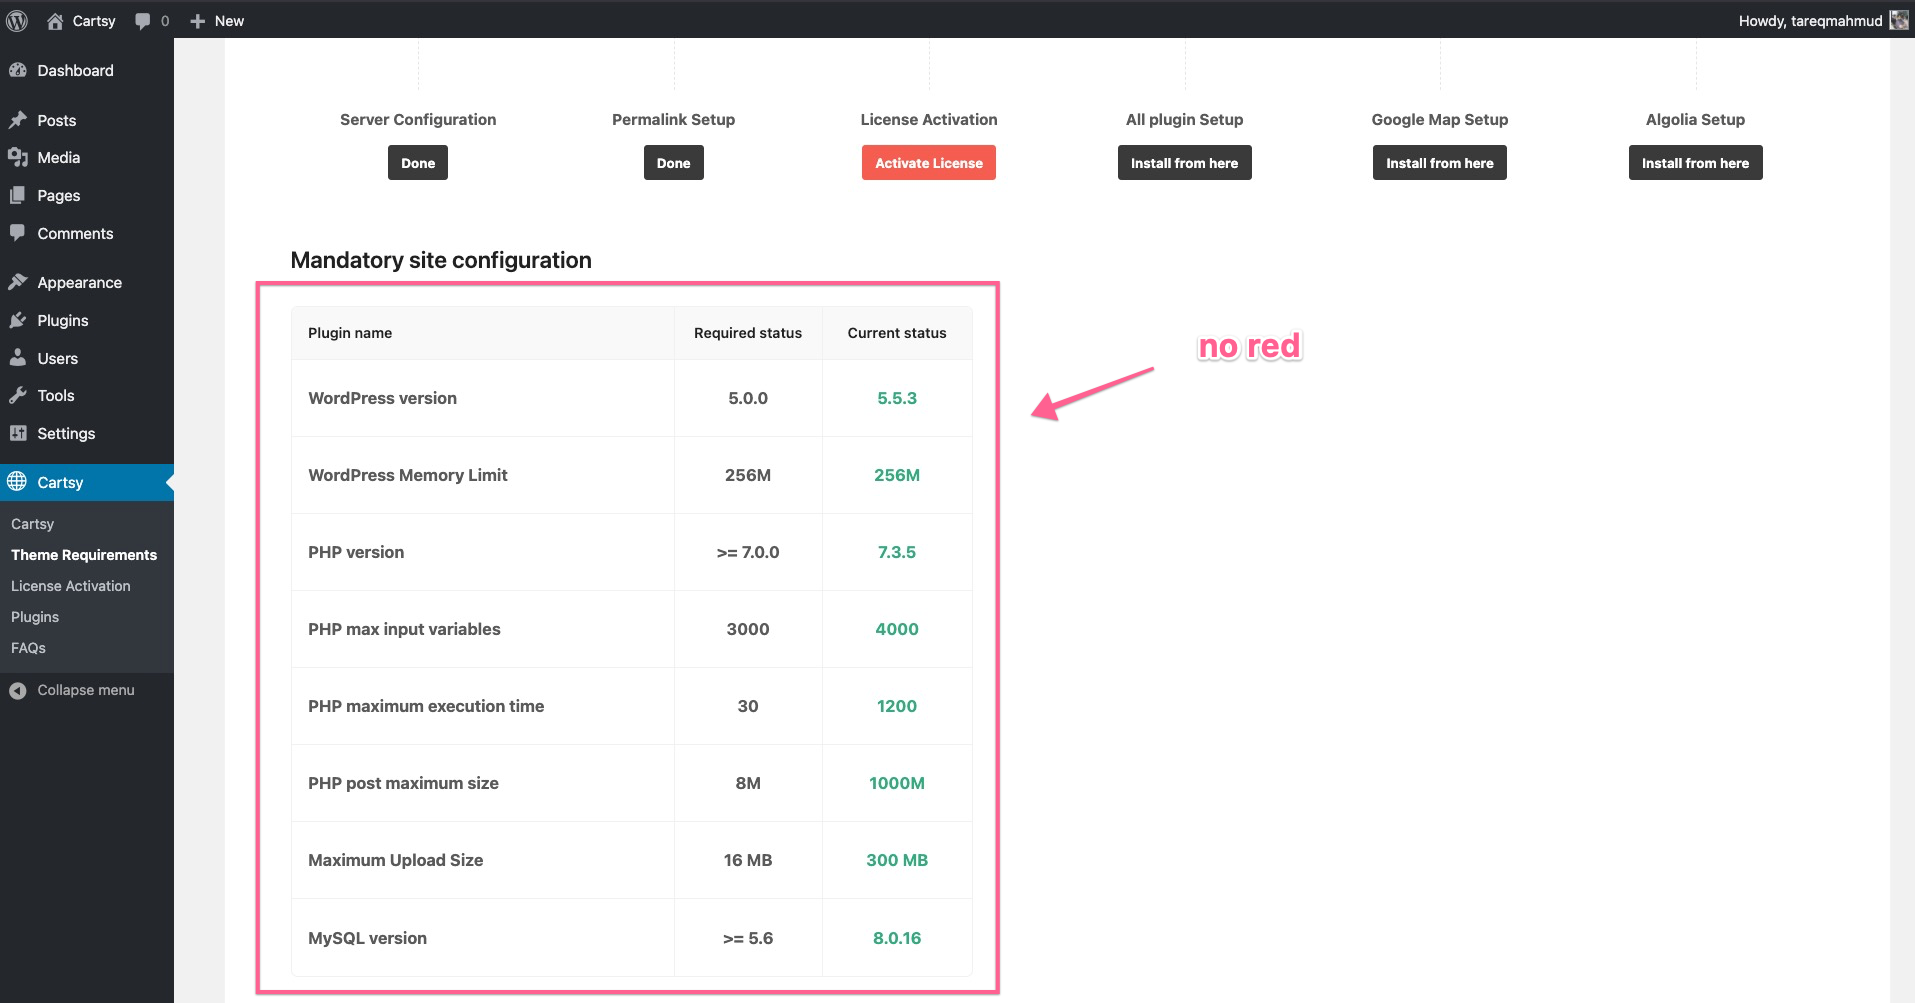
After doing all the necessary configuration, your server status page will look like this,
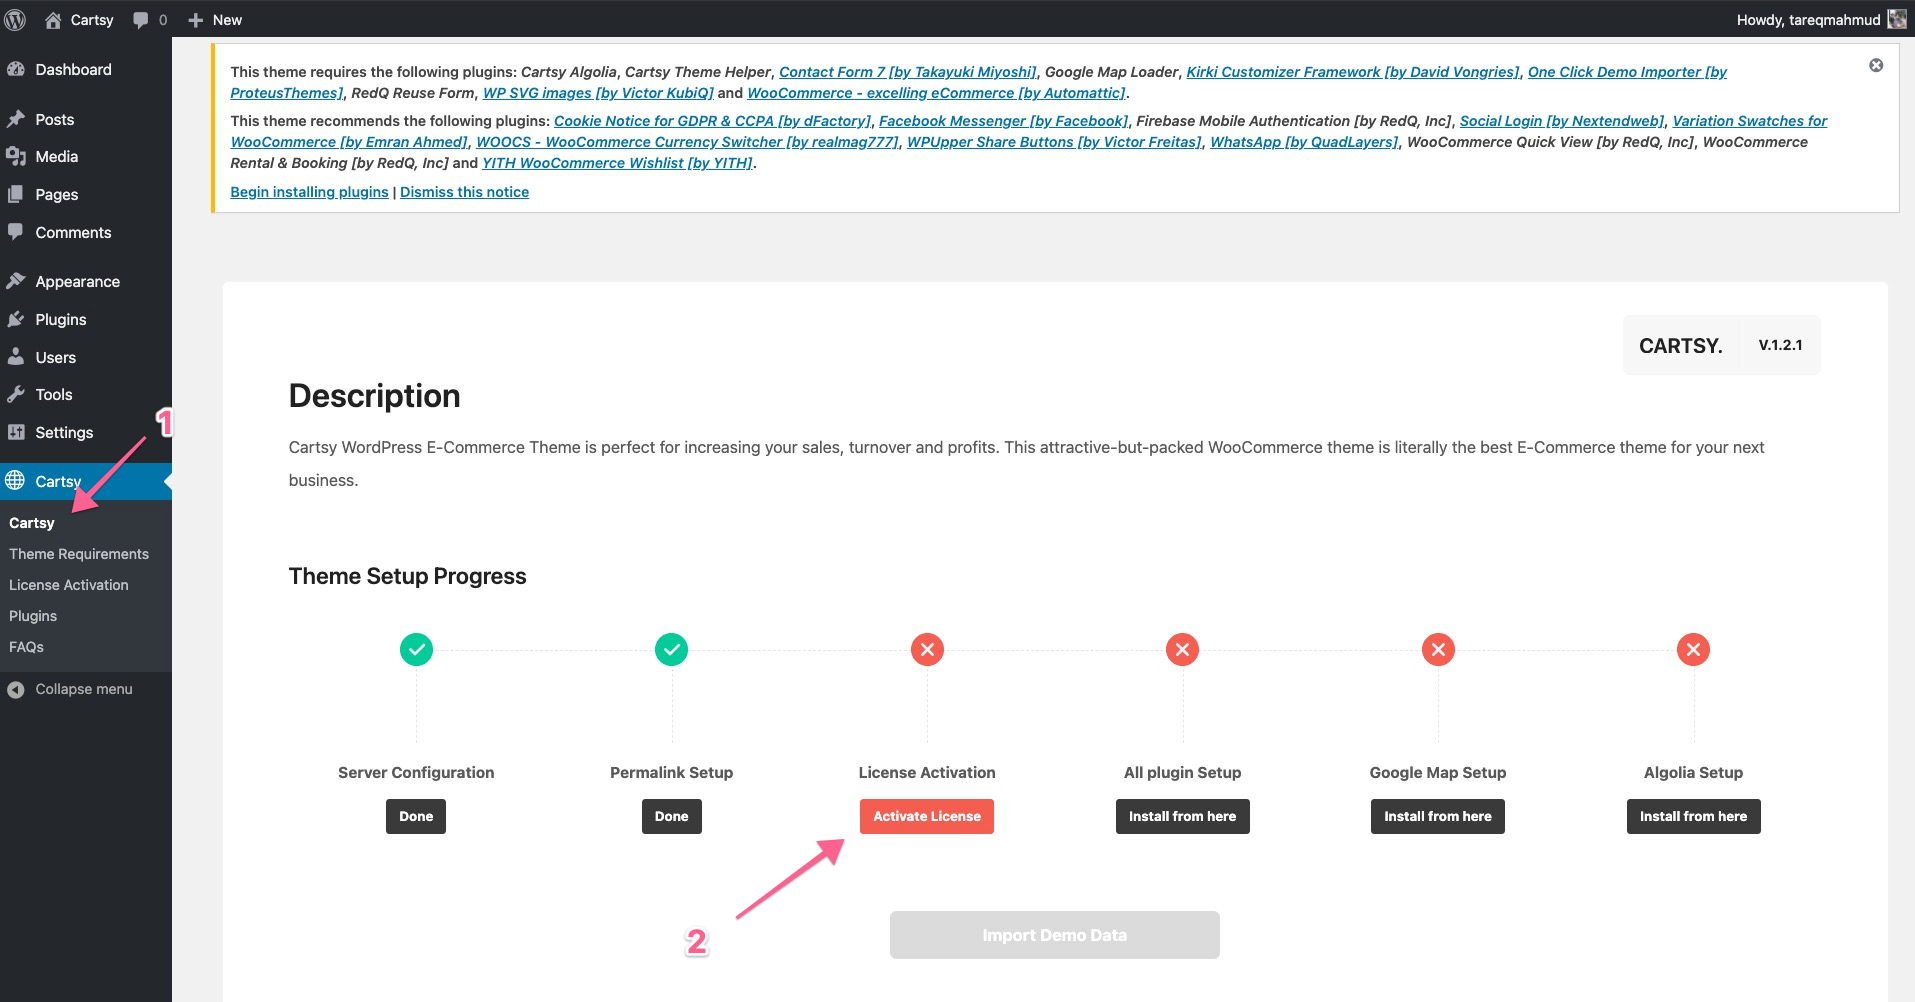
Activate License
During the buying of the Cartsy theme, you’ll get a license key. If you didn’t save that or lost it, don’t worry; just go to http://member.redq.io/ and get the license key.
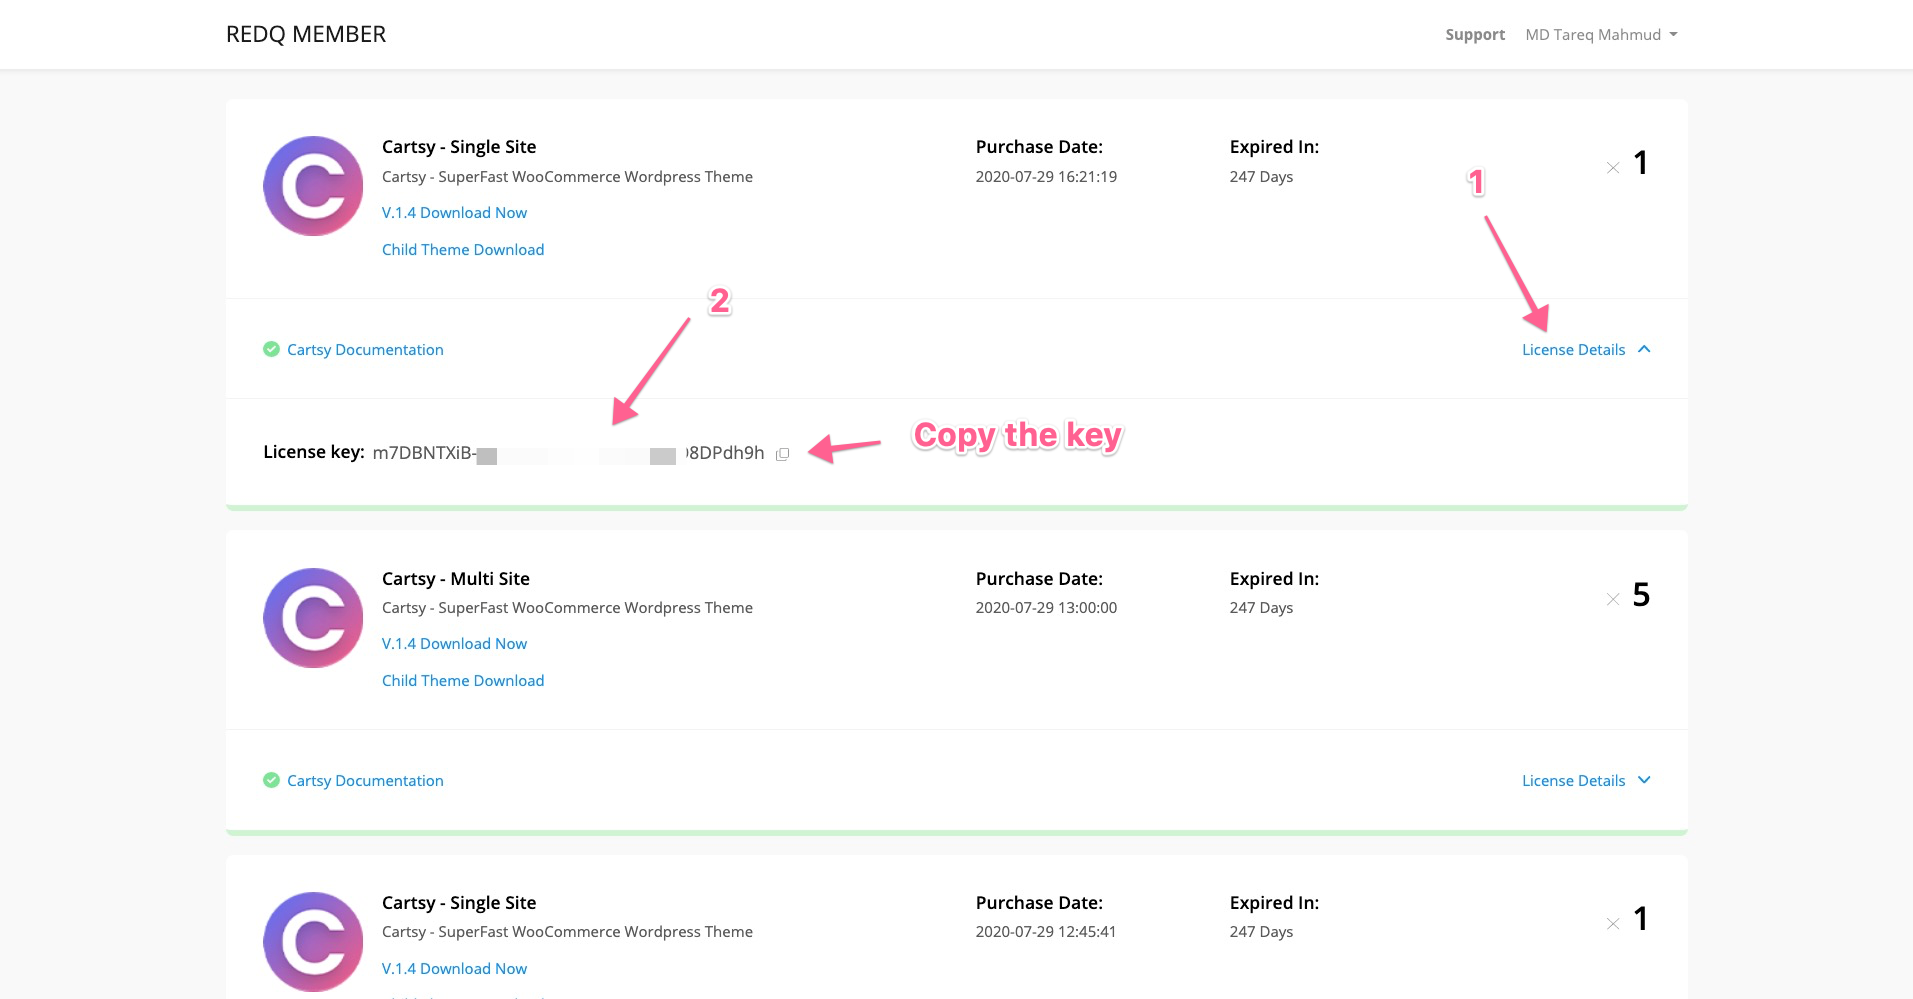
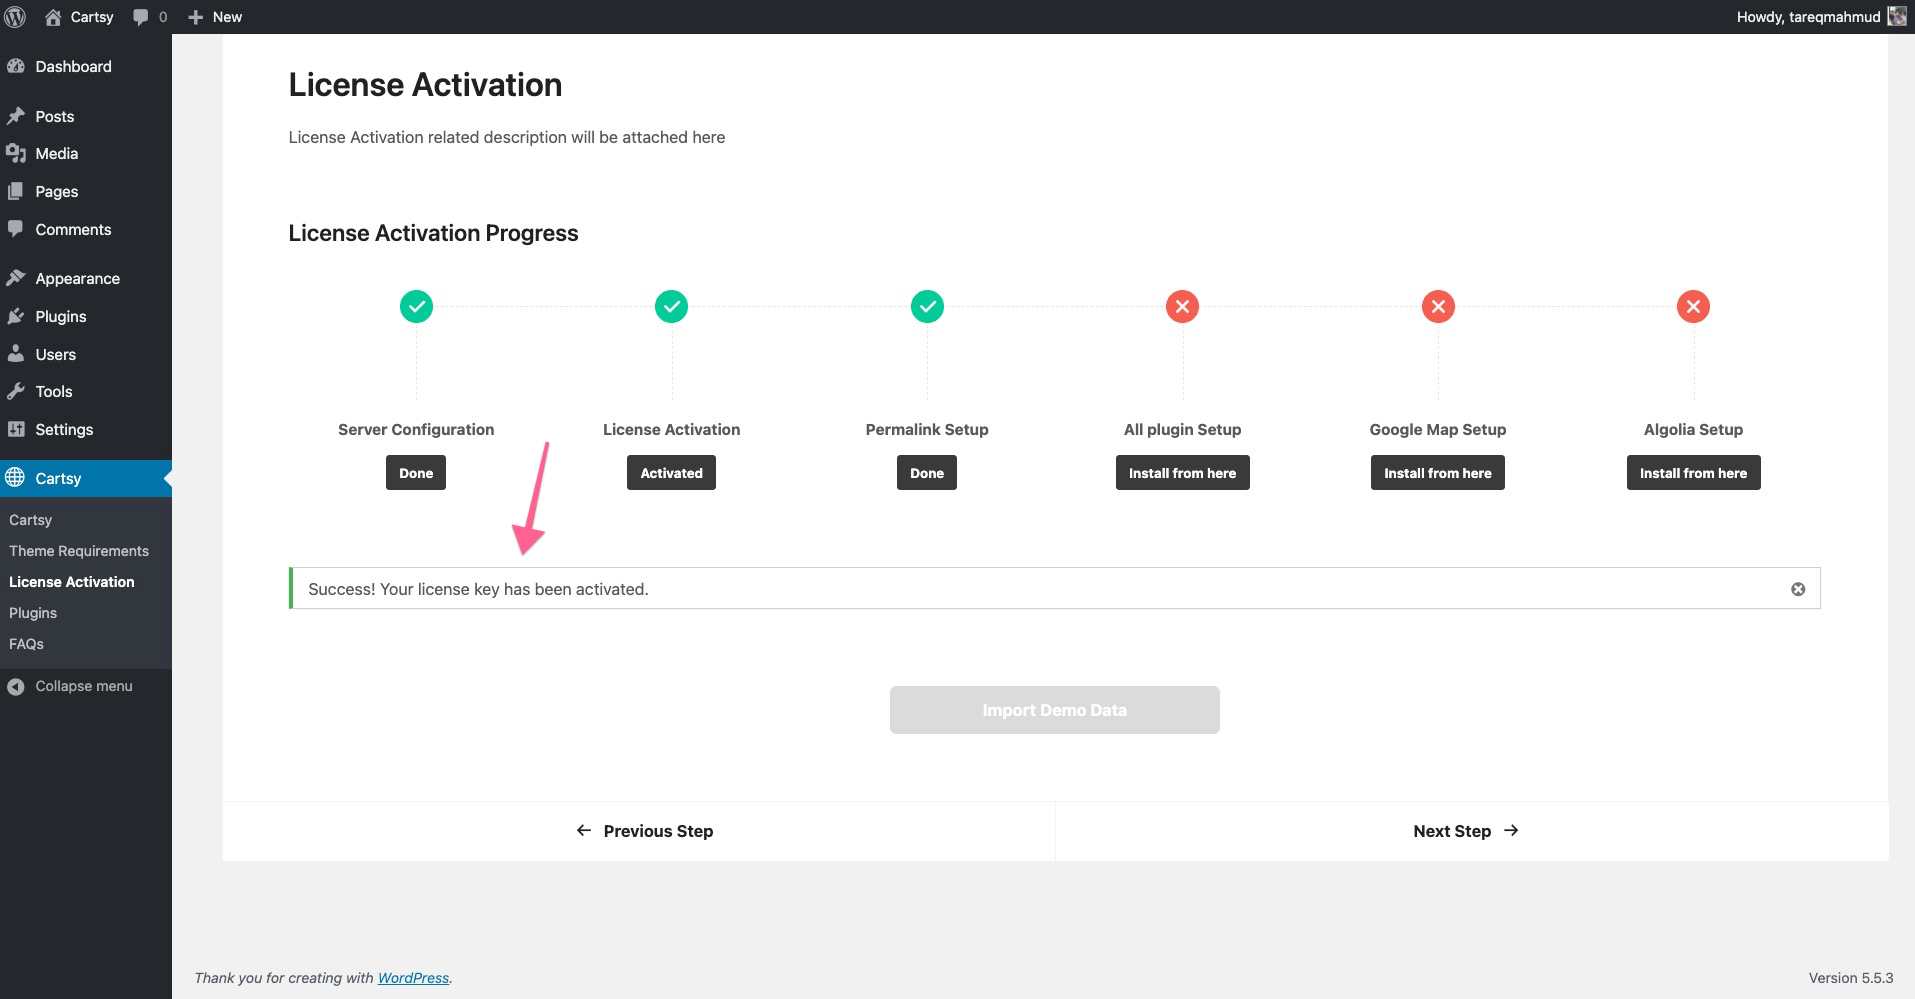
Copy that license key and save it to Cartsy -> Activate License -> Save

After activating the license, you'll get a success message like this one
Plugin Installation
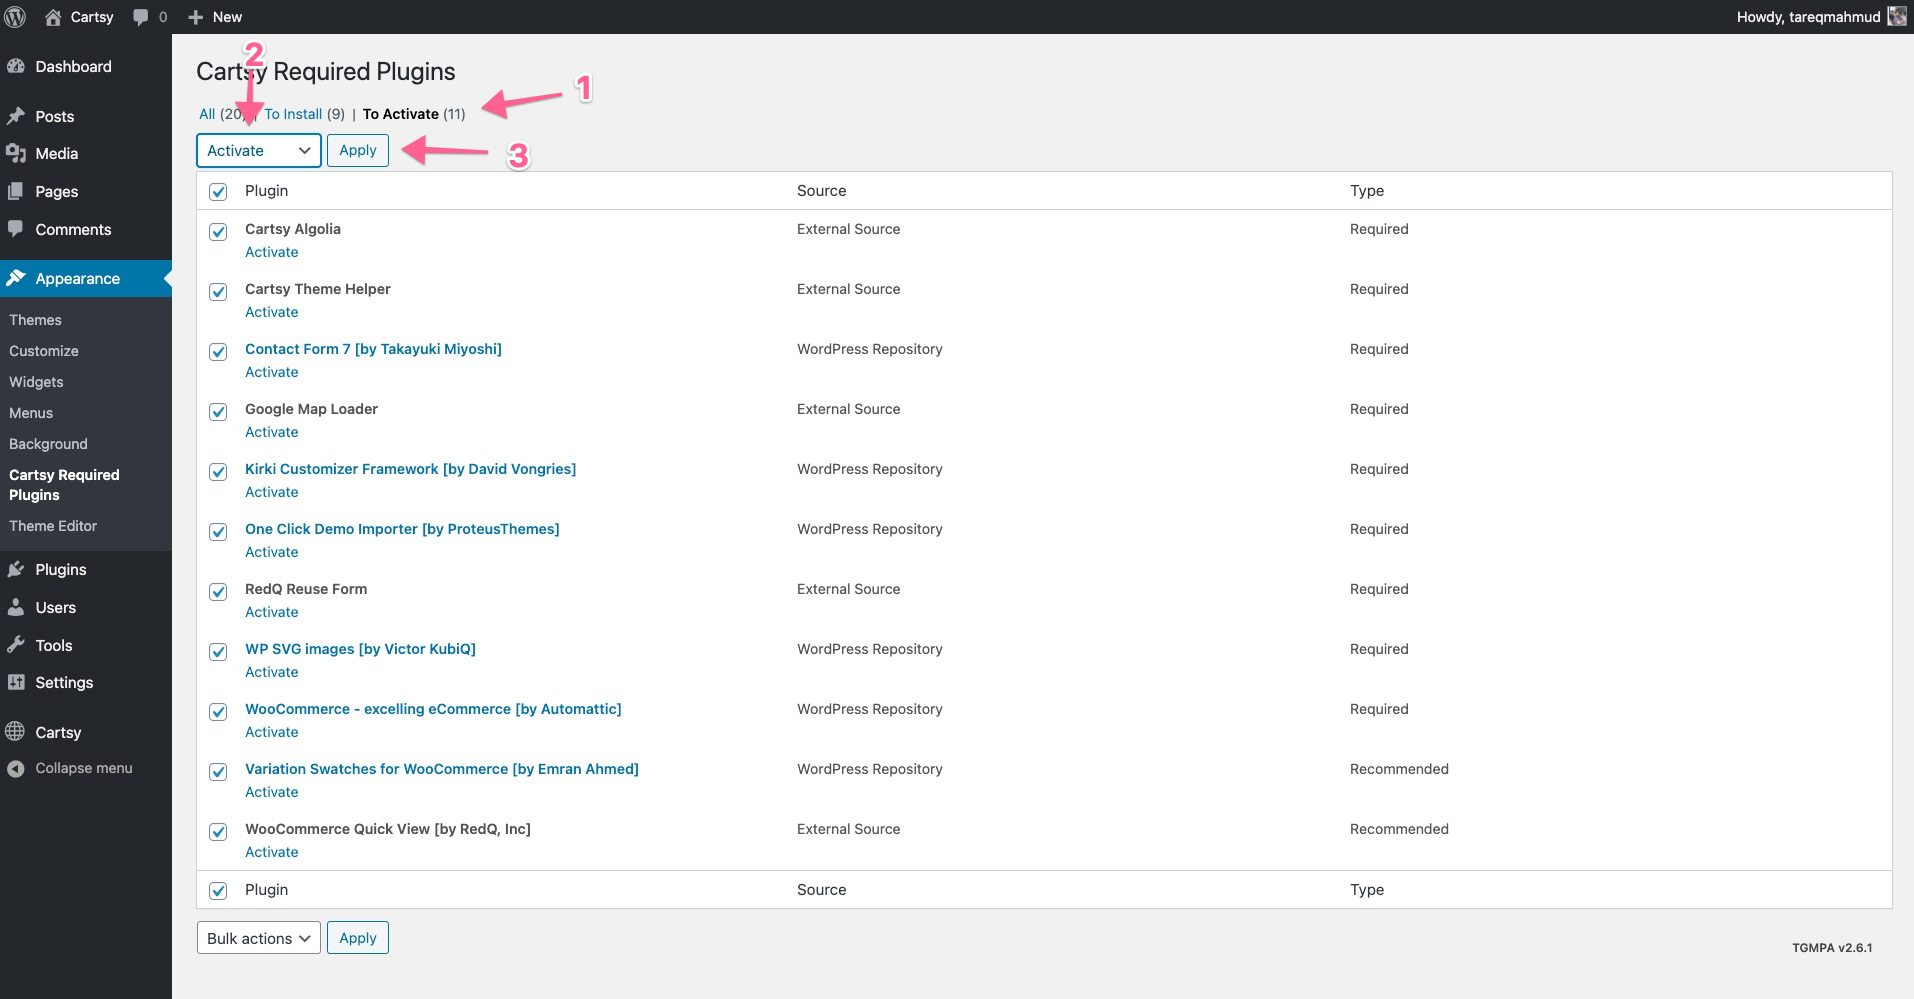
After the activate the license, click on All plugin Setup -> Bulk installations
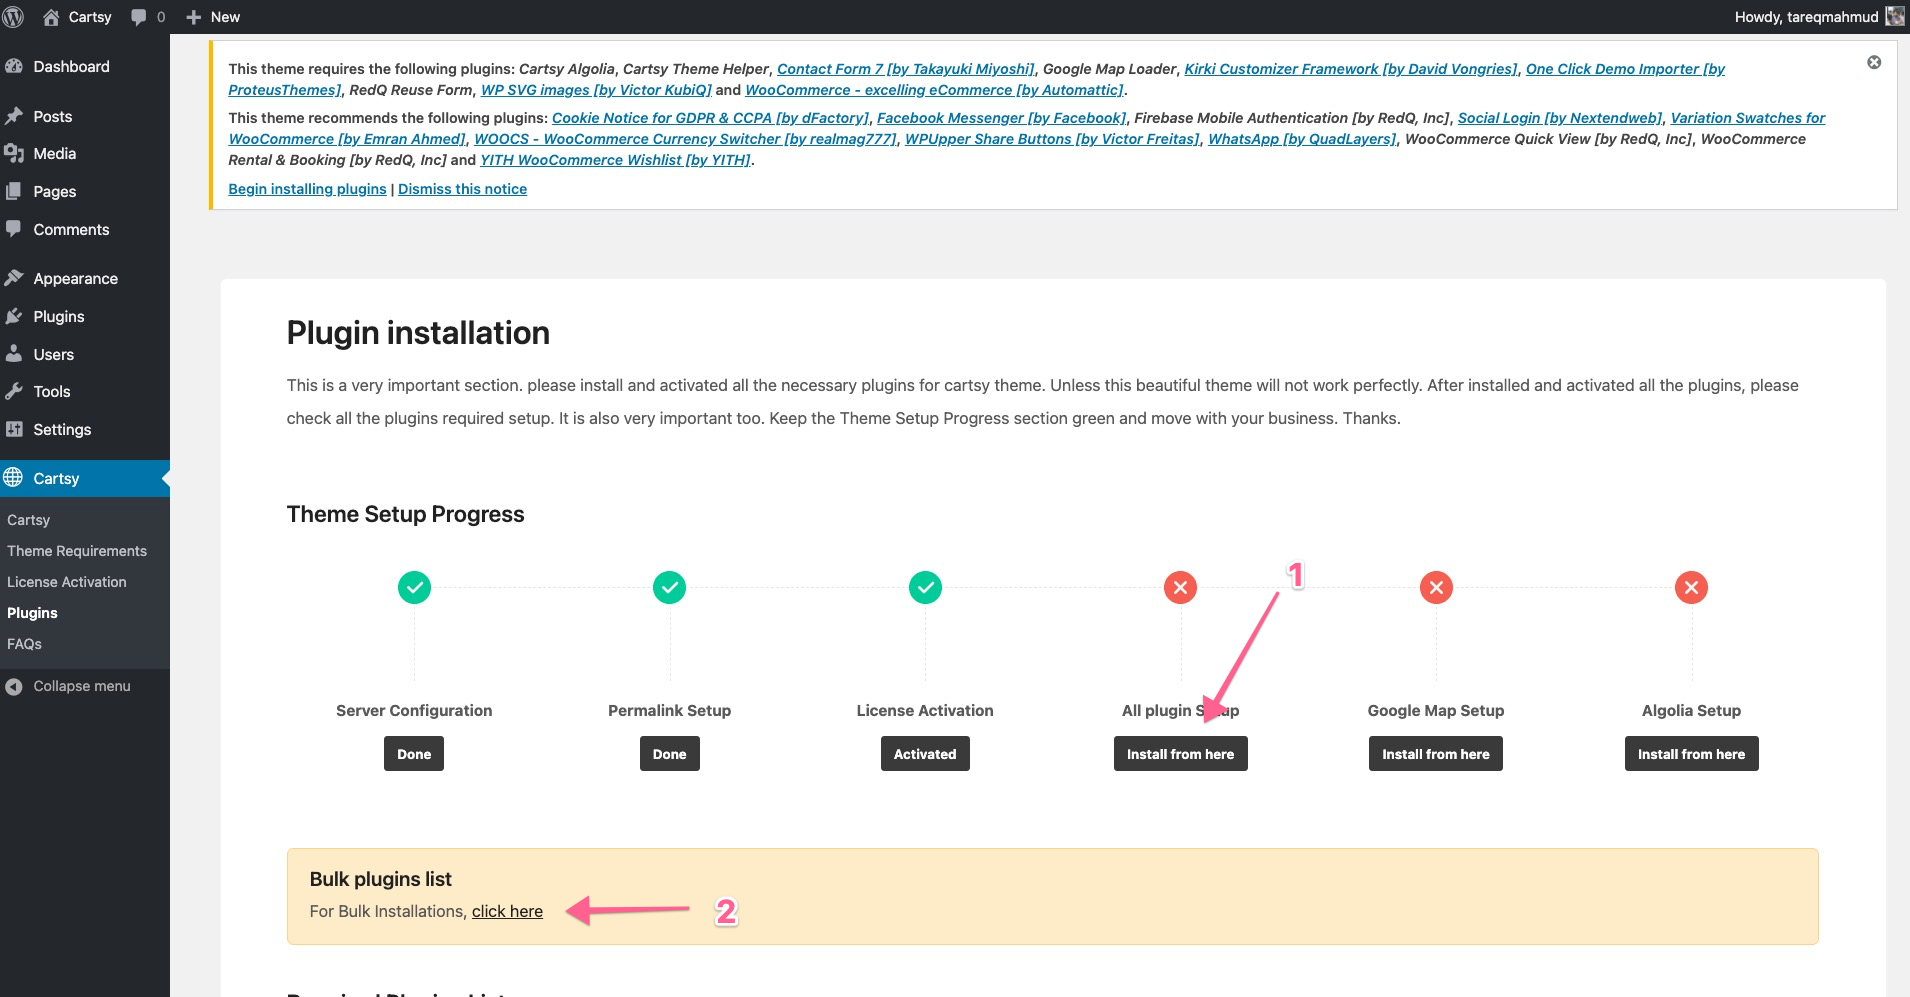
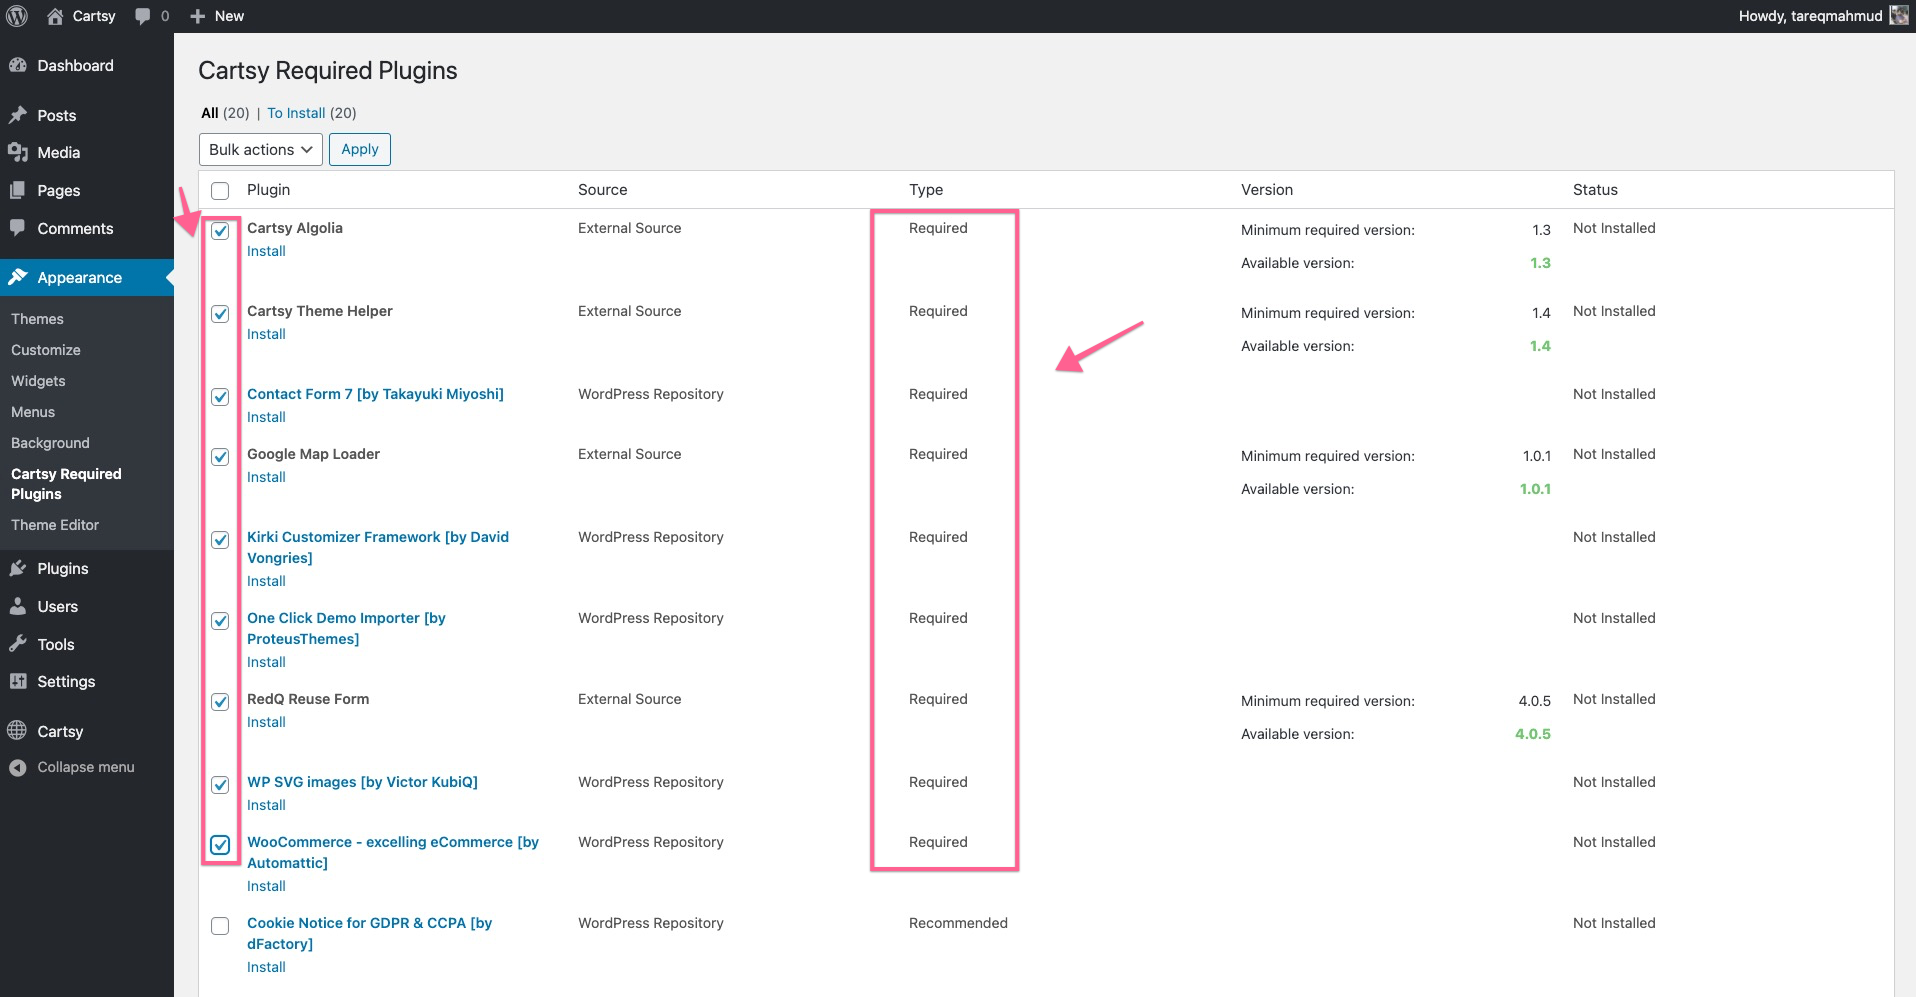
and from that at first install all the required plugin. The required plugin needs to install for all the demo, So install those plugins first.
(For Fashion Demo Only - Start)Now for a specific demo, the recommended plugin will be different. Suppose for Fashion demo it’s suggested to install quick view plugin and Variation Swatches for WooCommerce So for the fashion demo, install quick view plugin and Variation Swatches for WooCommerce plugin.
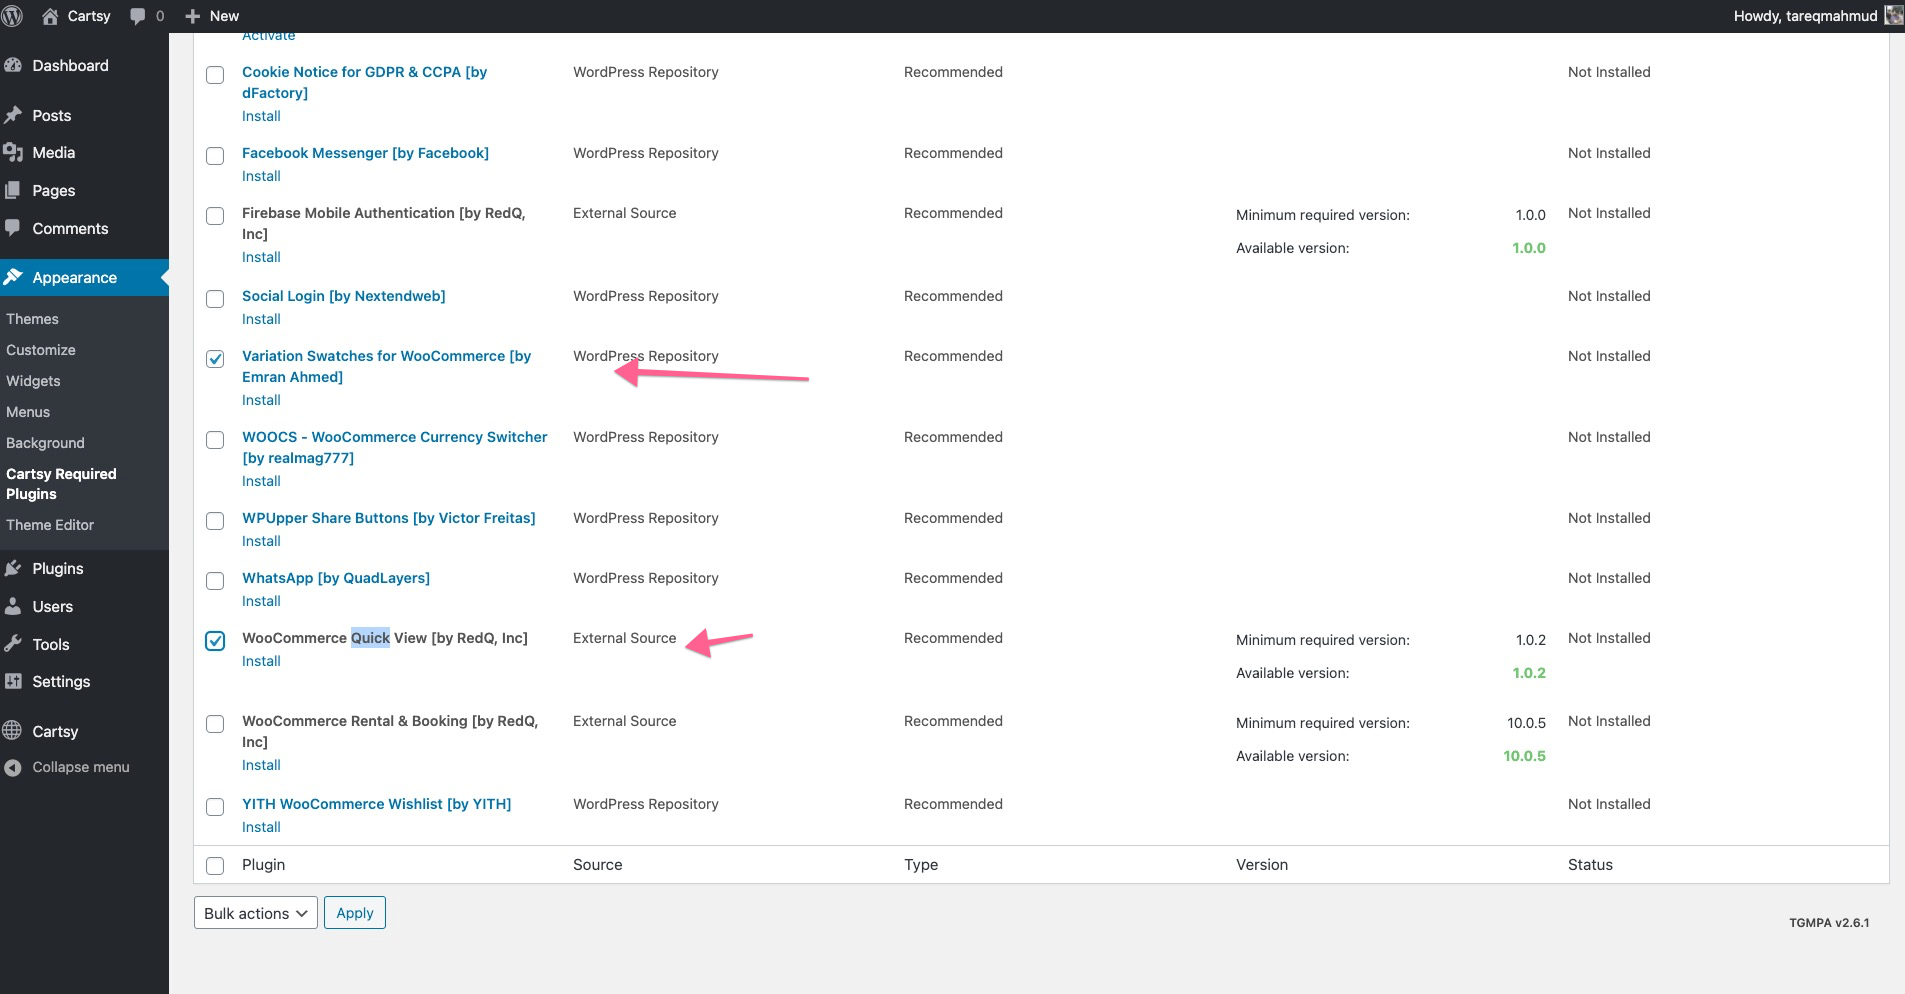
(For Fashion Demo Only - End)
Now, after installing the required and recommended plugins, it's time to activate the plugins.
To understand which recommend plugin do what, please check out our documentation or contact our support engineer. They’ll help you regarding this.
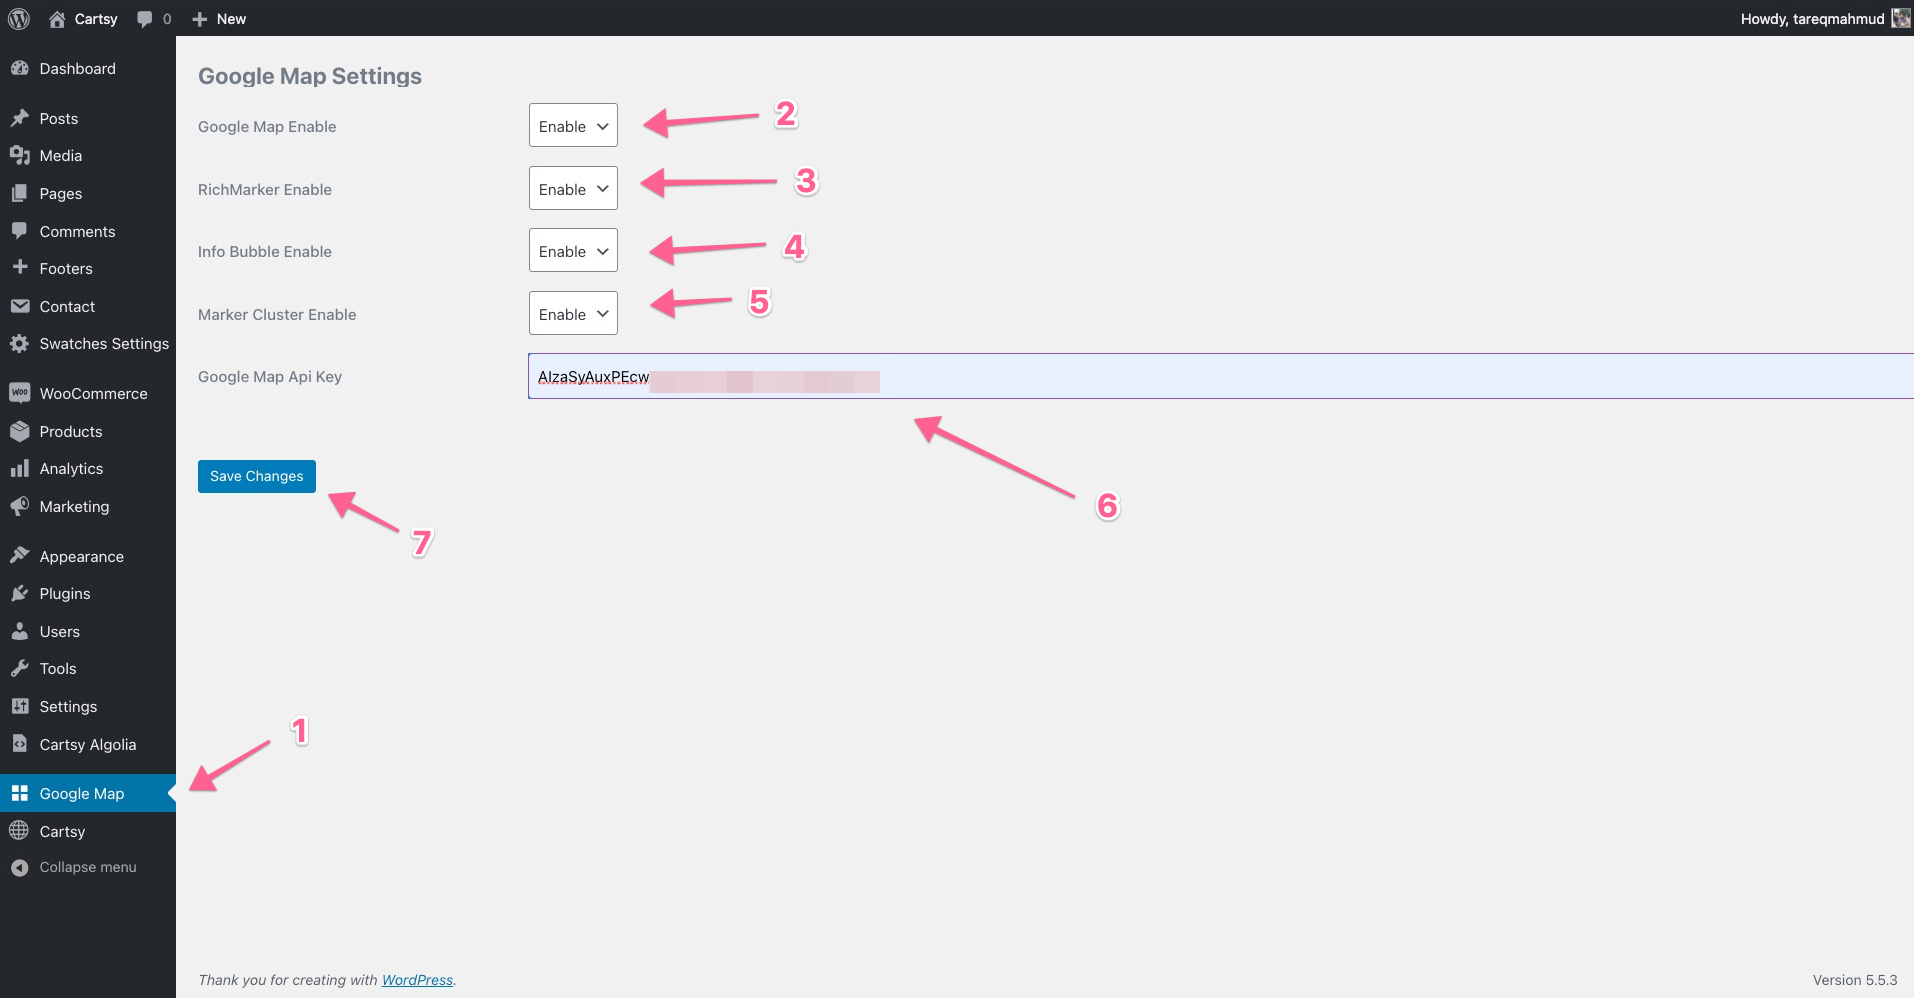
Configure Google Map
After Install the plugin, Create a google map key from https://console.cloud.google.com/ and paste it to wp-admin/Google Map to enable all the selector options. Check this official doc for creating a google map key, https://developers.google.com/maps/documentation/embed/get-api-key
Configure Algolia Key
If you want to use Native Search instead of Algolia, then you can skip the Configure Algolia Key part.
We’re going to create an Algolia Key for the fashion website,
-
At first go to https://www.algolia.com/
-
Click the
Free Trialbutton -
Add your email and password to create an account
-
After creating the account, log in to your created account
-
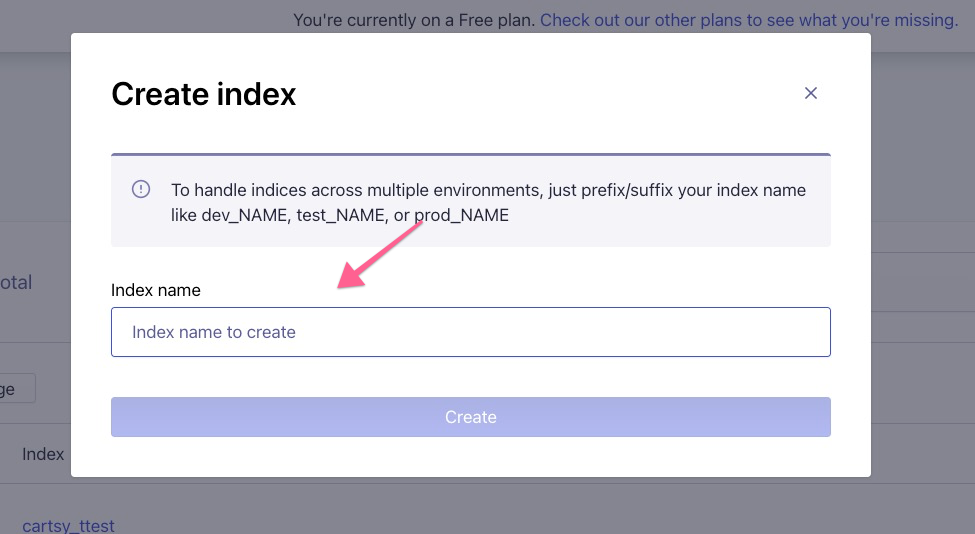
Click to
indices -> Create Indiciesand then input an indices name and clickCreate.
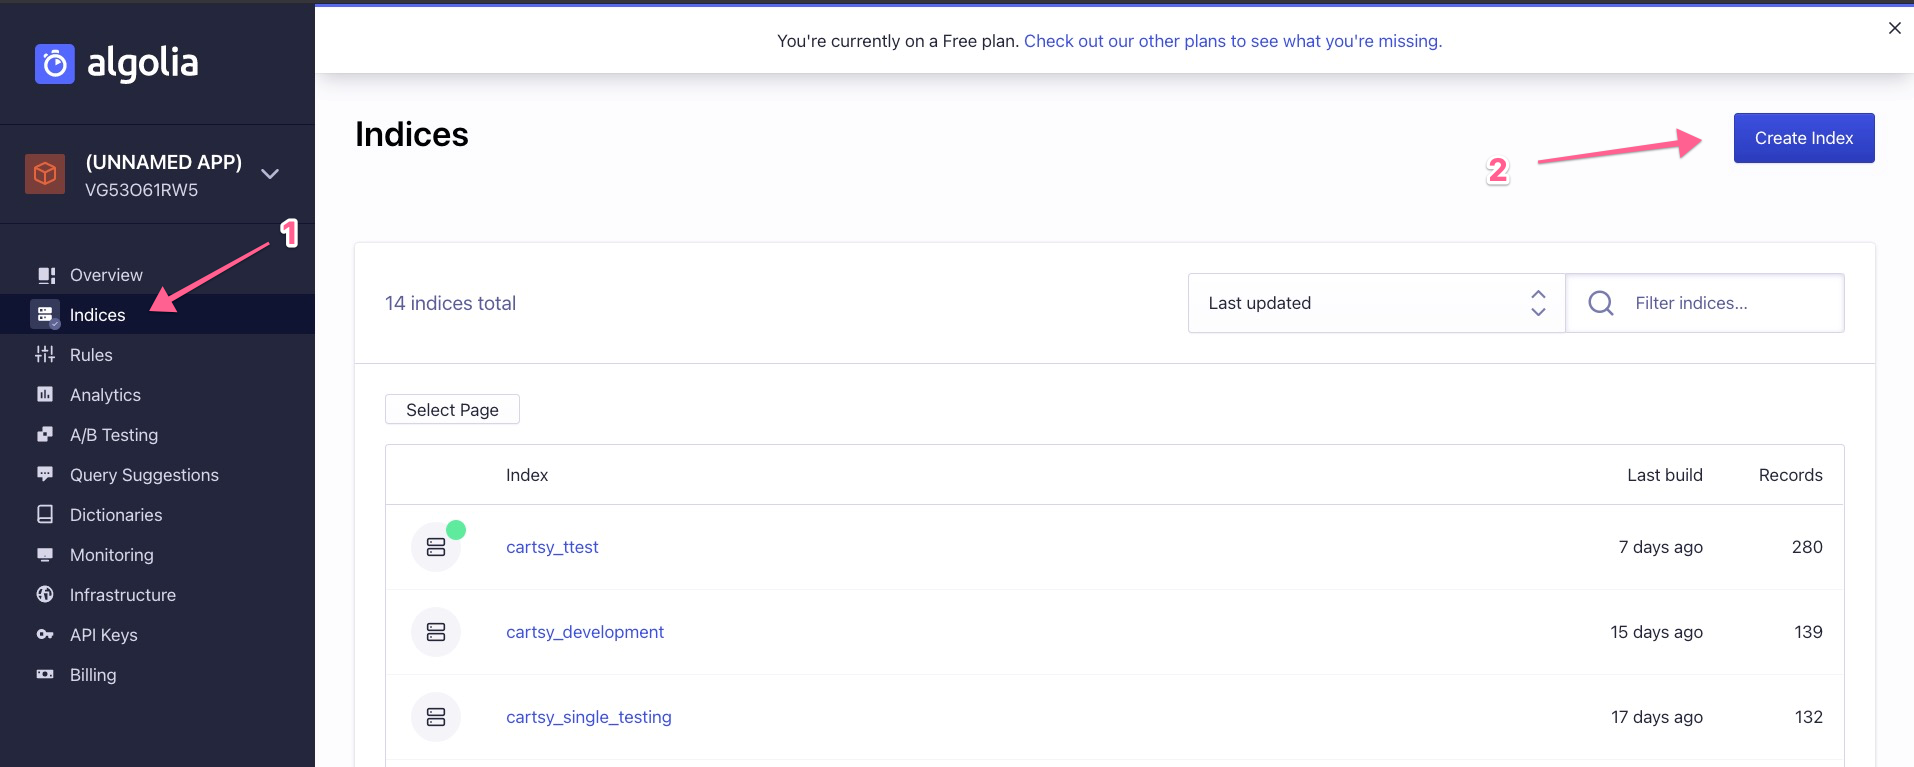
- After creating the indices, collect your API key from the API dashboard.
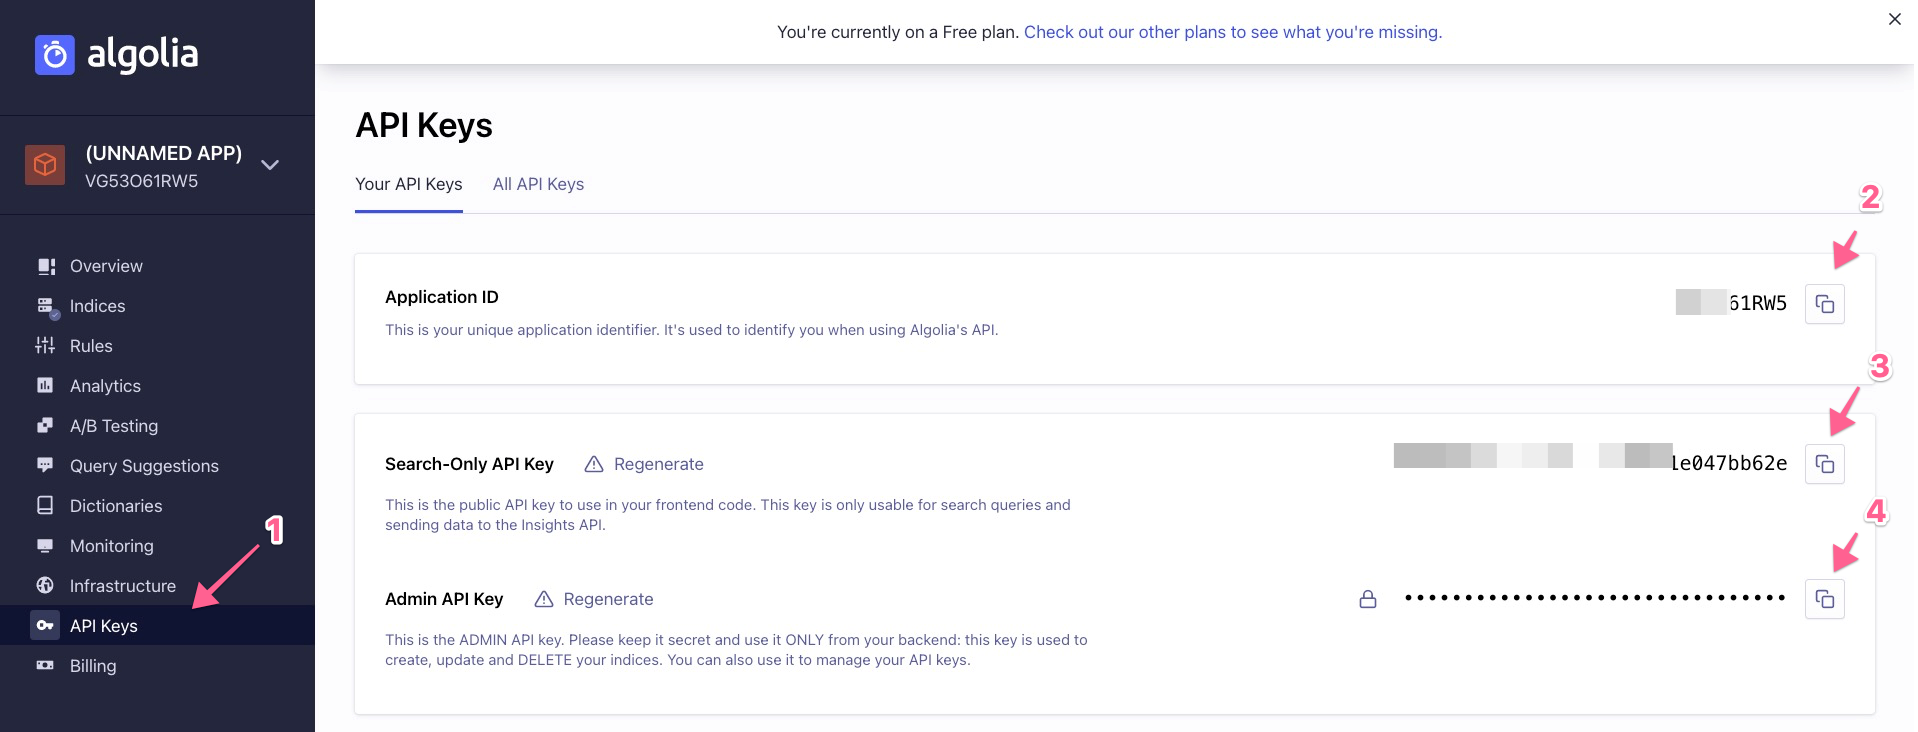
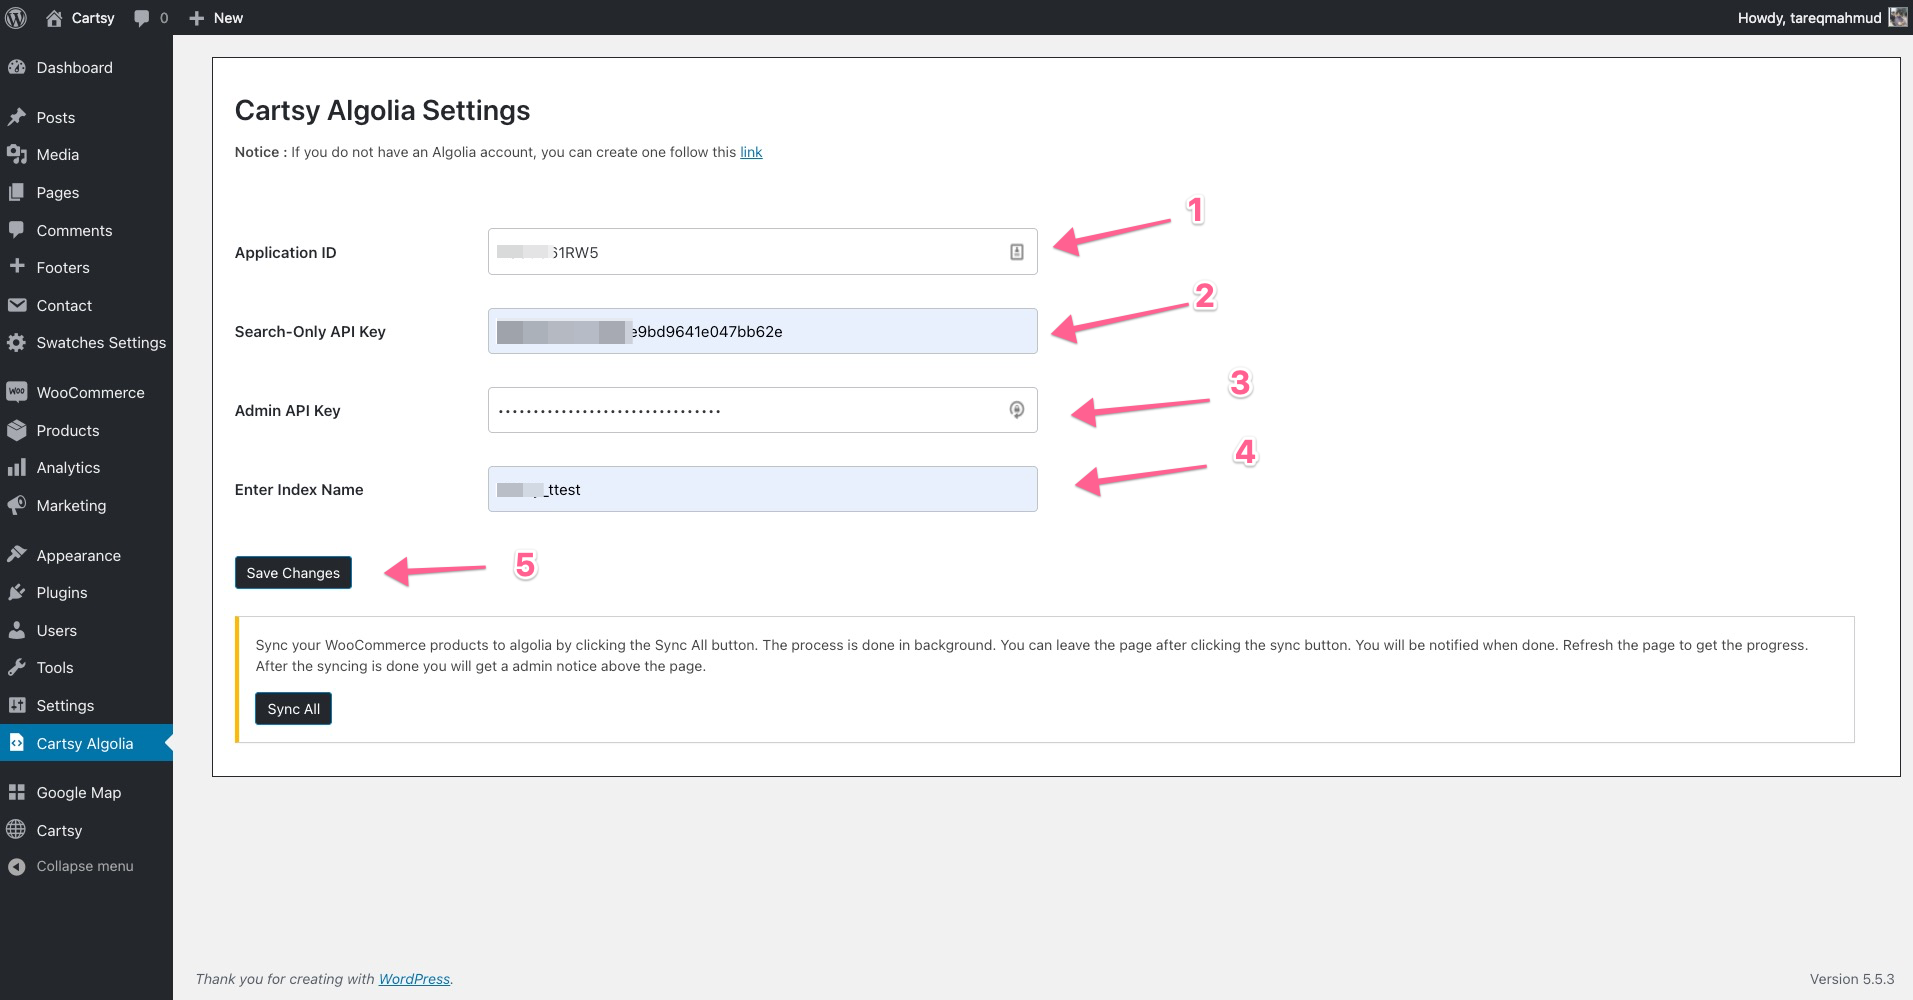
- After that, paste that API key to your
wp-admin -> Cartsy Algoliasite,
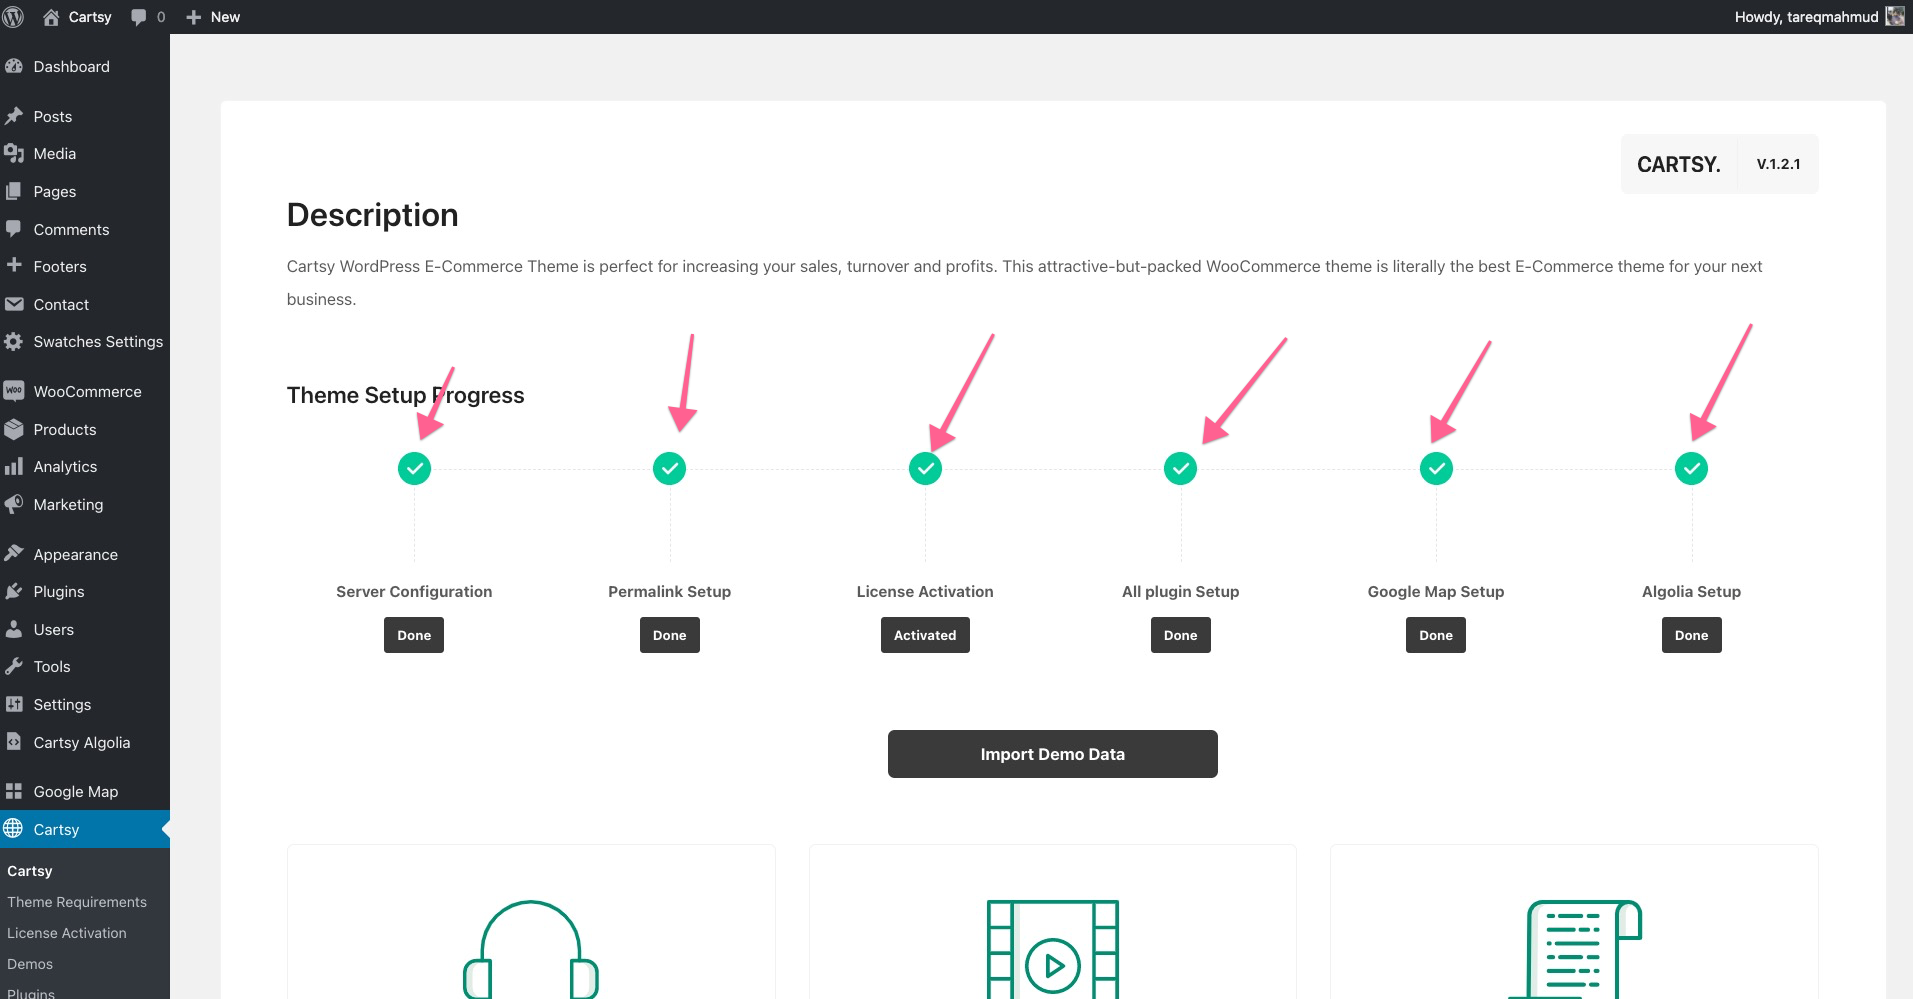
If you follow the procedure initially, then All the checkmarks will be green on Cartsy main dashboard.
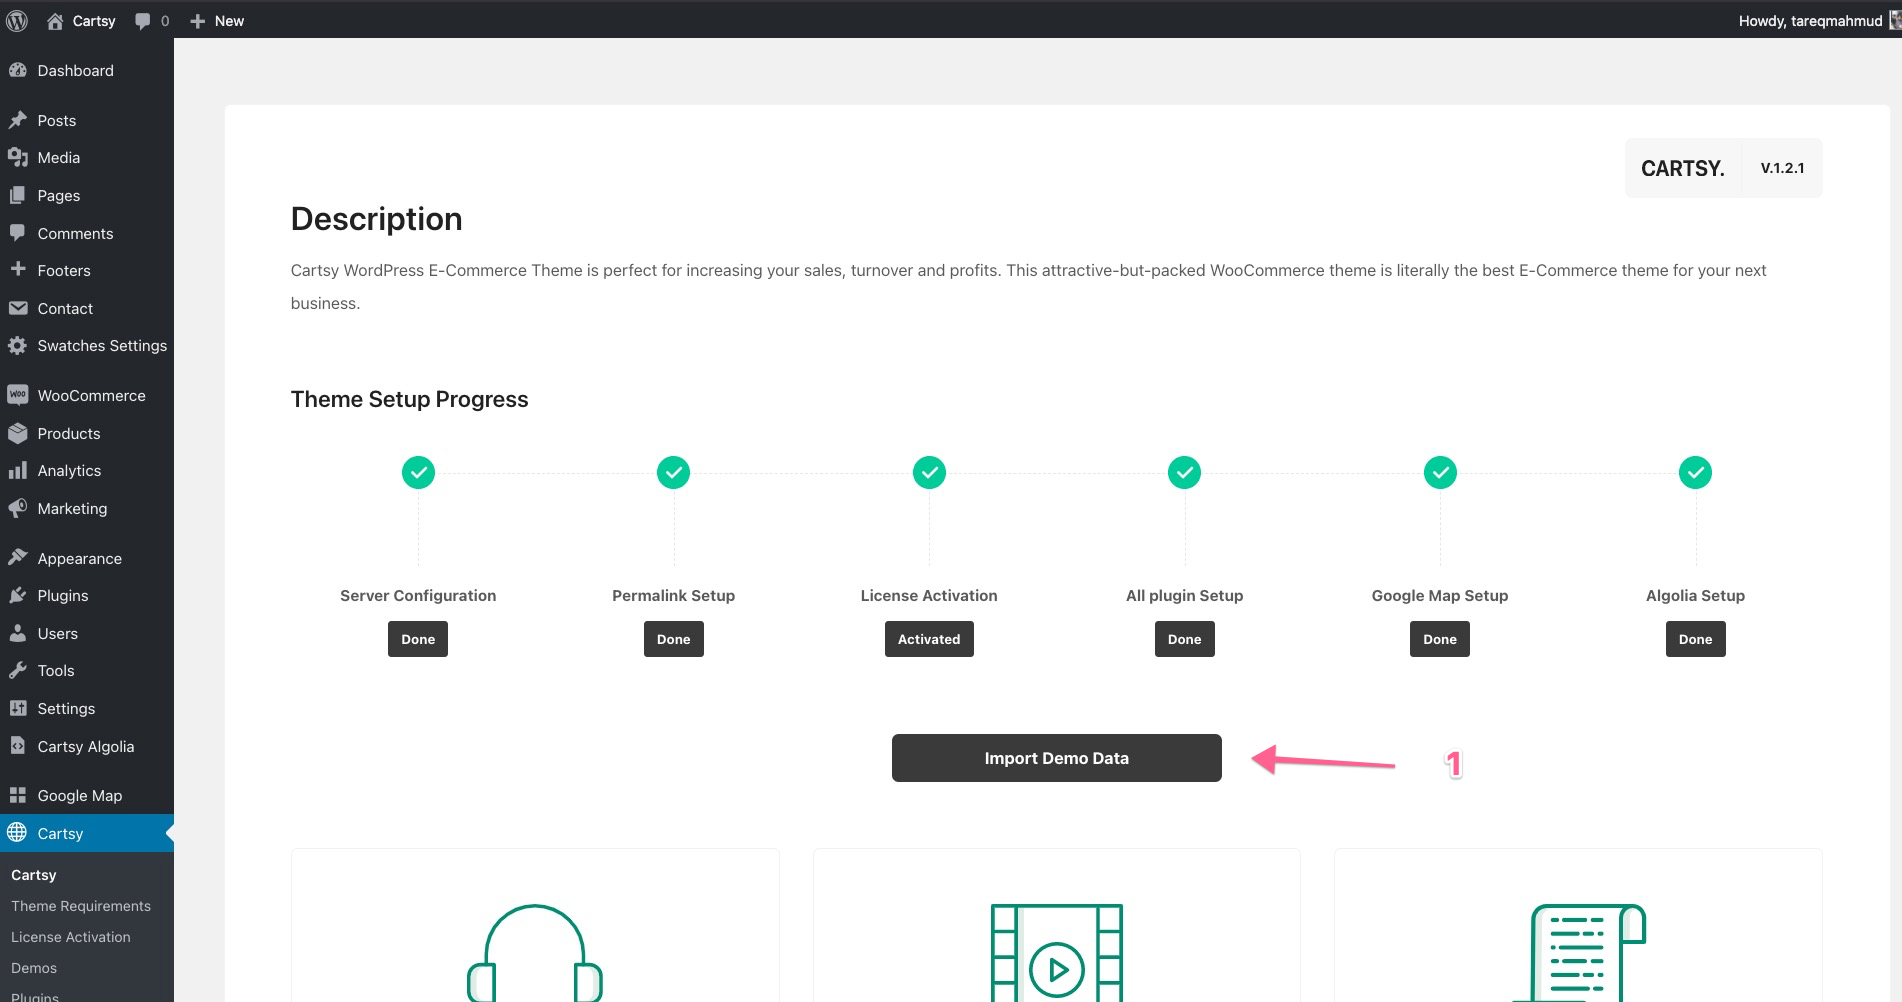
Demo Import
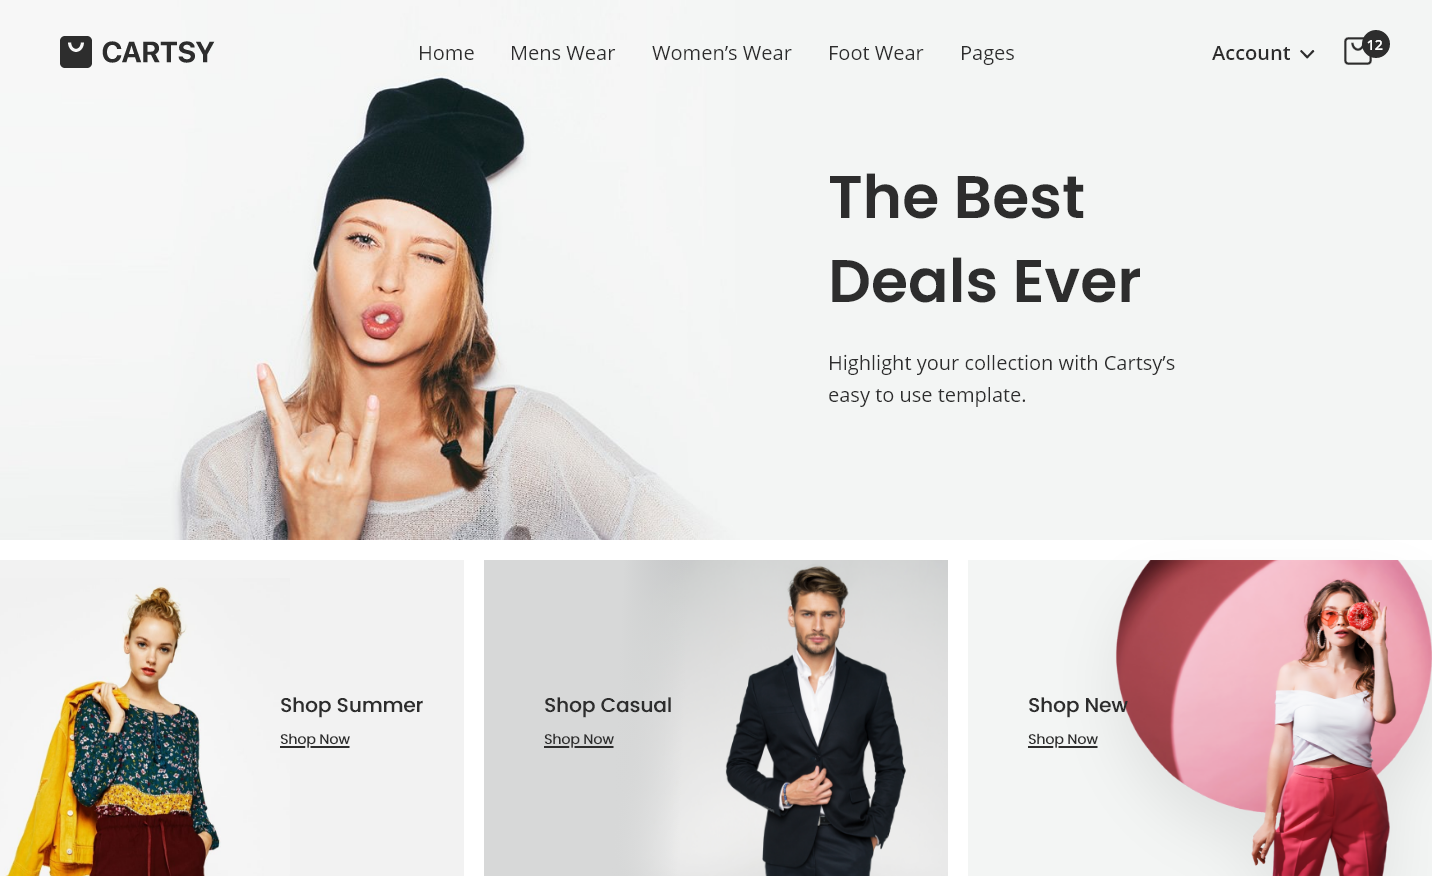
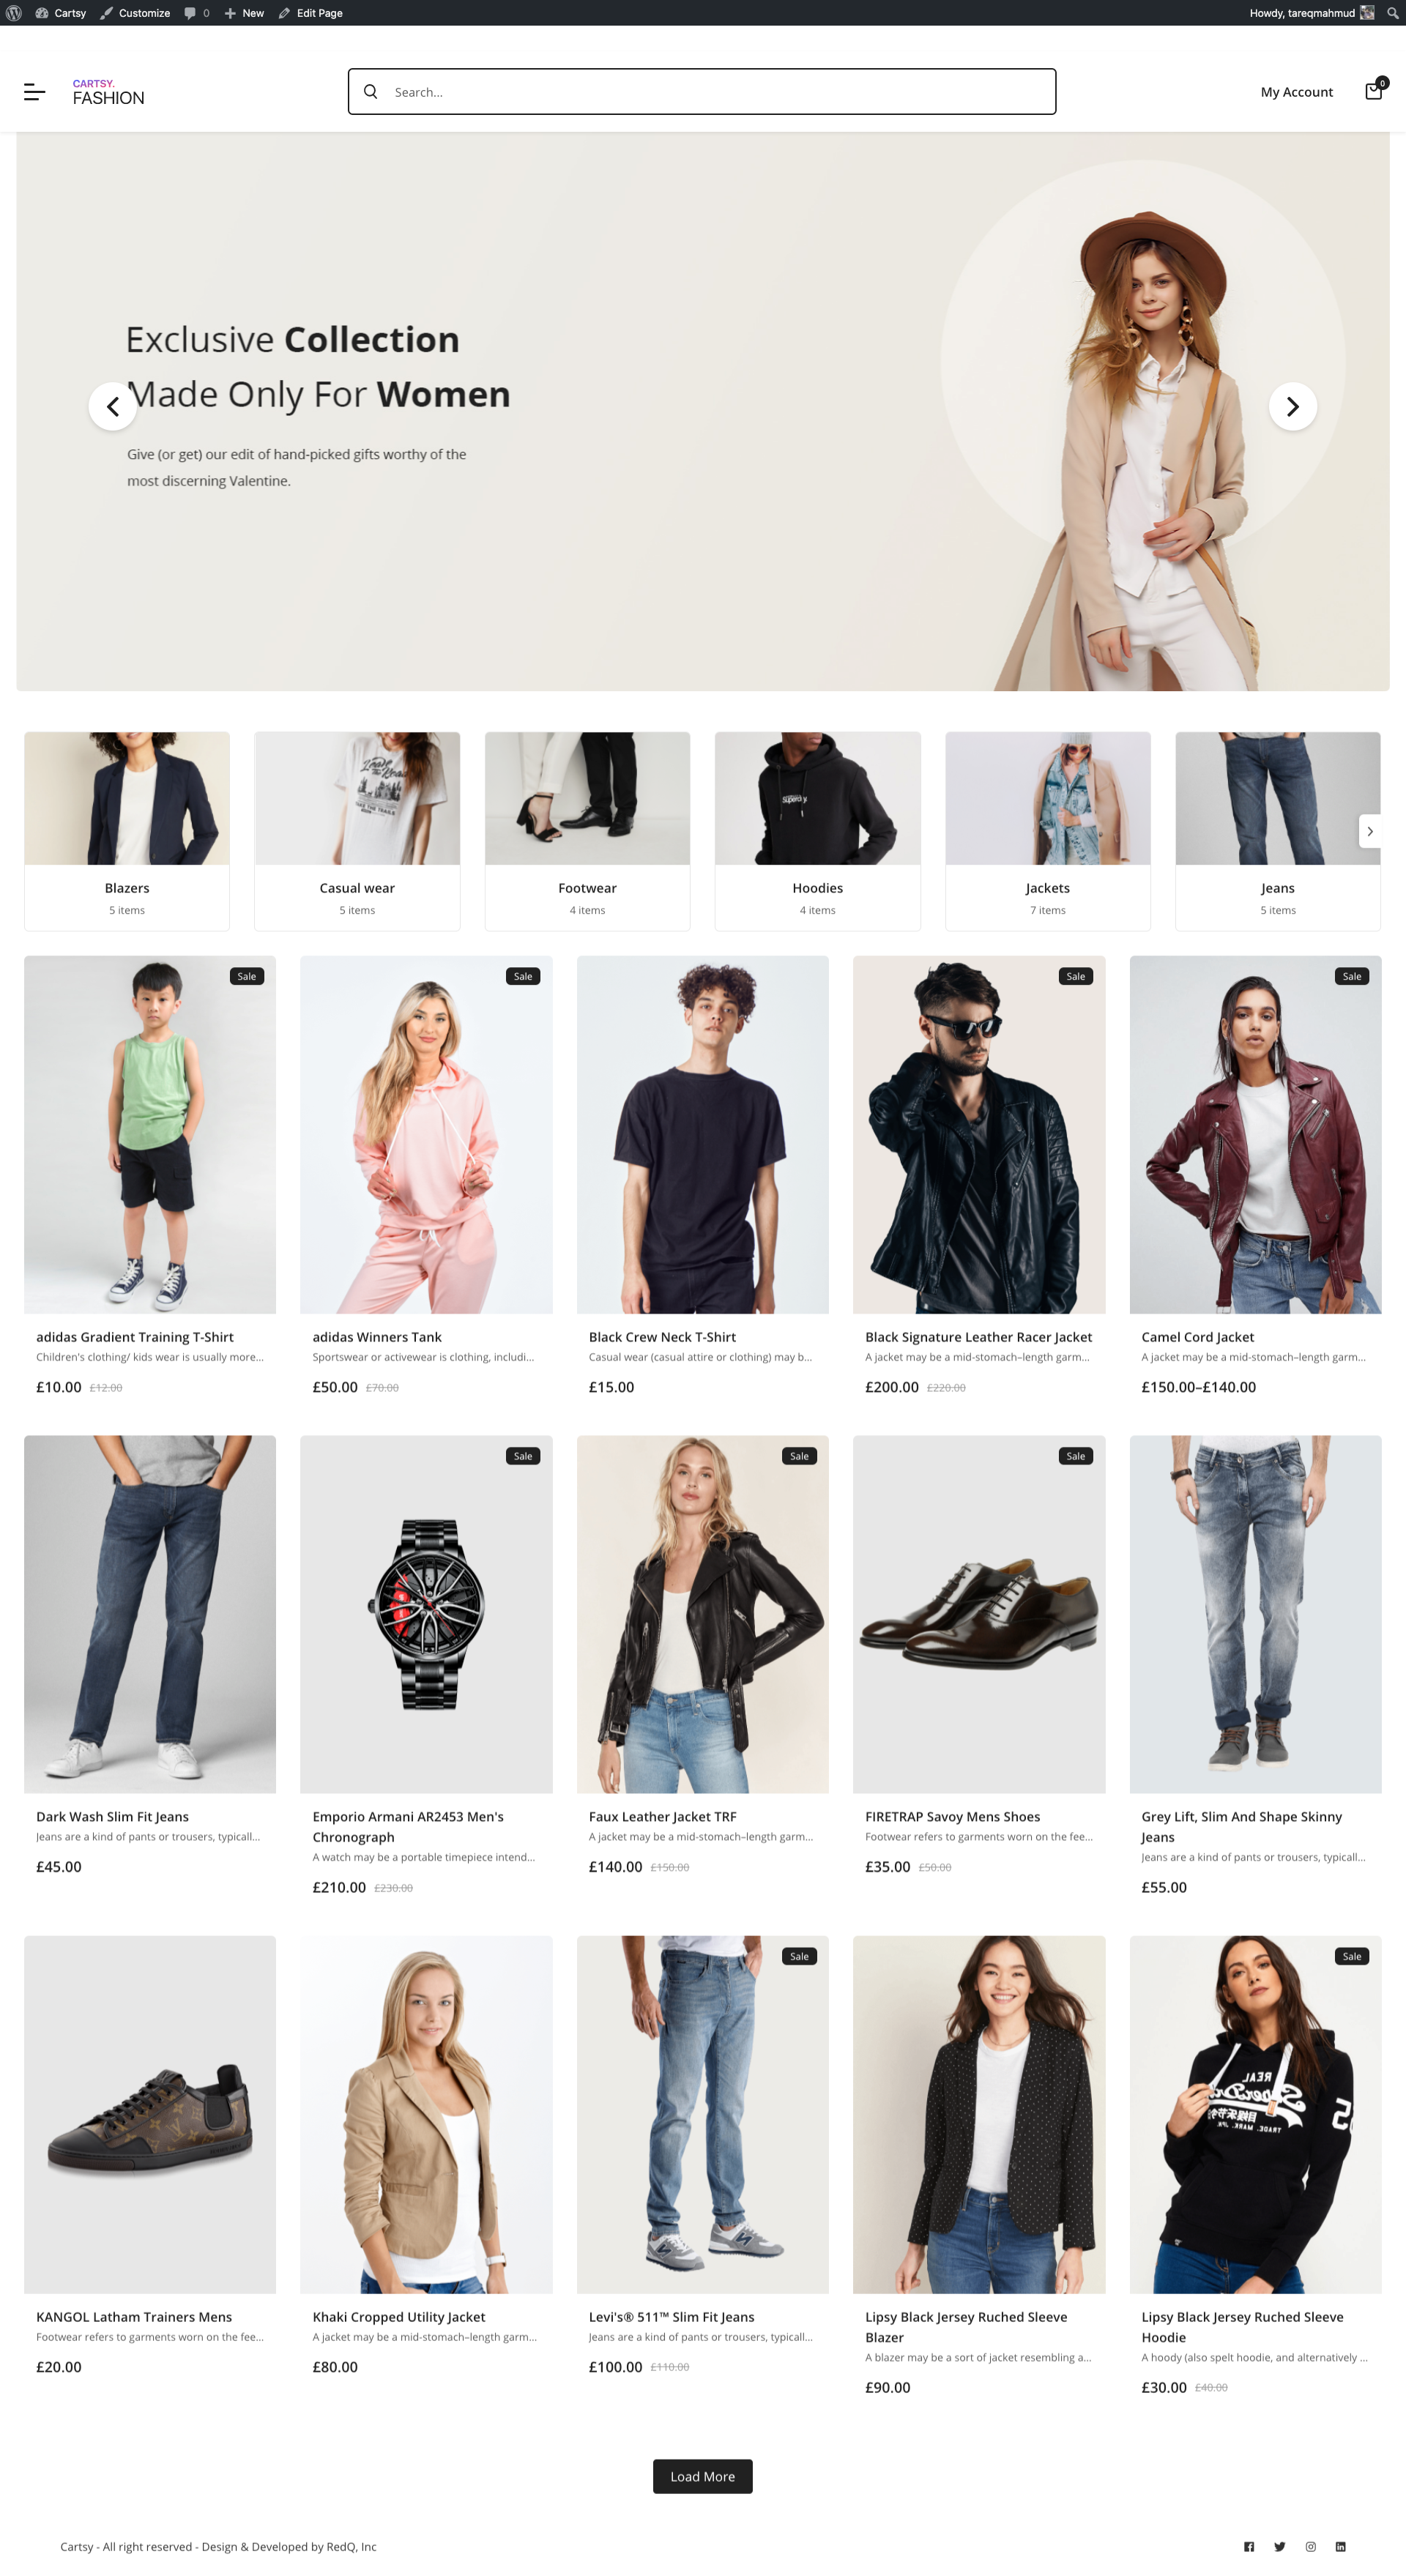
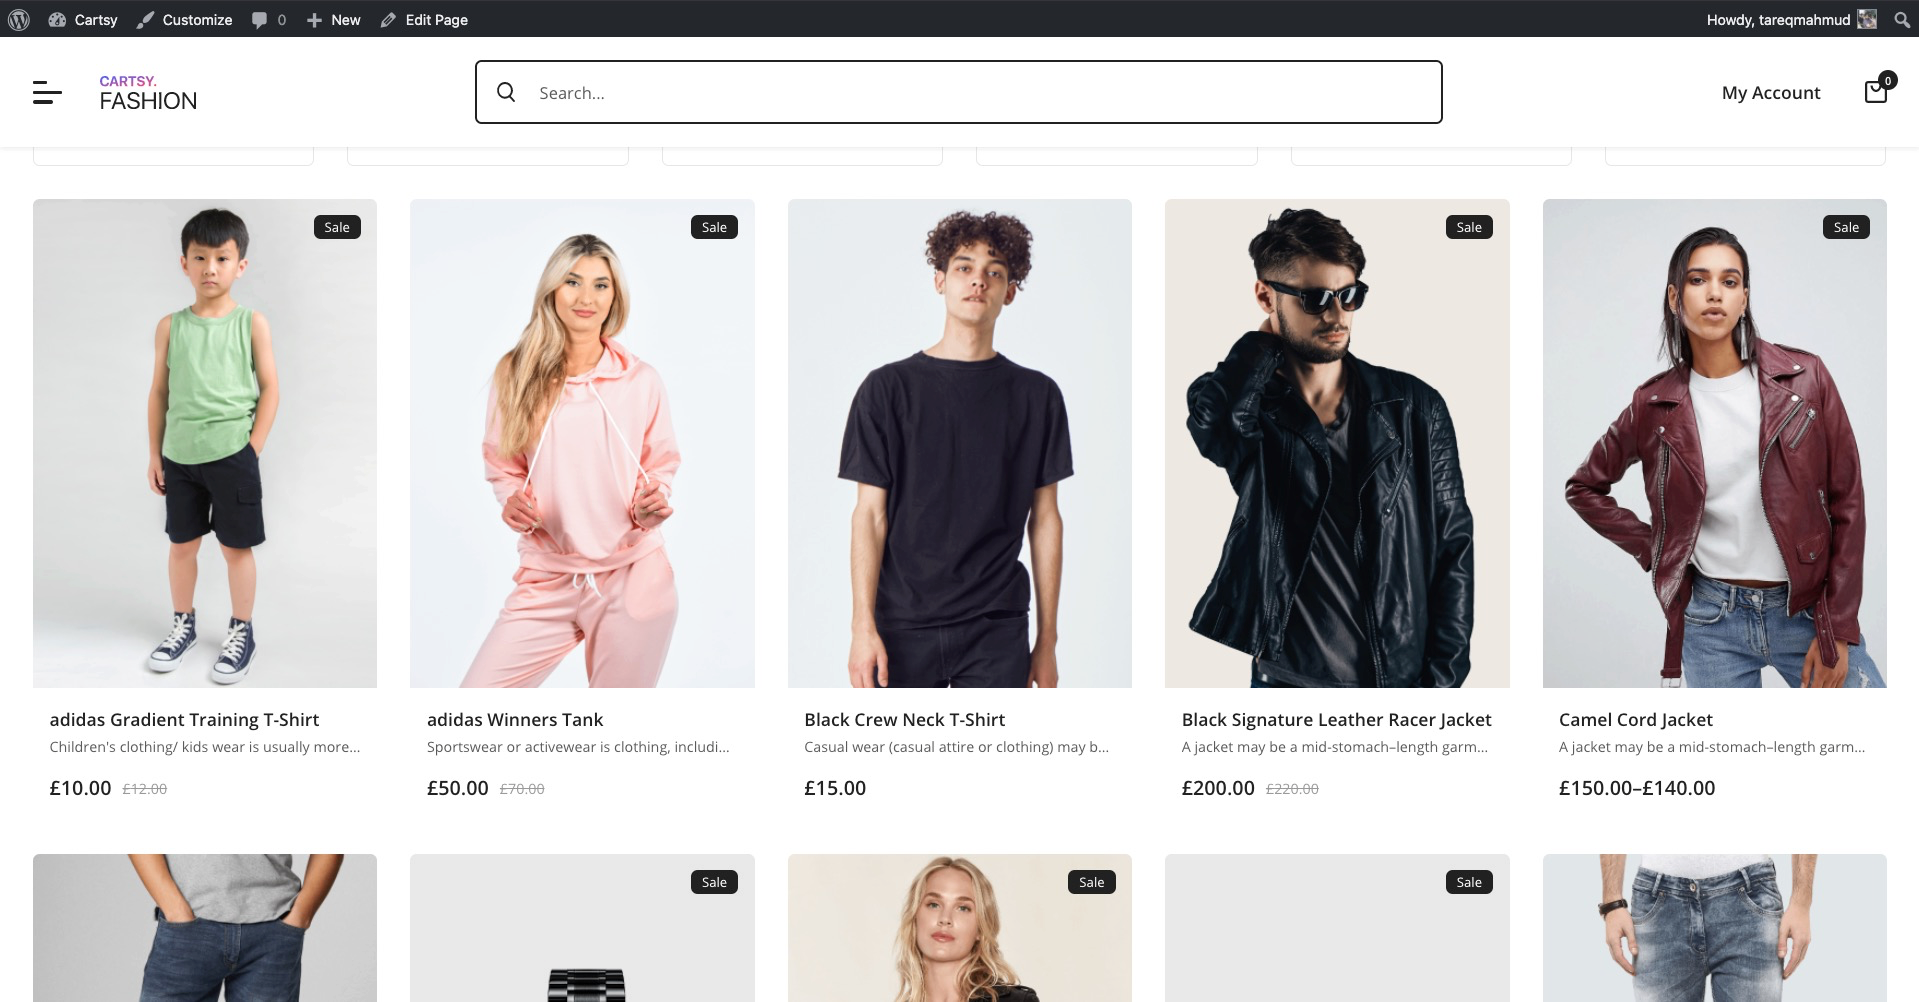
As we decided to build a fashion website so, we’re going to import a fashion demo for that; at first, click the Import Demo Data Button and from that, import Fashion Demo.

After import the demo, your website will look like this,
Video tutorial for installation,
https://www.youtube.com/watch?v=Qwok8si3bz4
Customization
Cartsy is a highly customizable theme. We’re built Cartsy with customization in mind. So let’s explore some significant customization.
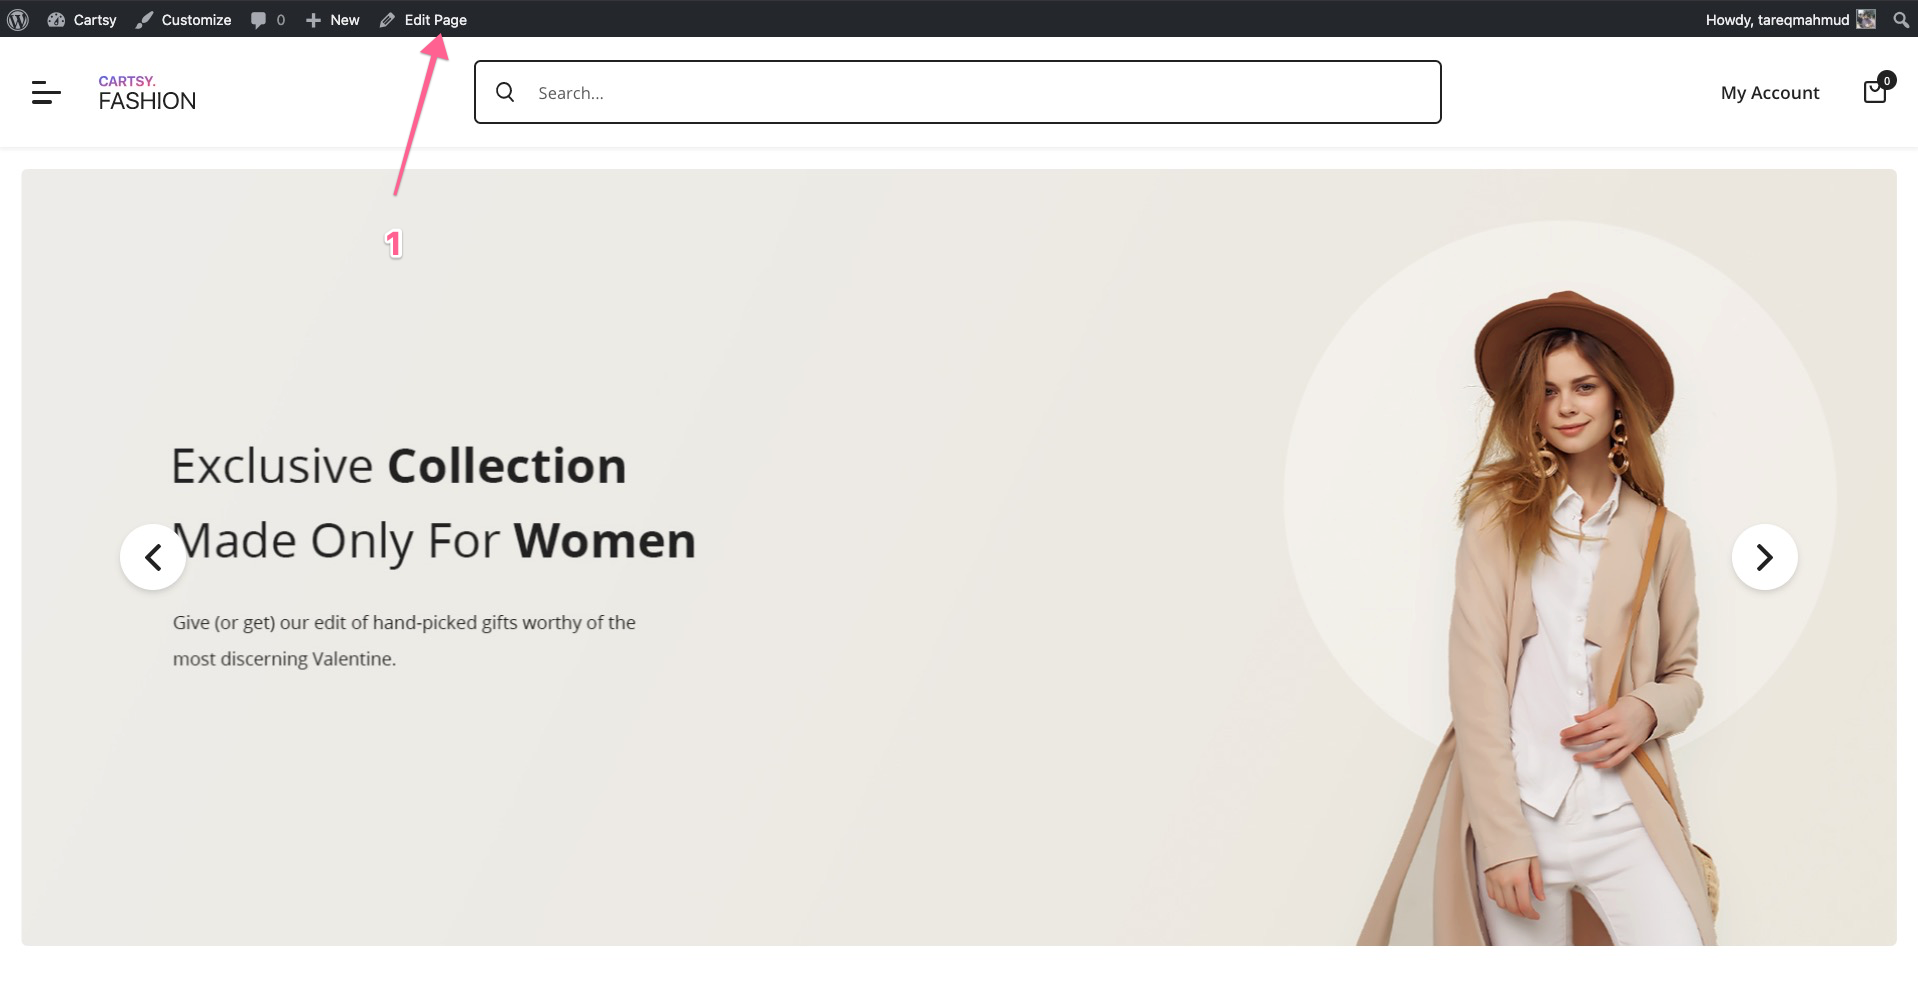
Home Page
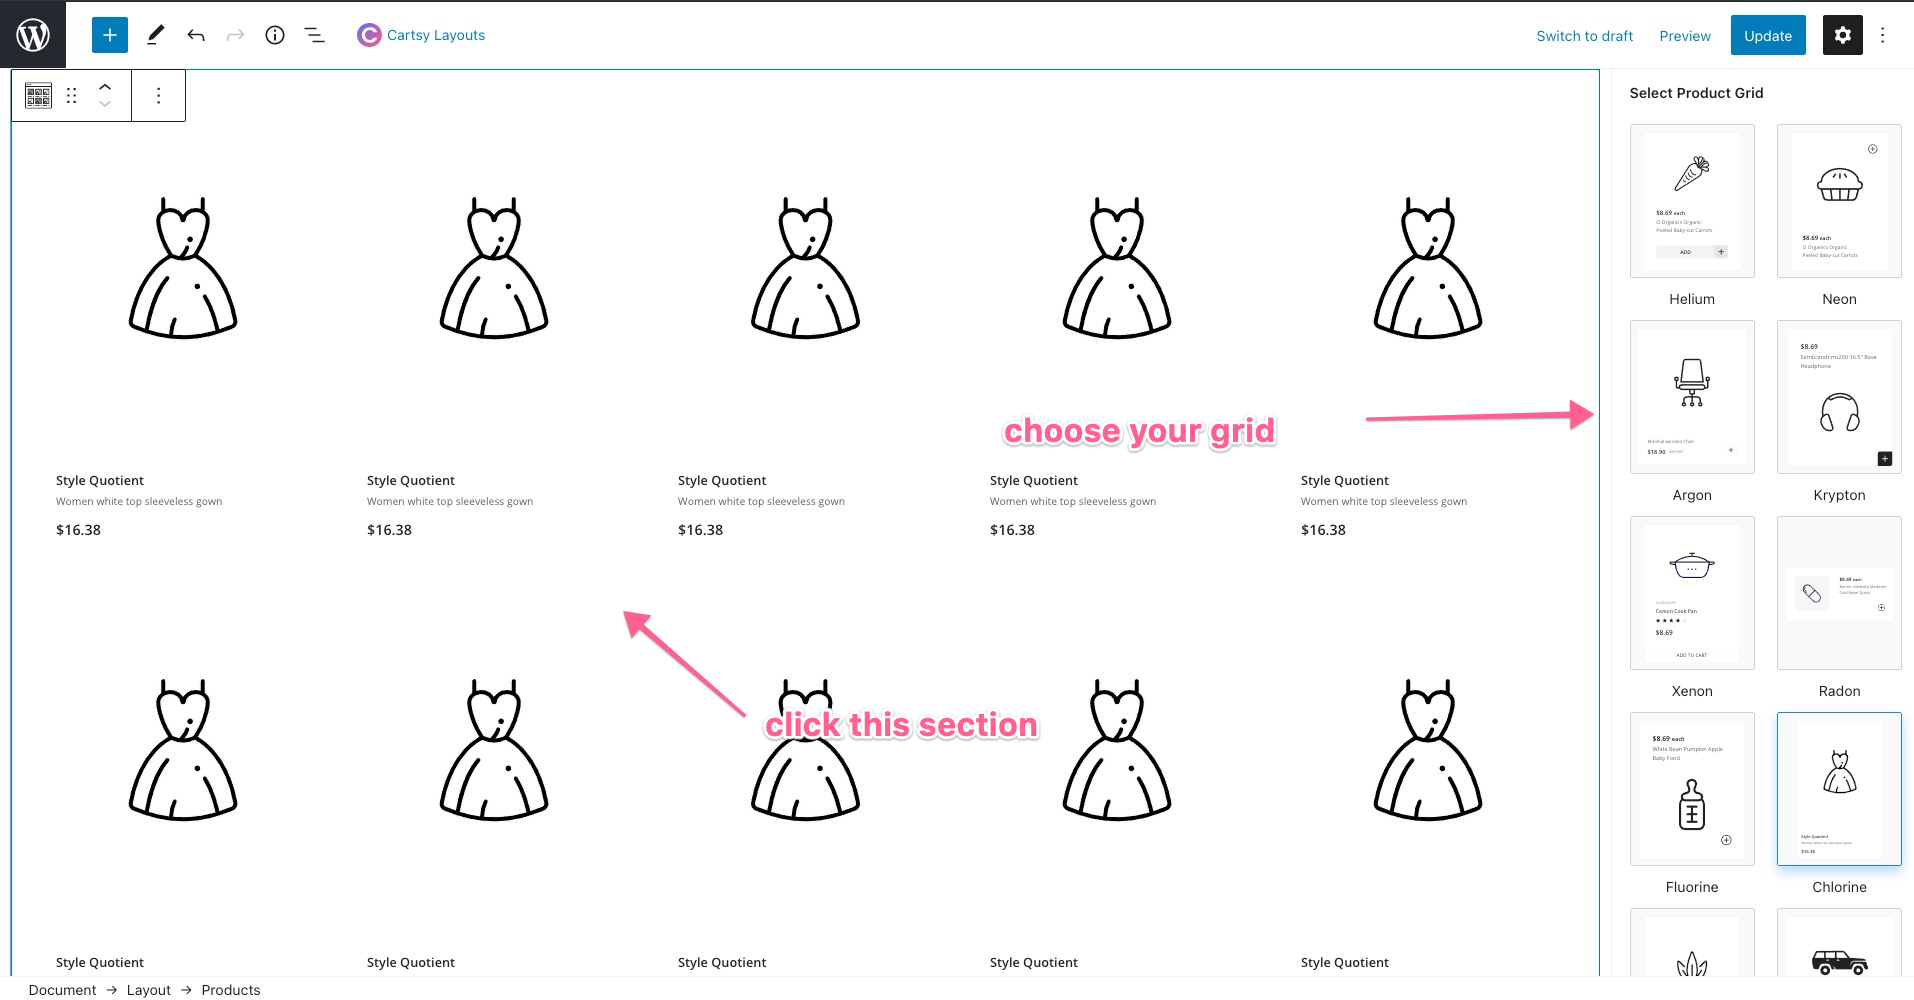
Home Page is built using Gutenberg block, and we add some pre-defined blocks so that you can customization the home page. After import the fashion demo, you want to changes the grid layout. To do that, at first edit the home page and click the grid section, and after that, change the grid layout from the sidebar.
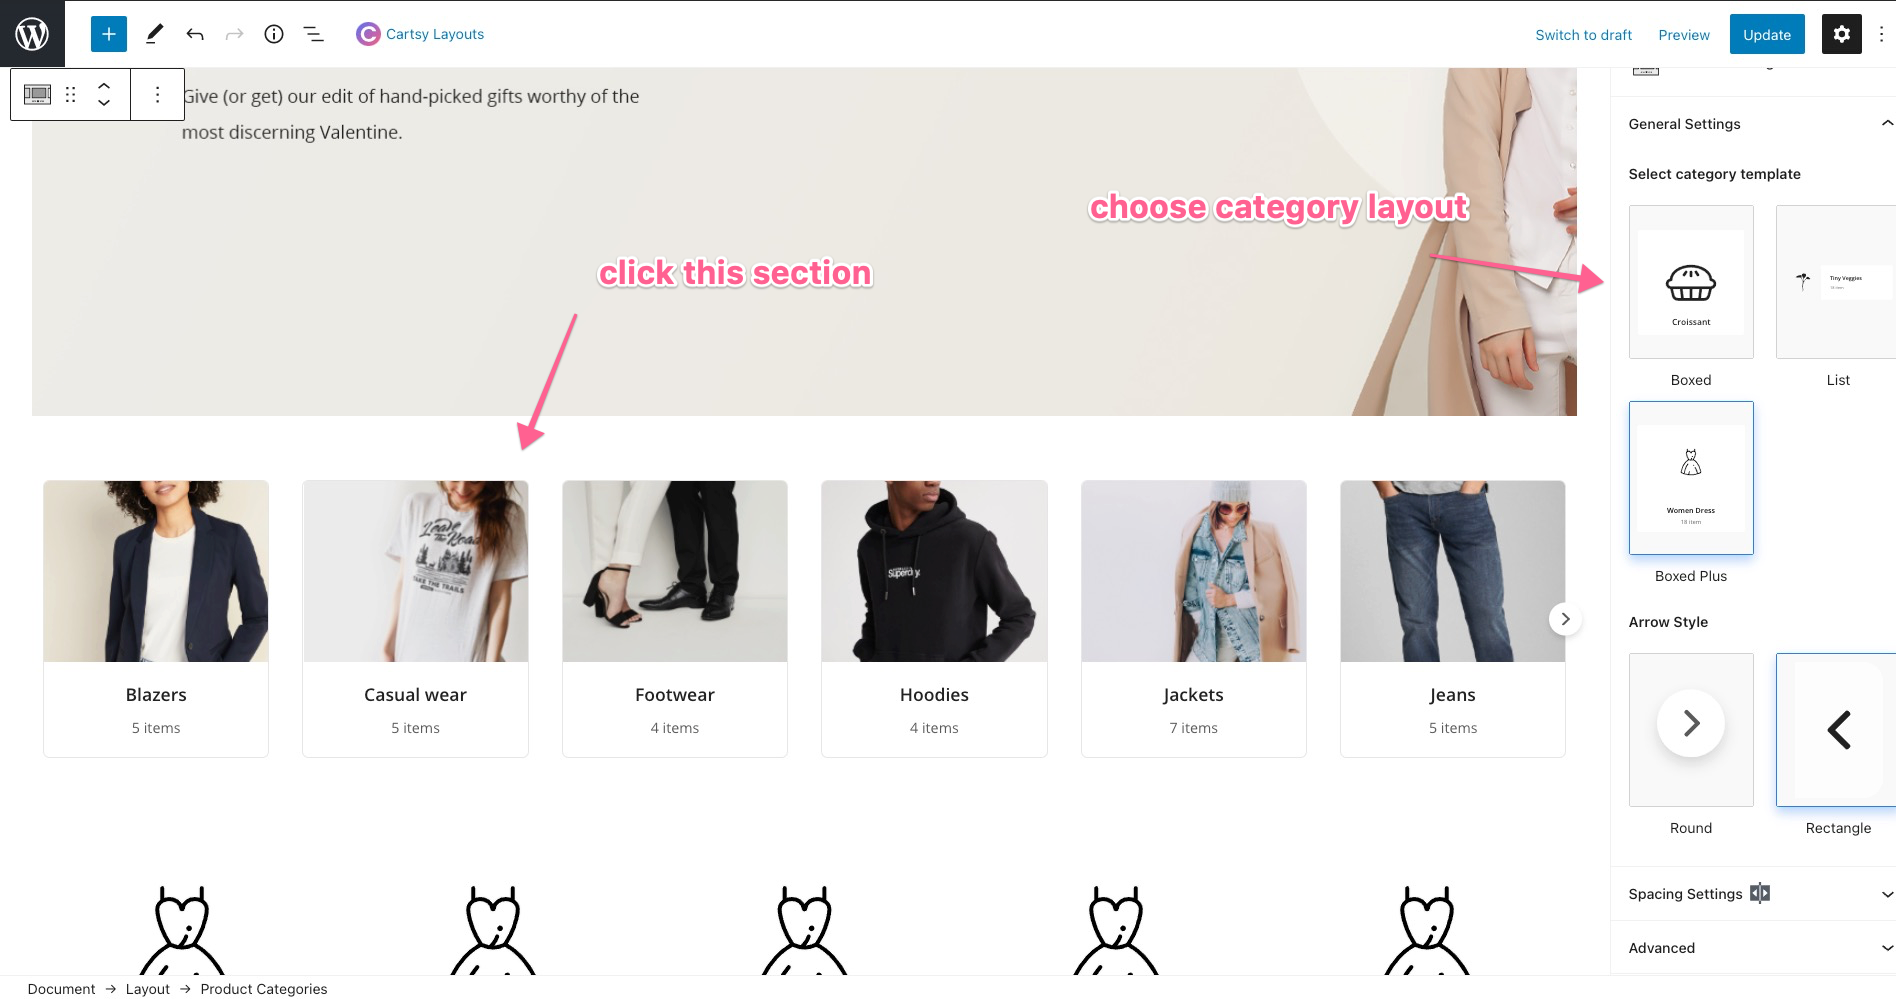
Again suppose you want to change the category style to another one. To do that, just click on a category and adjust the layout from the sidebar.
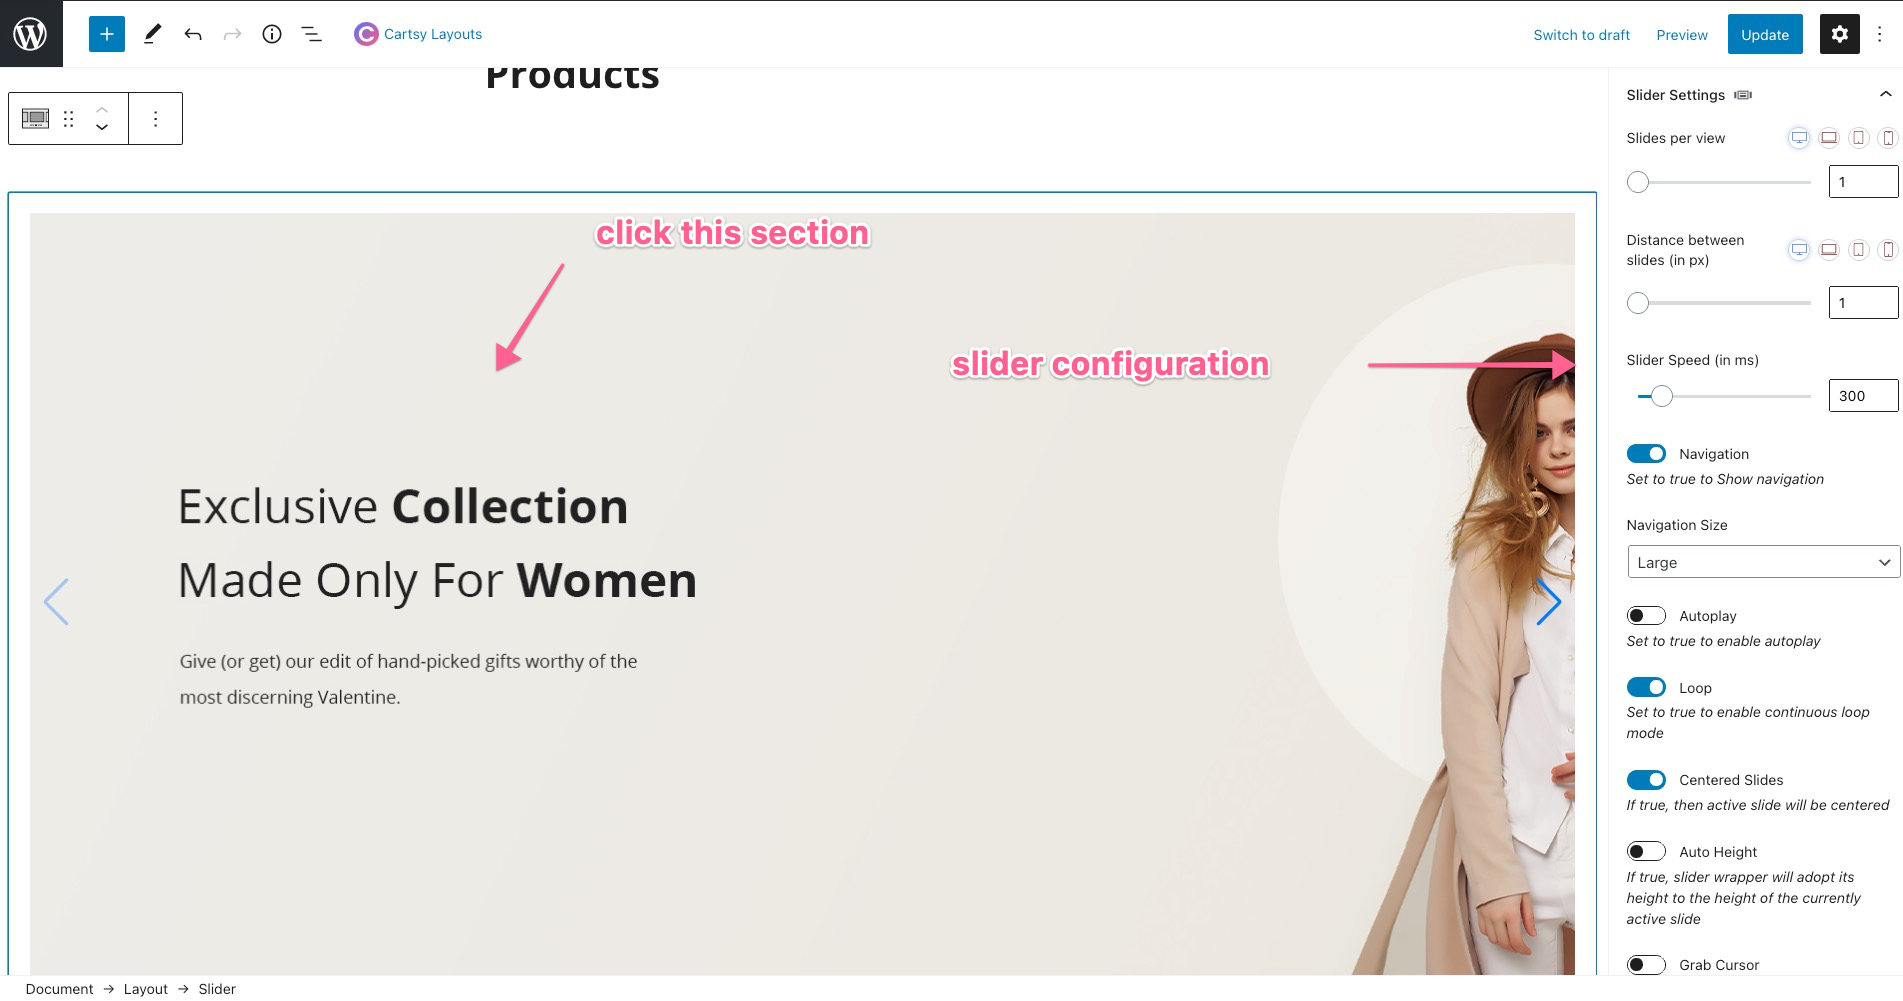
Suppose you want to configure the slider. To do that, click the slider from the edit page, and from the sidebar, you can change or upload new images.
If you want to changes any block from the homepage, just click that page and press delete from your keyboard; with that, the block will be deleted as the default Gutenberg block.

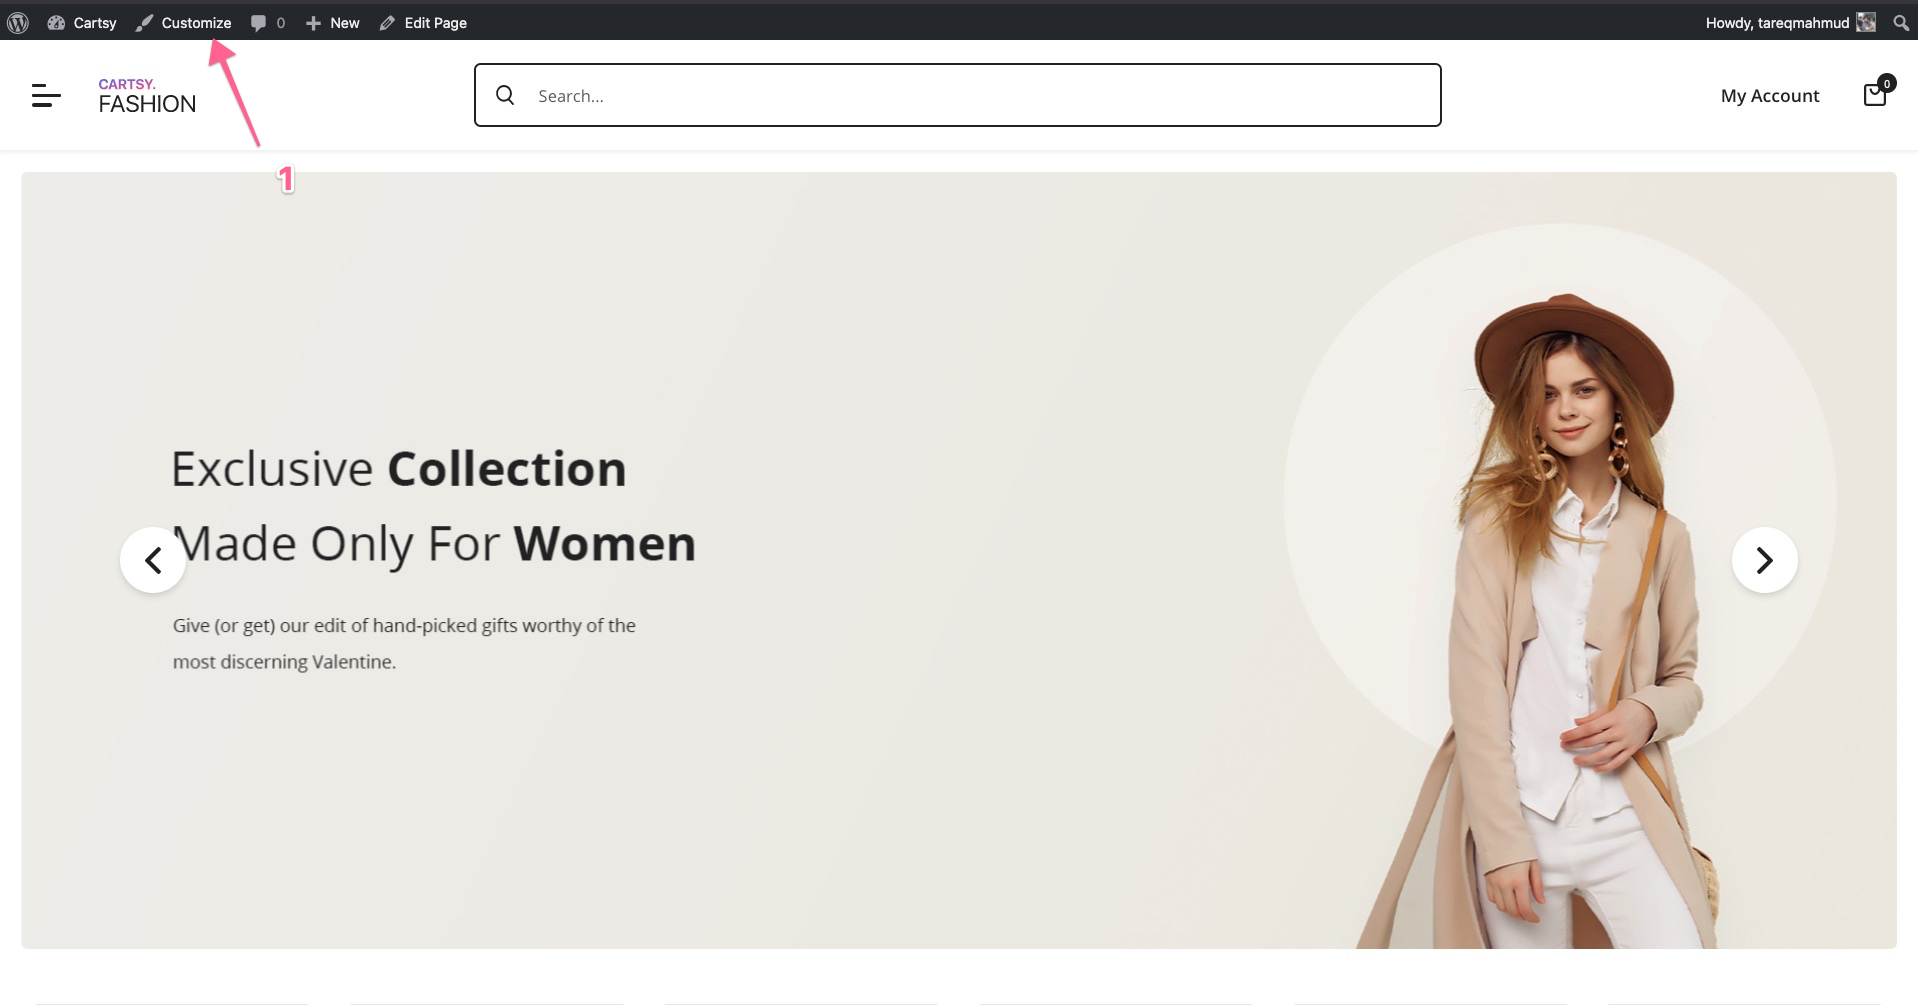
Customizer
Now, not only the homepage, we have a customizer option which you can use to customize your site.
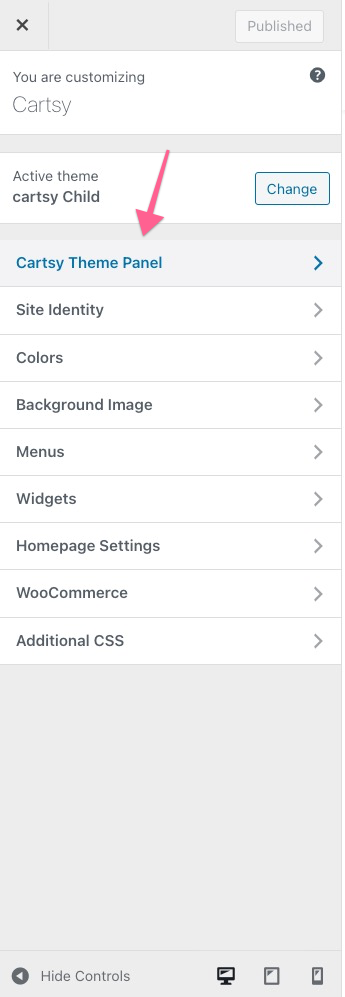
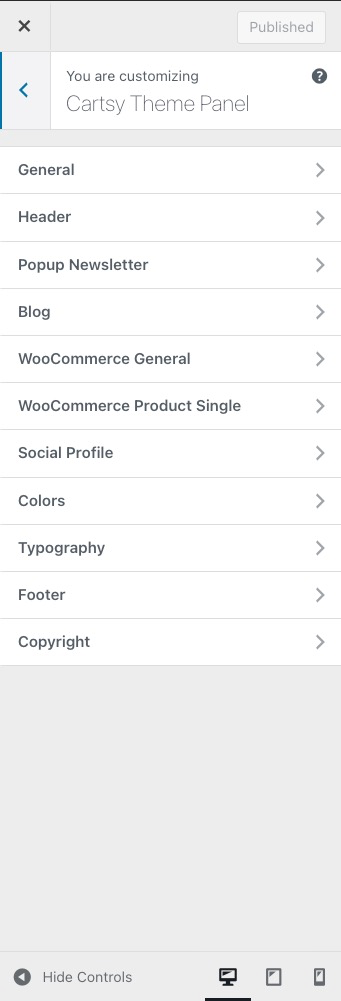
Suppose you want to use native search, or want to use infinity scroll instead of load more, use different header or footer style, and use a different layout for product page you can do all of that from the customizer settings. It’s just a summary; you can do a lot of customization from the Customizer settings. Please check our doc for checking all the customization options.
Fashion Demo
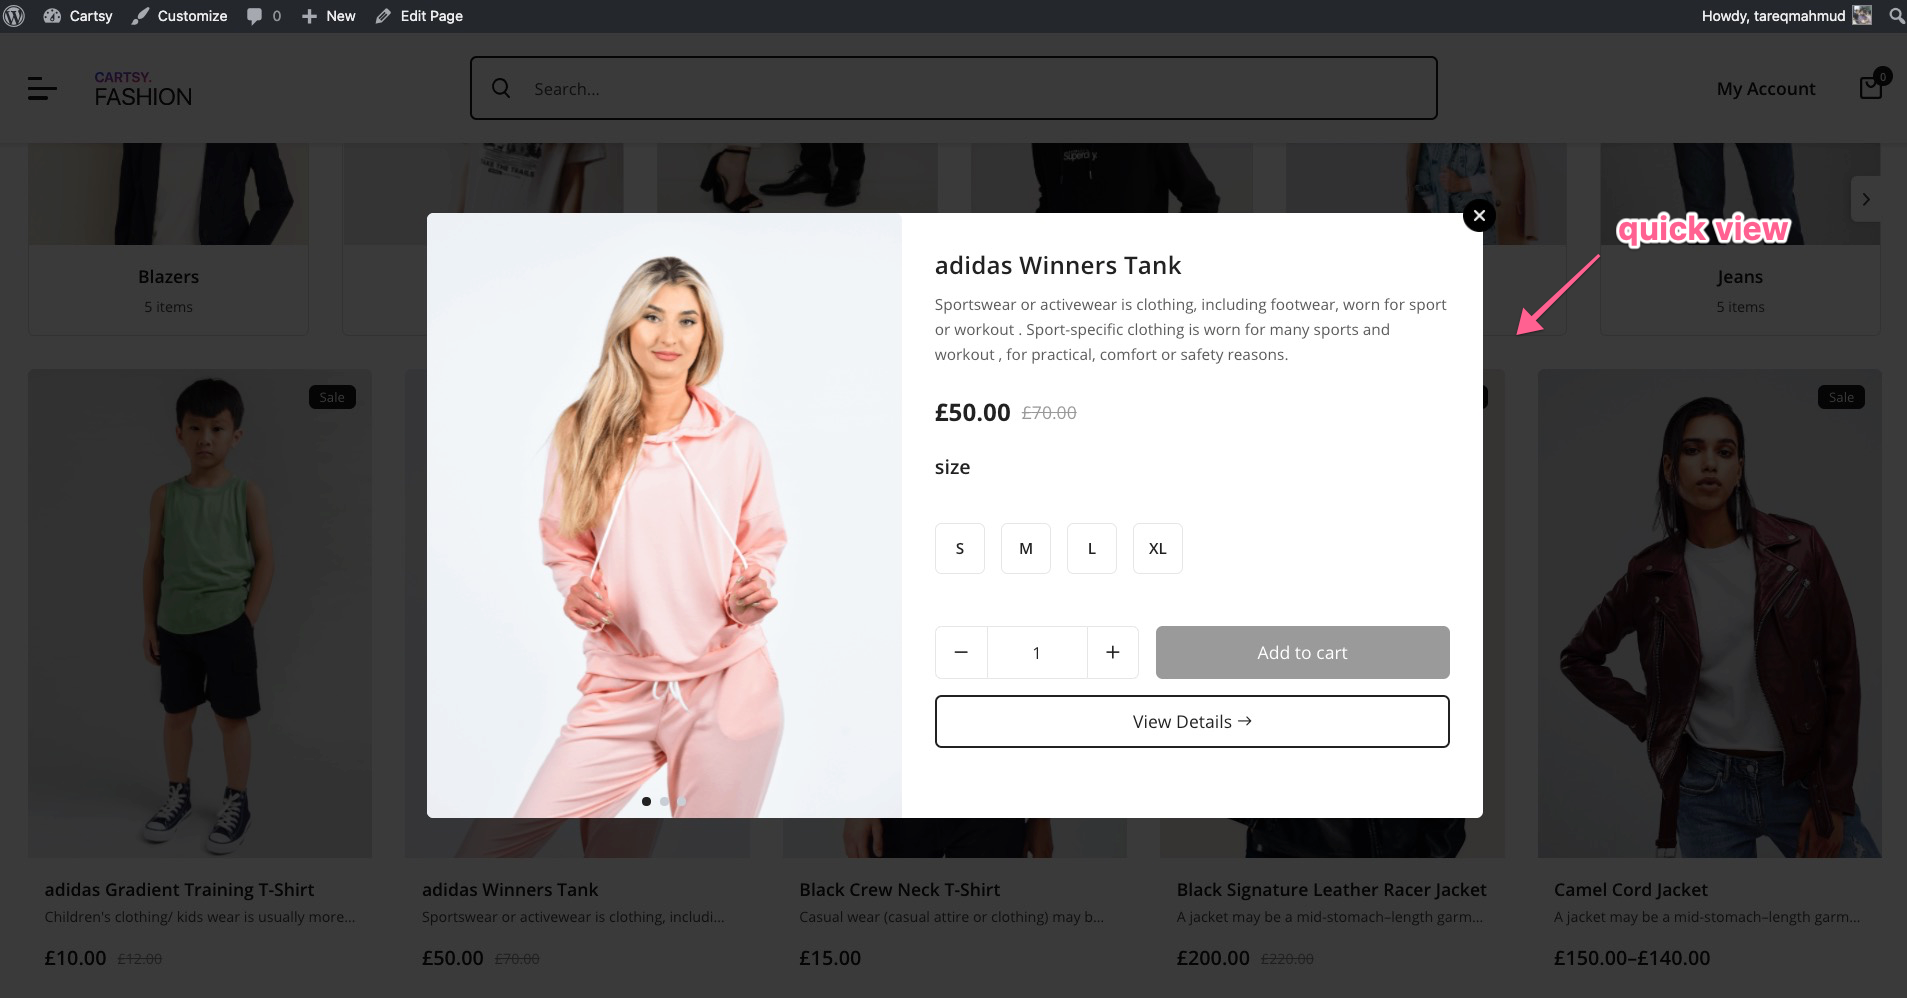
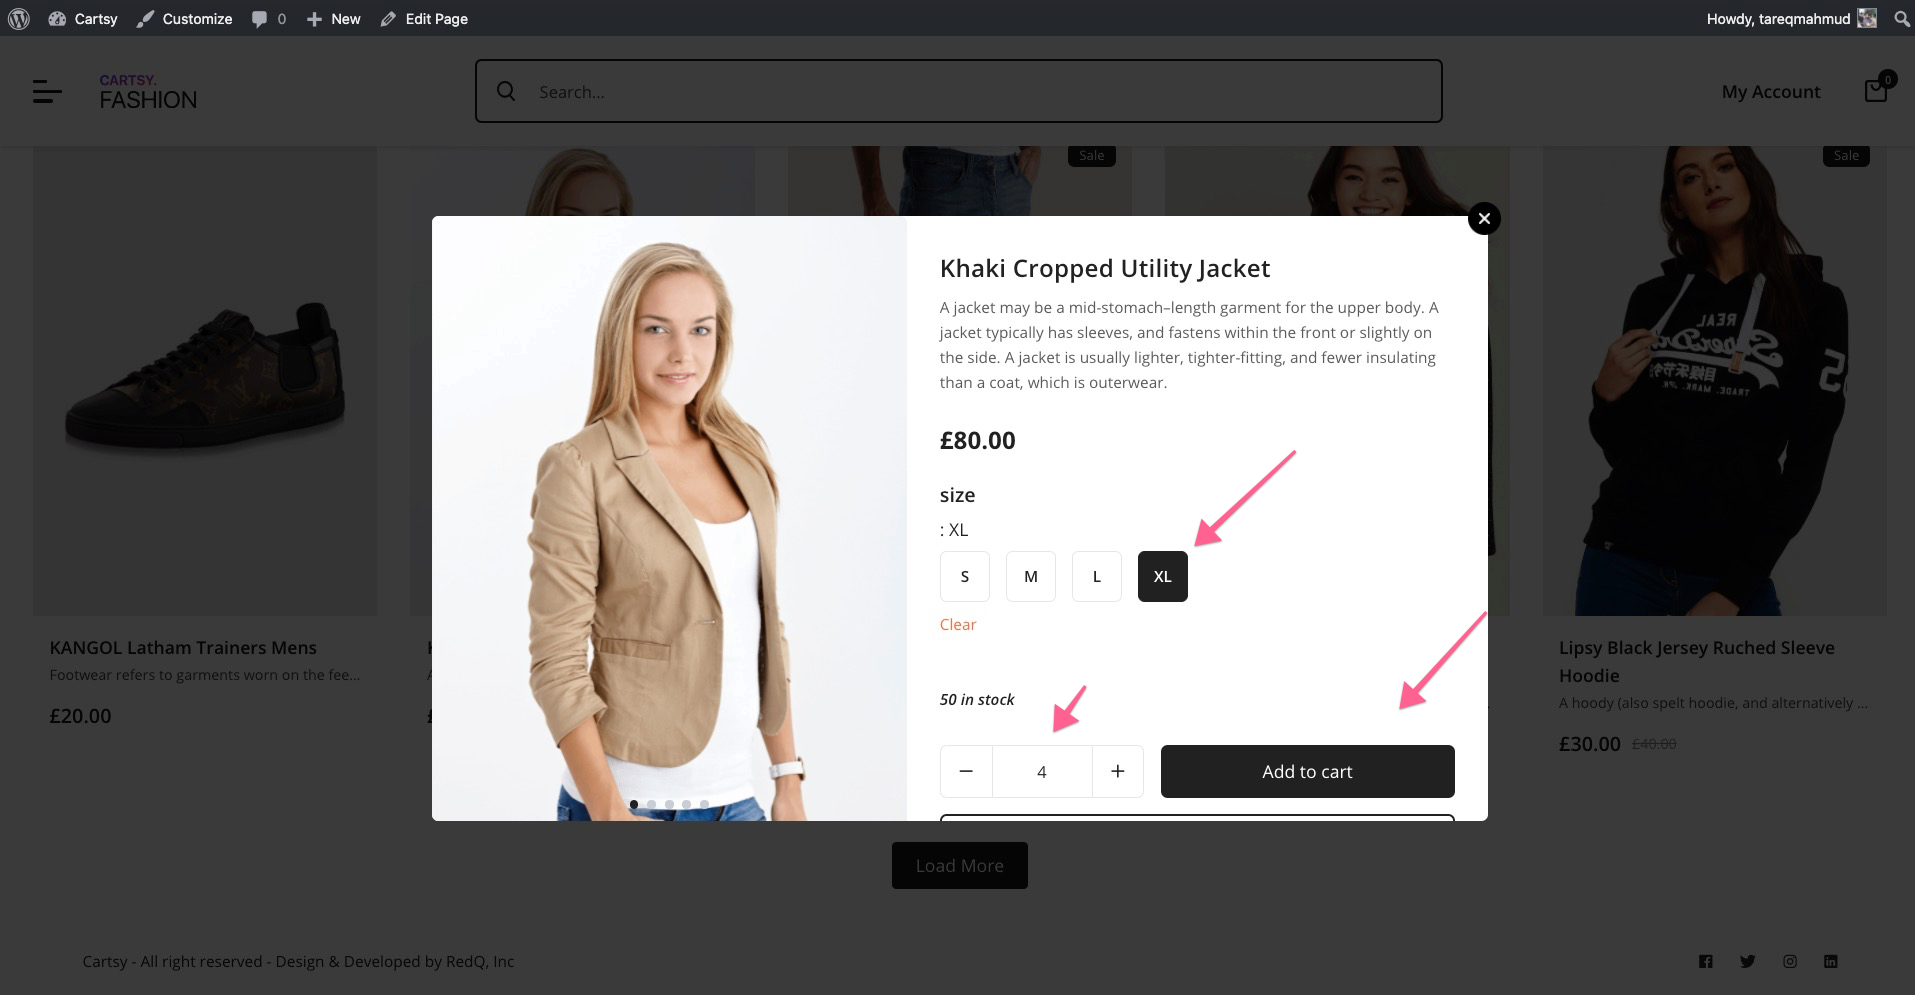
Let’s discuss about the fashion demo. We add a quick view feature on the fashion demo with that customer can check product and order that product from the home page. The customer doesn’t need to go single product page to buy a product. It’ll give the customer an incredible and first experience, and with this uniqueness, customer engagement will be high with your site.
Fashion Site Customer Flow
- Customer Visit the site
- Check a product using Quick View Feature
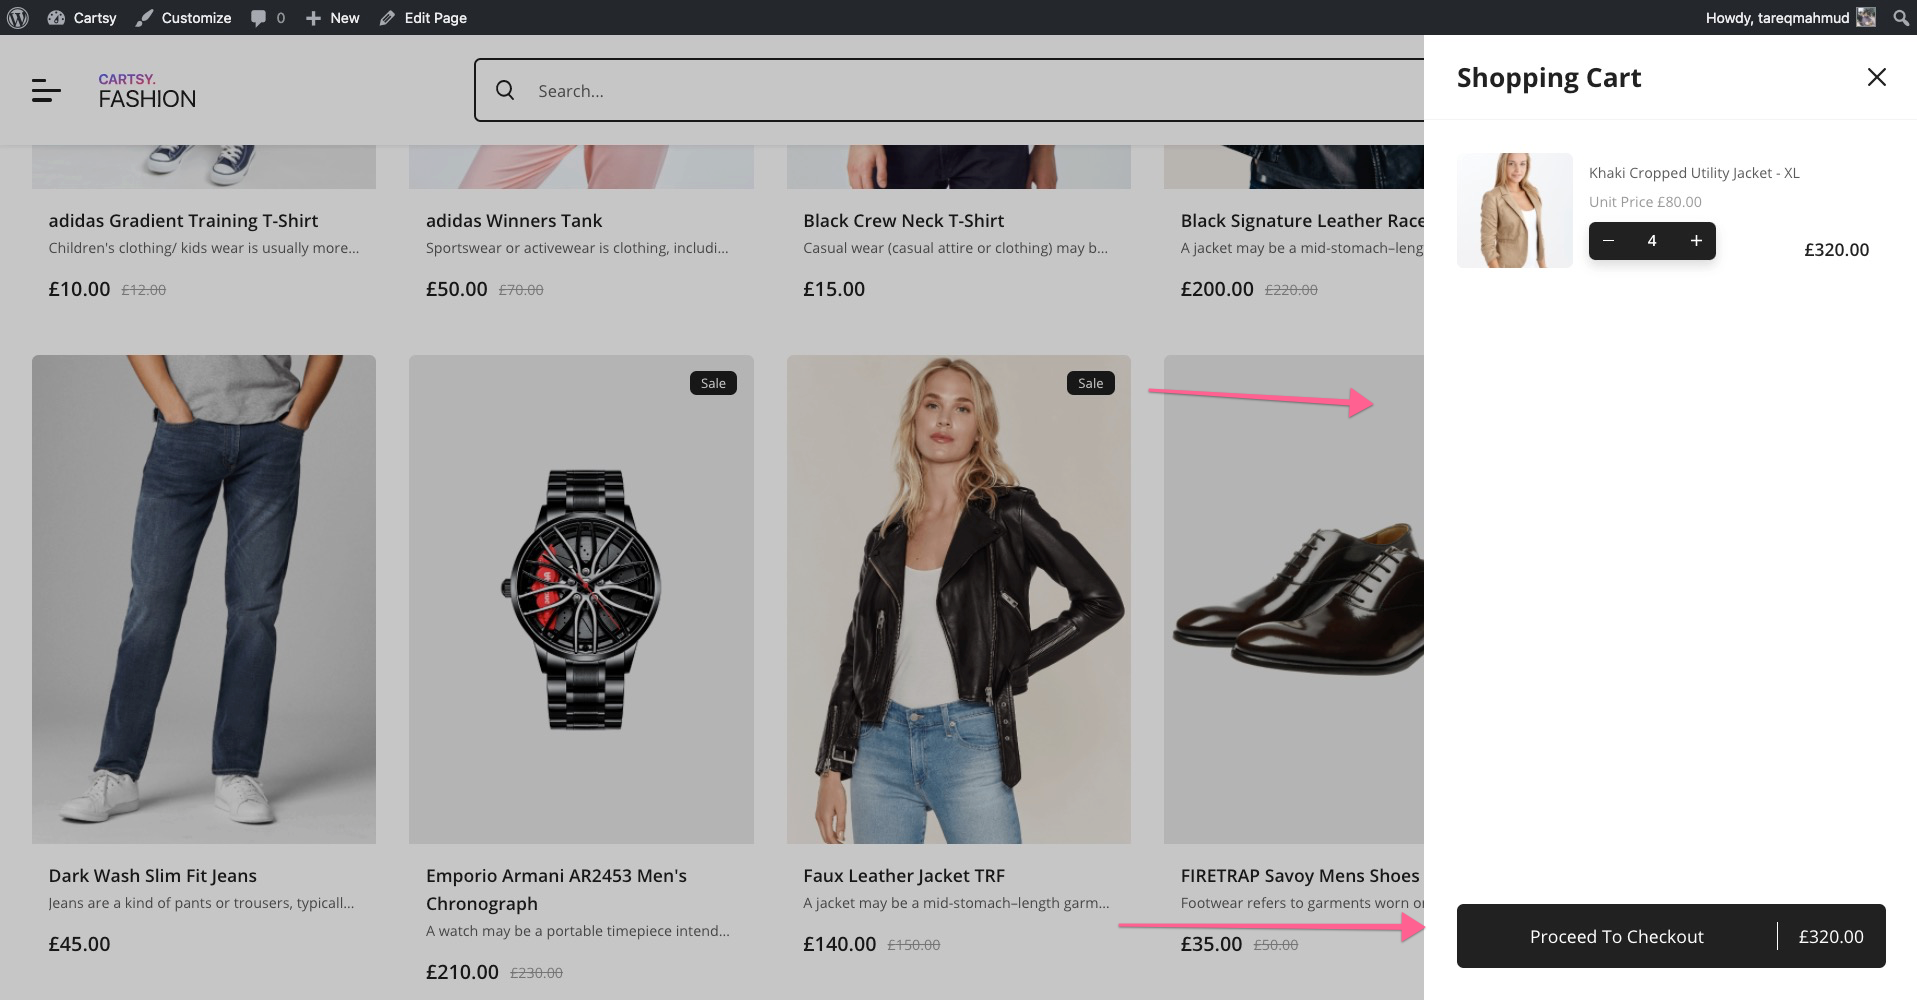
- Add the product to the quick cart
- go to the checkout page
- Add payment information for the order
- Done
SMS Customization
We provide two of our premium plugins to add the SMS feature. One of them is FireMobile and another is BOMB - SMS Notifier.
FireMobile
With FireMobile, you can add mobile authentication system on the Cartsy website so that customers can register and login to your site using their local mobile number. To handle the mobile authentication system, we use Firebase. With Firebase, You can add Mobile authentication system easily. Check this video to configure the FireMobile to your site,
https://www.youtube.com/watch?v=6Jm0tiPpokc
Bomb - SMS Notifier
With the Bomb - SMS Notifier plugin, you can send SMS to your customer based on the site flow event. Suppose you want to send a customer SMS when an order has been delivered or any type of status change of the order; you can do that by Bomb - SMS Notifier. Not only event status, but you can also send manual SMS to a specific customer by Bomb - SMS Notifier Plugin. Right now, we support Twilio and Nexmo to handle all the SMS. If you want to implement any local SMS delivery API, you can contact us. Check this video to configure Bomb - SMS Notifier plugin with Cartsy.
https://www.youtube.com/watch?v=AjR2pc3uQCc
What Next
After import the demo, your site is ready. But as all the product contact addresses and pages are demo pages, so you’ve to add your product and content. After adding your product and changes the content, your site is ready to live.
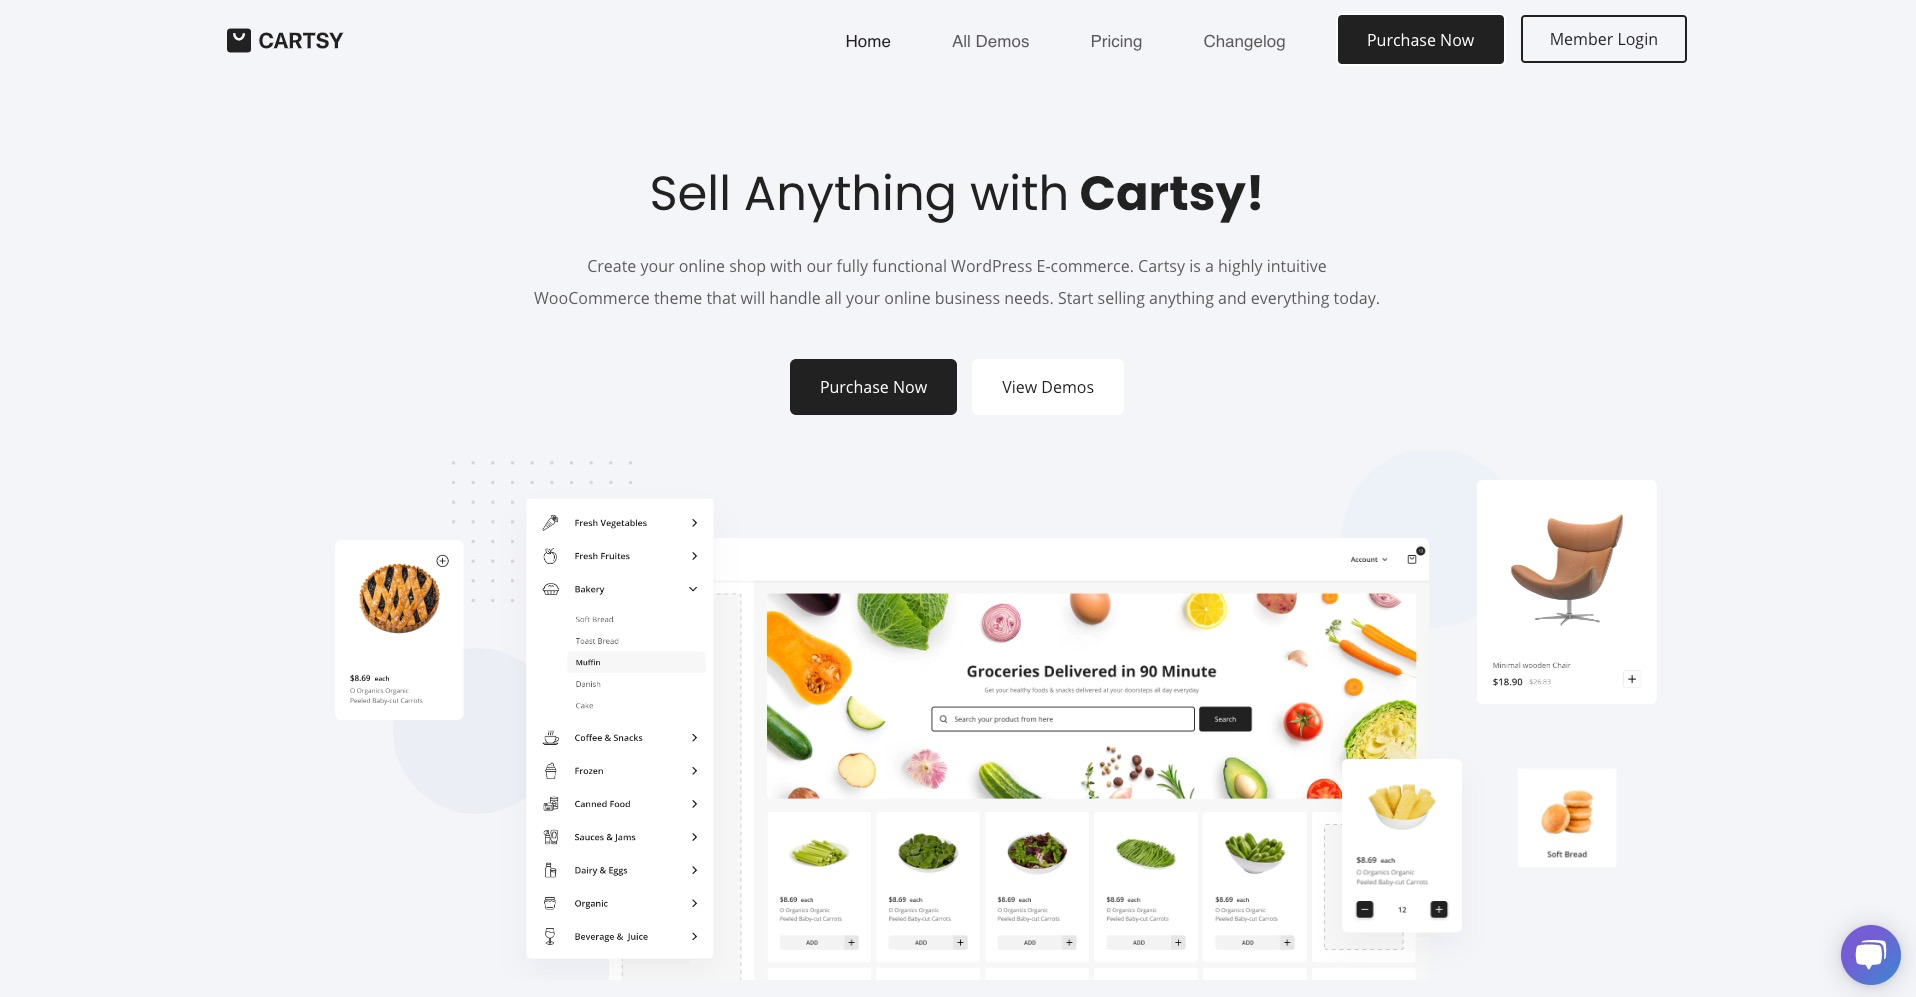
Resource
You can check our landing page, docs, or tutorials to check out all the features of the Cartsy theme.
Landing Page: https://redq.io/cartsy
Demo: https://cartsy.redq.io/
Documentation: https://cartsy-doc.vercel.app/
Video Tutorials: https://www.youtube.com/playlist?list=PLUT1MYLrVpA9sFhkzfxQGQ2DNVnmU03Q_